Light Dependent Resistor | LDR sensor | Photoresistor
LDR sensor is very simple and easy to use for a beginner. It is the best sensor to start working with the analog value with any microcontroller LDR stands for the light-dependent resistor. and here we are explaining what is LDR with full detail.
Introduction
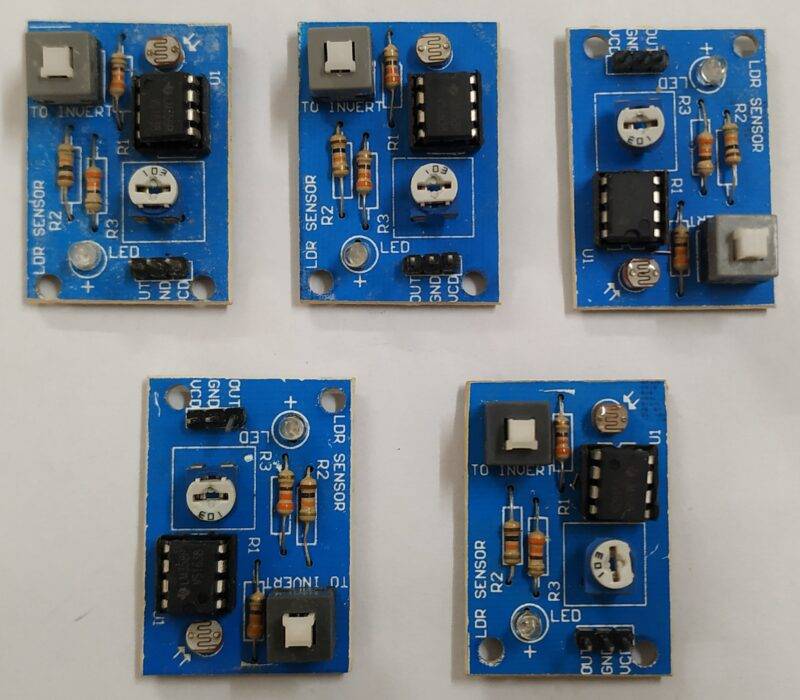
- The LDR sensor is available very easily in the market and in various versions. The one I’m demonstrating is the simplest one available and most common. Visit its projects for more applications. all of the projects of photoresistor have been uploaded on our website you can see all the details on our category page.
- It comes with DIGITAL output only (the version I have). Along with this, it also comes with a push-button with is provided onboard, which is used to switch the output of the LDR .

- The LDR is prone to behave or give false readings in daylight or direct sunlight, i.e., if you want to measure the intensity of light in open daylight then it may be difficult as the results may vary highly.
- The LDR sensor or Light dependent Resistors can be replaced according to the need of the user for a better range of values.
Advantages:
- There is no such high advantage of LDR but the nominal ones. Firstly, it can be used in various projects due to its simplicity and flexible voltage operating range.
- Secondly, it has a physical switch to switch the output between the output of the two Op-Amps. This is good in times of instant change of digital values if required.
- Thirdly, you can replace this photoresistor according to the requirement and your choice, as it can be de-soldered and soldered easily.
Disadvantages:
- The main disadvantage of the LDR sensors is the bulky structure. Due to the big size of the LDR , it needs a space to be placed which compromises the space for other components in compact projects.
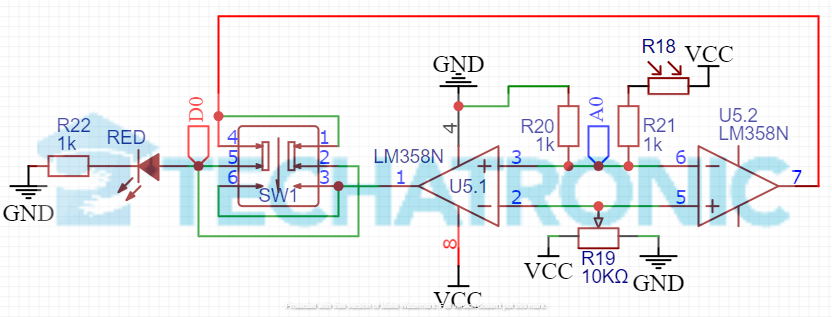
- Secondly, the version which I have pf the sensor doesn’t have an analog output. In the schematic, I have added from my side, you can add a separate wire for this.

Price & Availability:
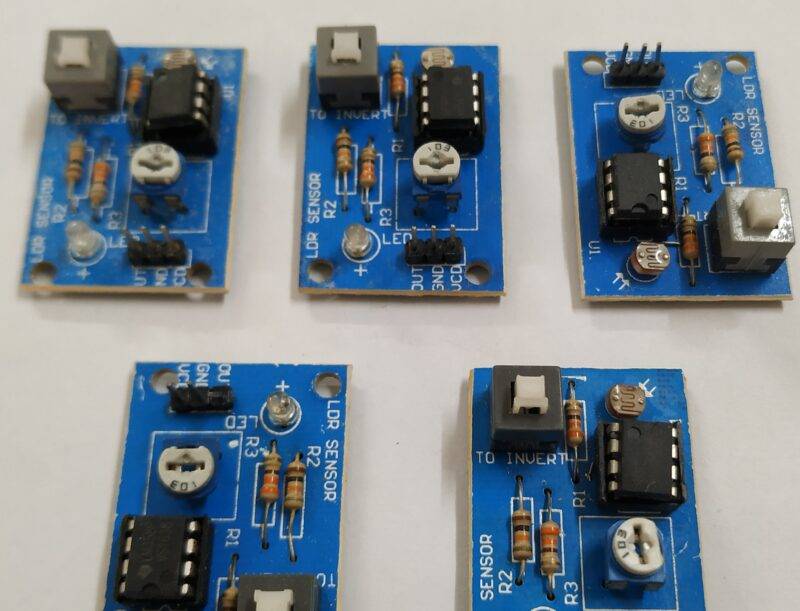
- The ldr is cheap due to its simple schematic and easily available in the market both offline and online. The version available may vary from mine (attached above). Some of the online websites are given below which I recommend you to buy from:
photoresistor sensor Construction

- The PCB of the LDR is very simple and similar to another sensor as discussed in previous articles. The only difference could be a push button.
- It is built out of LM358 IC, which is a Low-Power Dual Operational-Amplifier. a photoresistor is used in various sensors like Ir sensor which is also very popular and is also included in basic electronics series.
- The main advantage of this sensor is that you can change the Light dependent Resistor according to your need. Also, you can turn the output of the LDR with the push button provided on-board.
- The Analog values are available in a few versions of the LDR sensor only. The one which I am demonstrating does not have an analog output pin. But the schematic above will have it.
Working
- The working of this sensor is very simple and can be easily used with all microcontrollers. The main component of this photosensor is LDR, which can be changed in any case of damage, unlike other sensors.
- The LDR sensor working is depend on sunlight. ldr also uses an LM358 Op-Amp to amplify the voltage, or we can say that it acts more like a comparator in this circuit.
- In the above circuit you can clearly see that both op-Amp are giving individual and opposing outputs to both pins of the push switch while the middle one is the final output pin.
- You can easily switch between the outputs to the microcontroller in case of the digital values. There will not be any effect on the analog values as it depends purely on Light dependent Resistor and power supply.
- The LED which is provided on-board gives the status of the final output which is given out to any microcontroller. But the analog output always remains the same.
Applications
- As this LDR is easy to use, it is mostly a basic sensor with which a beginner can start. The projects which can be made from this include both basic and some food level ones. Some of them have been built in detail and with code, whose links are below.
- Arduino UNO with LDR Sensor
- Arduino Weather Station
- Automatic Streetlight
- IoT Weather Monitoring System With Blynk App
- One of the most famous project and most demanding is Single Axis Solar Tracker.
- Also, Dual Axis Solar tracker

FAQ
Q. What is the resistance range of the LDR sensors?
Well, it’s totally depended on the version of the sensor you have. Normally it has ranged from 100 Ω to 10 MΩ.
Q. Which IC is used in photoresistor?
The one which I have uses LM358, but many others also use the LM393 Dual Voltage Comparator. The working of both ICs is similar to comparing the voltages on both inputs (Inverting & Non-Inverting) & give the Output.
Q. Is analog value useful in LDR sensors?
Well, again it totally depends on the requirement and usage of the ldr which you need or want. But analog value only values when you want the task to be done in reference to light, but if you are using LASER Diode then digital is useful over analog. Same for detecting day-night or light on-off.


Explanation is excellent.
I need some idea for my project from you. I want to generate a display based on change in resistance. My input is analog value of variable resistance.
For more clarity please call me 9445002522