
Table of Contents
Introduction
Hello geeks, we are back with a new post in the series of nodemcu tutorials. Today we will learn how we can measure the temperature and humidity using a nodemcu board and a DHT11 sensor.
If you are new to our website then please also check out our projects on IoT and final year projects.
- You just have to complete the circuit and then upload the given code to the nodemcu. We are sharing all the details regarding this project below.
Let’s don’t waste more time and move to the working of the project. We have also discussed a project on a weather station in our previous blogs, you can read the article for full details.
DHT11 Sensor
This project is useful where you have to find the temperature and humidity in the air. If you understand the concept of this project then you can modify the code and make other different projects out of it.
- This project can print the values of the temperature and humidity on the serial monitor screen.
- When to provide the power to the nodemcu then the sensor starts working and continuously print the values on the serial monitor.
- dht11 sensor with esp8266 is a good combination for IoT projects.
- The temperature values are in degrees Celsius and the humidity values are in percentage.
- We use the read temperature function for taking the readings of the temperature and read humidity function for taking the values of the humidity.
- The thing about this sensor is that it is easy to use and small in size also. It can calculate the humidity and temperature with the help of electrodes present inside its plastic casing.
- Check the IoT weather monitoring project made by us using a nodemcu board.
- know more about DHT11 sensor click here

How the Activity will look like
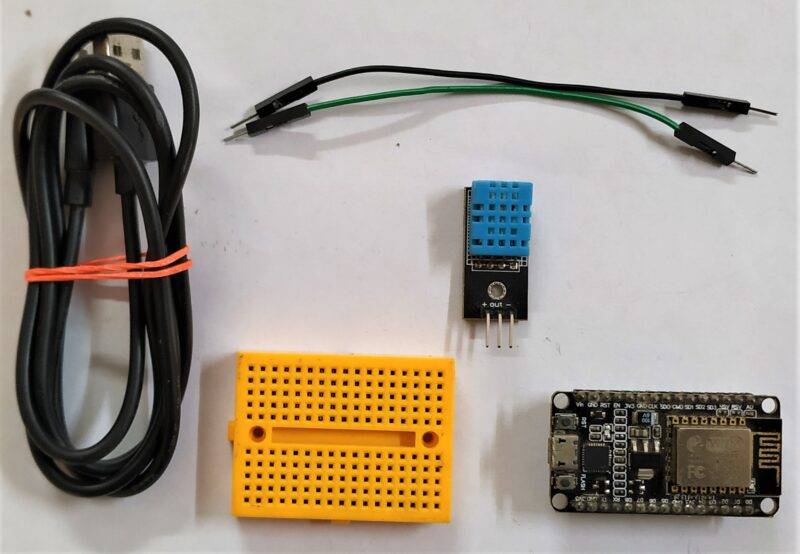
Components Required
| ESP8266 nodemcu | BUY LINK |
| DHT-11 Sensor | BUY LINK |
| Jumper wires | BUY LINK |
| breadboard | BUY LINK |
| USB cable for uploading the code | BUY LINK |
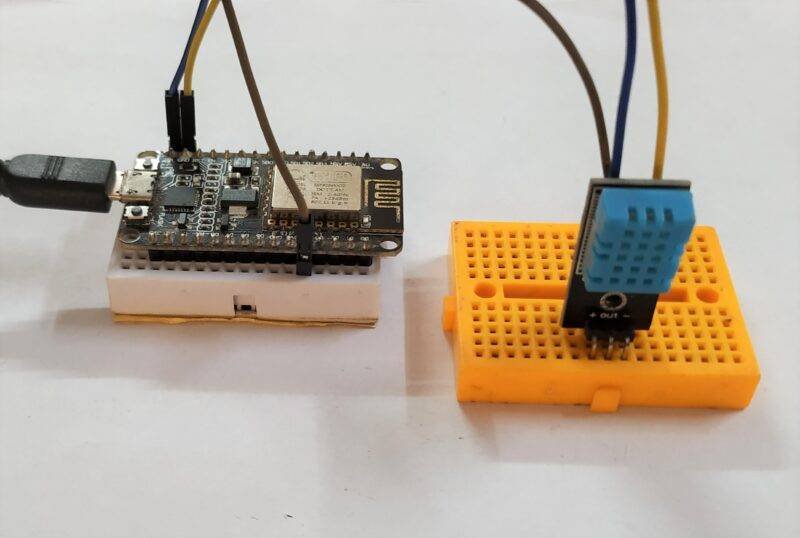
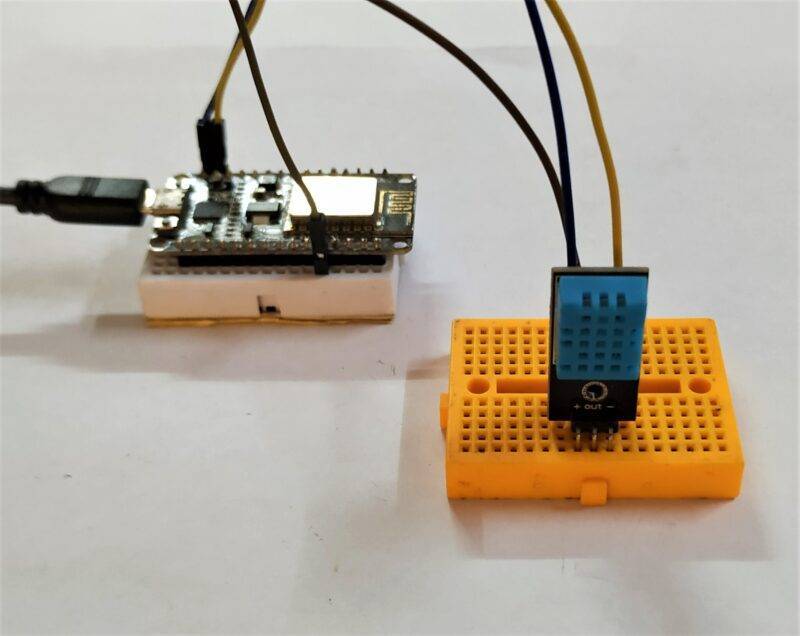
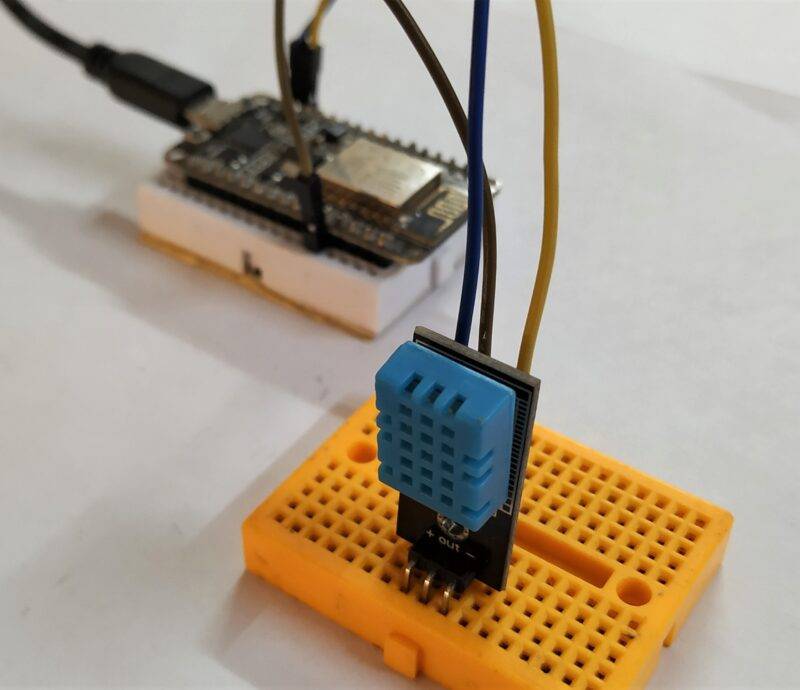
Circuit Diagram for the Project

Connection Table
| Nodemcu esp8266 | Dht11 Sensor |
| VV, Vin ( +5V ) | ( V ) VCC ( Positive + ) |
| G, GND ( Ground ) | ( G ) GND ( Ground – ) |
| D4 Pin | ( S ) OUT Pin |
Make the connections as given in the above diagram.
- There are three pins in the DHT-11 sensor out of which two are for power and one is for the output data transmission.
- You have to connect all three pins to the nodemcu.
- Connect the VCC pin of the sensor with the VIN pin of the nodemcu.
- Join the GND pin of the sensor to the GND pin of the nodemcu.
- At last, connect the remaining pin that is OUT pinned with the digital-4 pin of the nodemcu.
- You can also check the interfacing of the DHT-11 temperature and humidity sensor with Arduino.
Before uploading the code please check that connections are correct and tight.

Code for the Project
NOTE: You have to upload this code to the nodemcu but before that install <DHT.h> library to the IDE software. Check here how to add a zip library to the Arduino IDE.
 // TECHATRONIC.COM
 // DHT11 LIBRARY
 // https://github.com/adafruit/DHT-sensor-library
 #include "DHT.h"
 DHT dht2(2,DHT11);
 void setup()
 {
  Serial.begin(9600);
 }
 void loop()
 {
   Serial.println("Temperature in C:");
   Serial.println((dht2.readTemperature( )));
   Serial.println("Humidity in C:");
   Serial.println((dht2.readHumidity()));
   delay(1000);
 }
Do you like this project? Tell us in the comments section below and also if you have any doubts regarding the project then ask them. For better understanding try to make it on your own.
DHT11 Temperature and Humidity Sensor | DHT11 sensor
dht11 Sensor With SSD1306 OLED | dht11 with Arduino
DIY Arduino Weather Station | DHT11 Sensor
Arduino Weather Station | Rain Sensor of Arduino | DHT11
DHT11 with Arduino Temperature sensor Interfacing
You can also check out projects on Arduino projects, Nodemcu projects, IoT projects, Mini Projects, and Raspberry Pi written by us.
Video Sample