

Hey guys, welcome back to the Techatronic. we are going to set up Nodemcu Arduino IDE. There are two ways to set up the module one is by AT command and another is through the Arduino Ide. in the second method, the first step is lengthy but after adding the board and setup. you only need to write the code and upload it directly. So, basically, the setup is lengthy we need to add the board and libraries. So, today we are going to demonstrate the process today. So. first we need to learn some basics of esp8266.
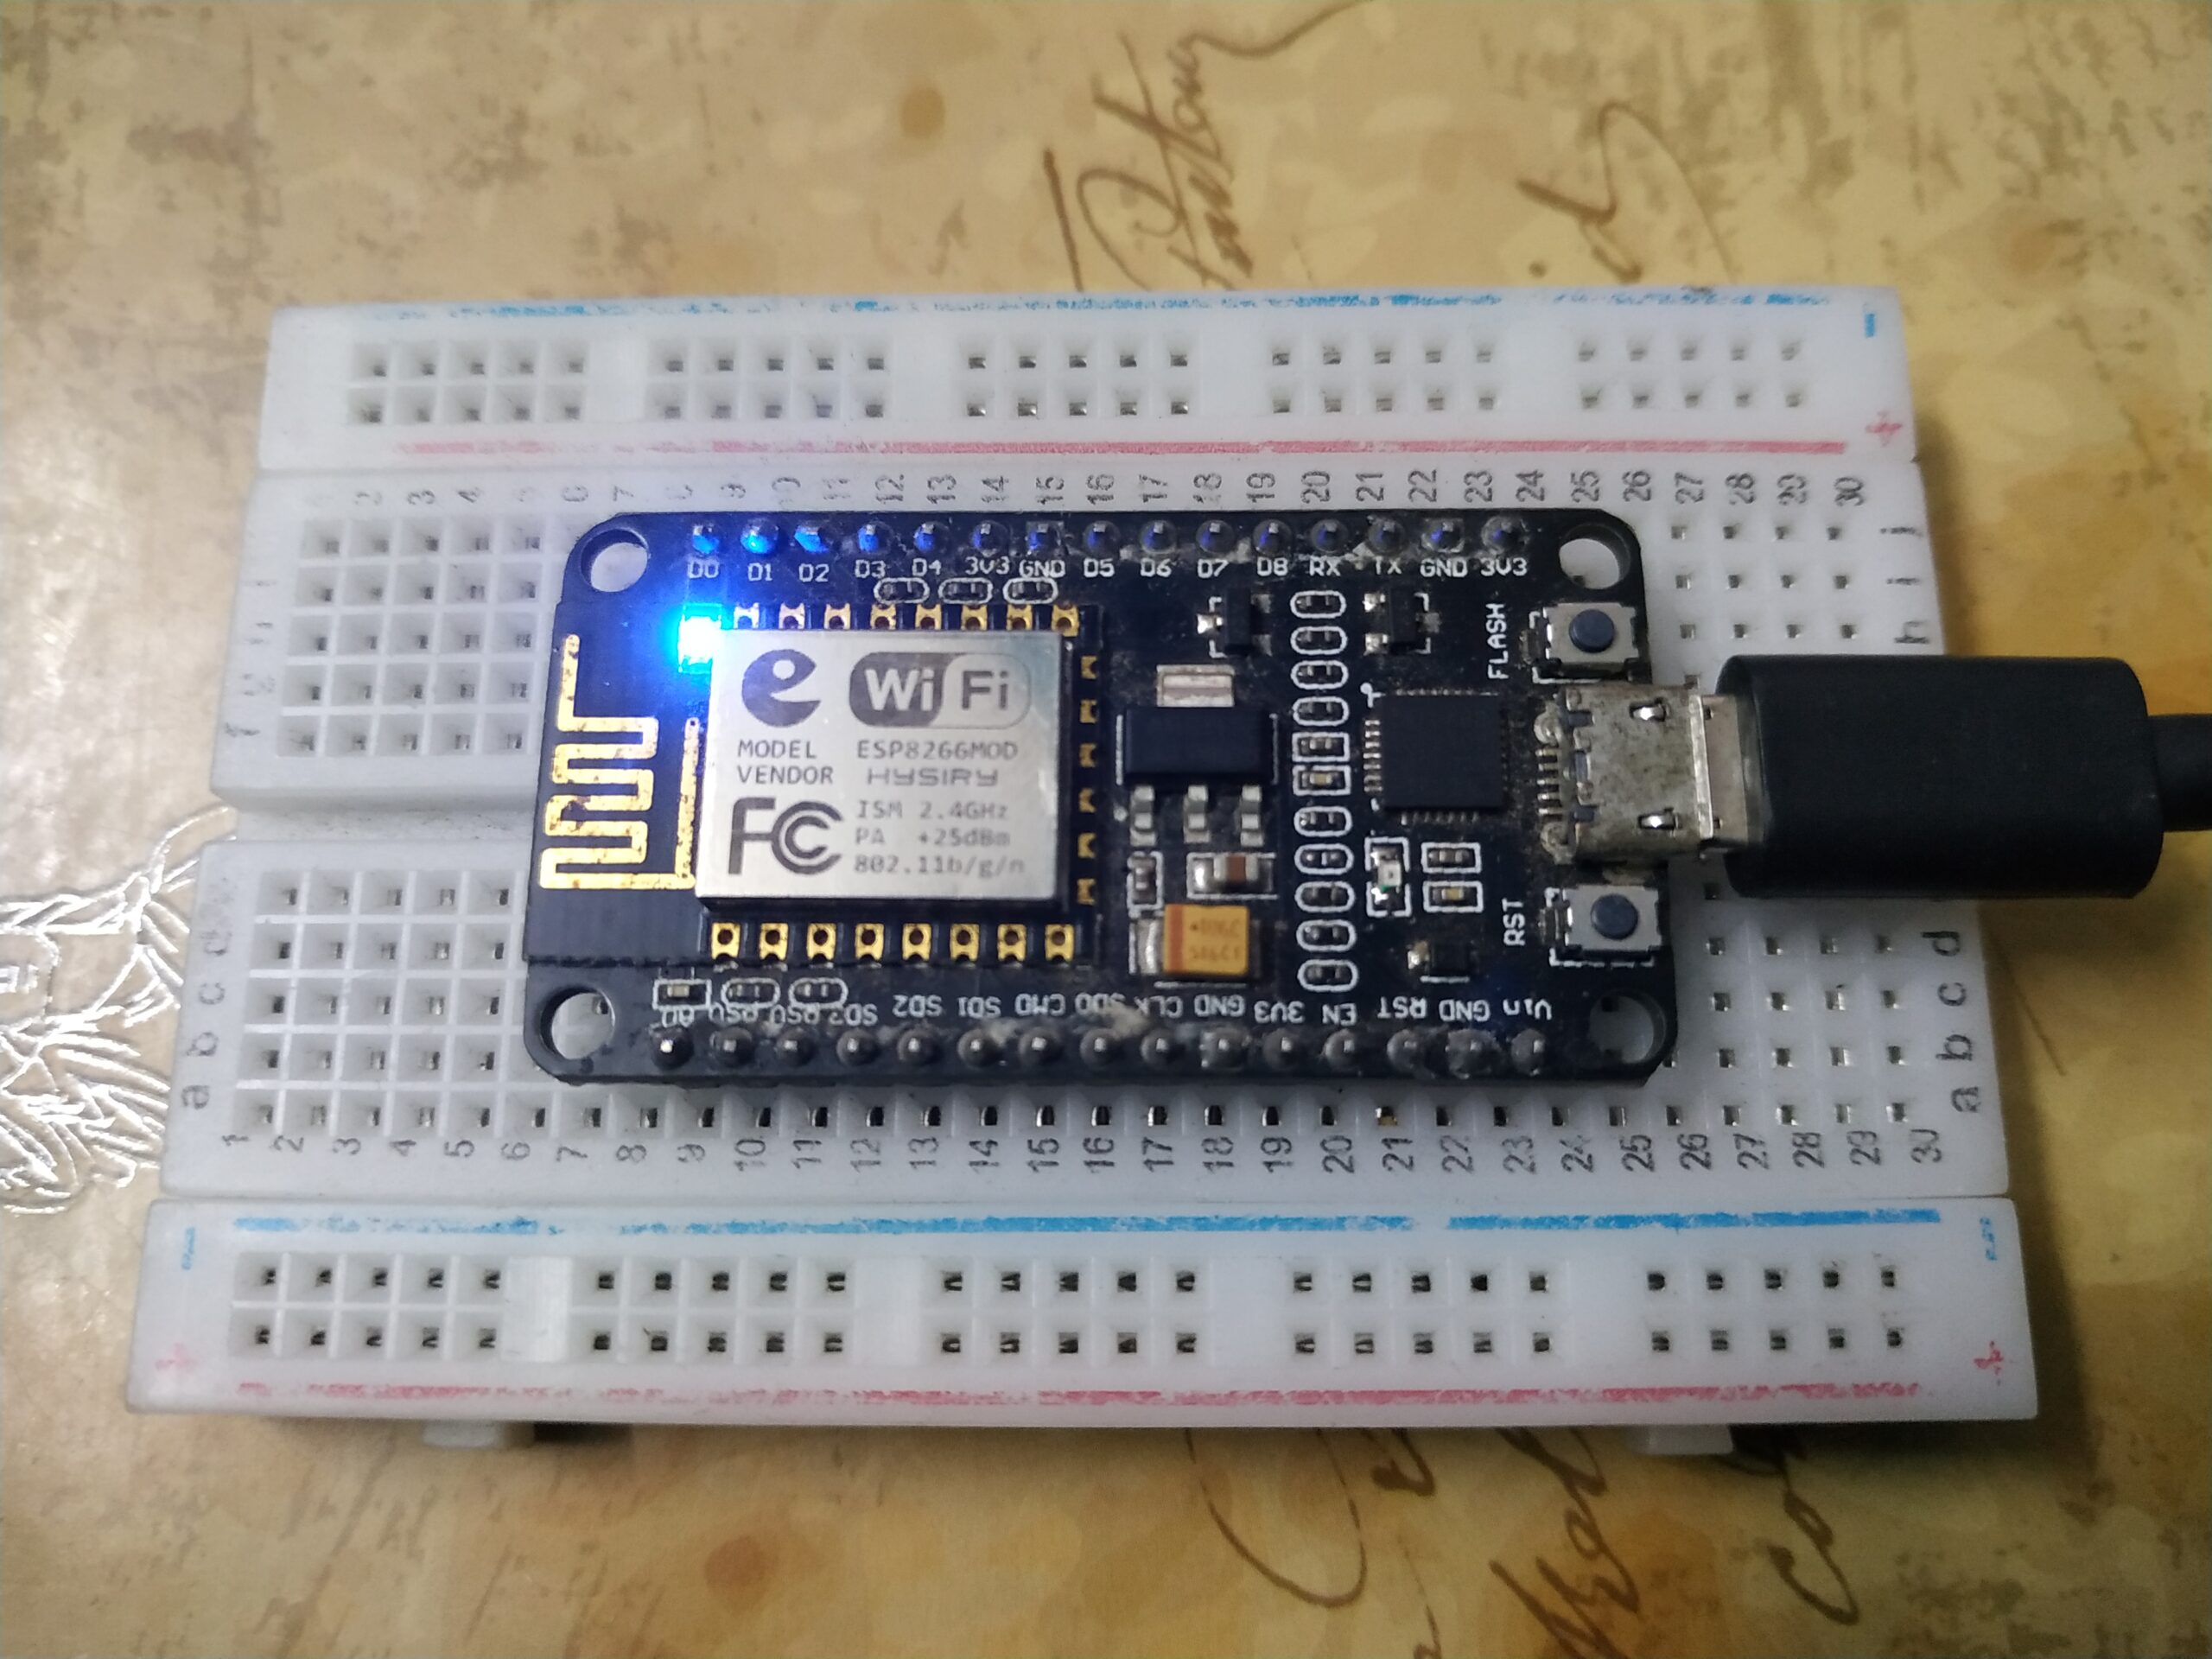
ESP8266 which is also known as the NodeMCU. it is just a wifi inbuilt microcontroller. this is its advantage that we don’t need to connect any external wifi with that. otherwise, if you are using any other microcontroller you need to connect to external wifi.
Some specification of nodemcu
There is 16 GPIO pin which we can be used as input either output pins. Nodemcu also supports the I2C, SPI, and UART protocols which can be controlled by the Arduino IDE now. so we are setting the esp8266 Arduino ide software for programming. There are preinstalled libraries and all the libraries for the sensor are available on GitHub also
As you can see in the above image all the pin descriptions are given above.
step by step instructions nodemcu arduino setup
Let start with Steps 1.
Step 1
Download Arduino IDE from Arduino.cc or from our given link. and make sure to install port com driver during the Arduino ide installation. it will ask you to install it. Arduino Ide software makes it easy to program.
Step 2
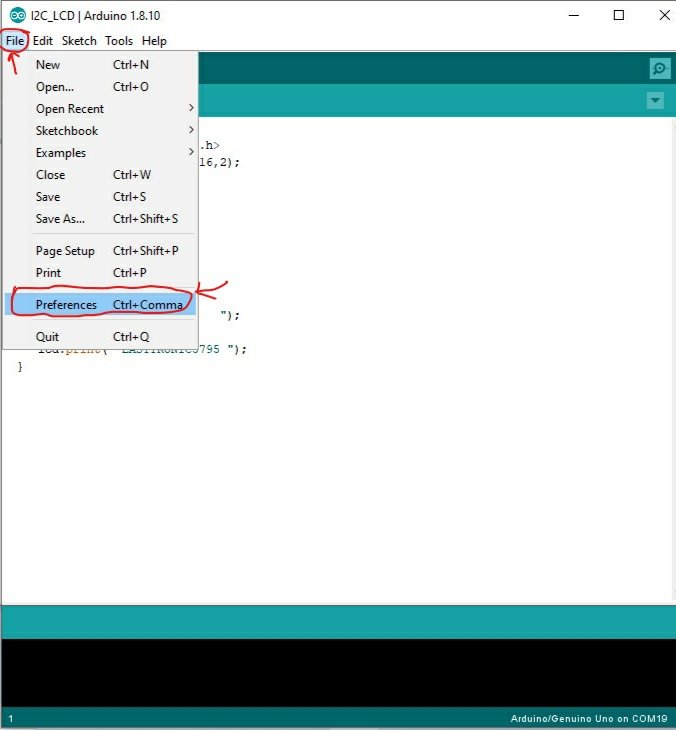
Open the Arduino IDE software. and click on the left upper corner ” file” option then click on the preference. here we are going to open the preference where we need to paste a link we have given in the next step.
Step 3:-
Paste the given link into the additional board manager url.
http://arduino.esp8266.com/stable/package_esp8266com_index.json
this link is help to arduino ide to download the supported board esp8266 Arduino ide. and click on the ok button

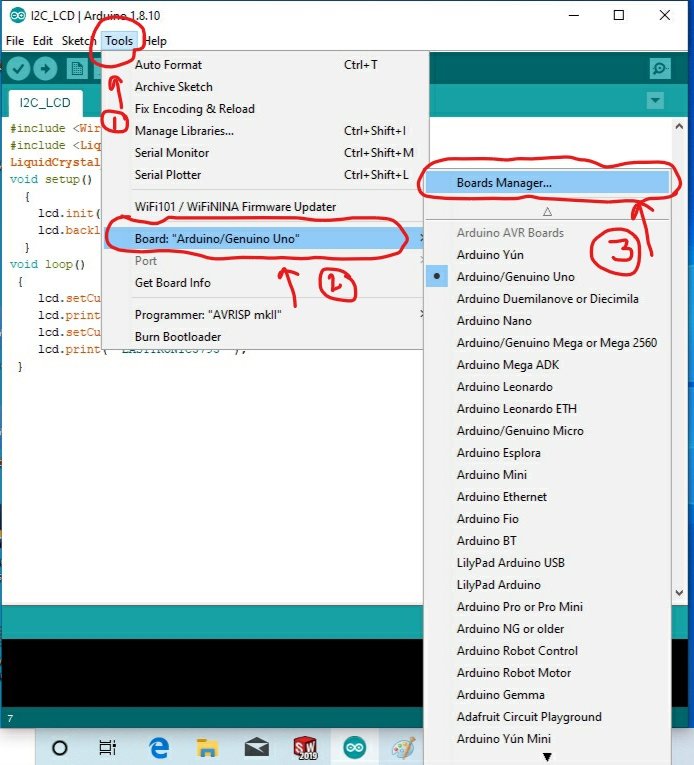
Step 4 :-
in last step we have downloaded the board. go to the tools from the given option. click on the board where arduino/genuino uno and select the board manager to add the board in App.
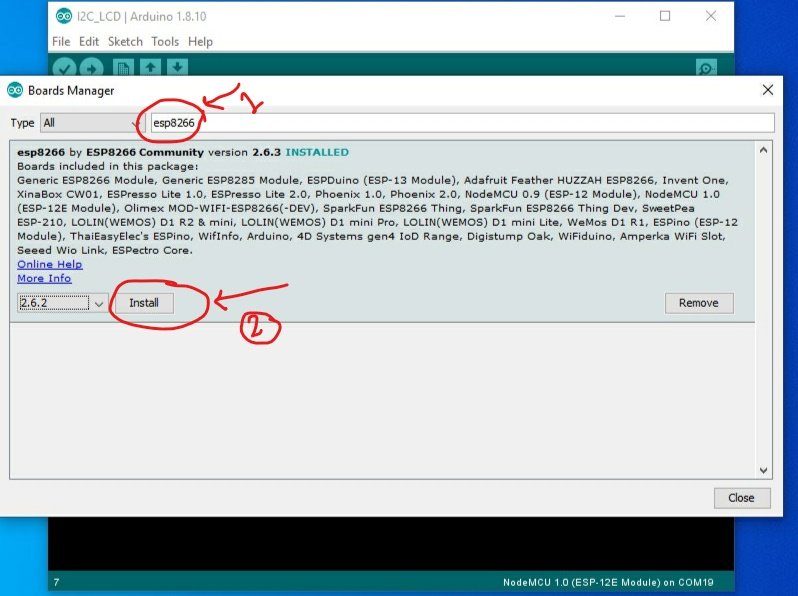
Step 5:-
Write esp8266 in the search and install the board to the software. as we have given the screenshot.
Step :6-

the board is added to the software. now we need to select the board because there are a lot of board in the software every time we need to select the board which we are using. firest click on the tool and select the board from the 2nd option click on the board you are using in the given image we are selecting the ” nodemcu 1.0(esp-12E module) ” . so if you programming esp8266 with Arduino ide you need to select the same board.
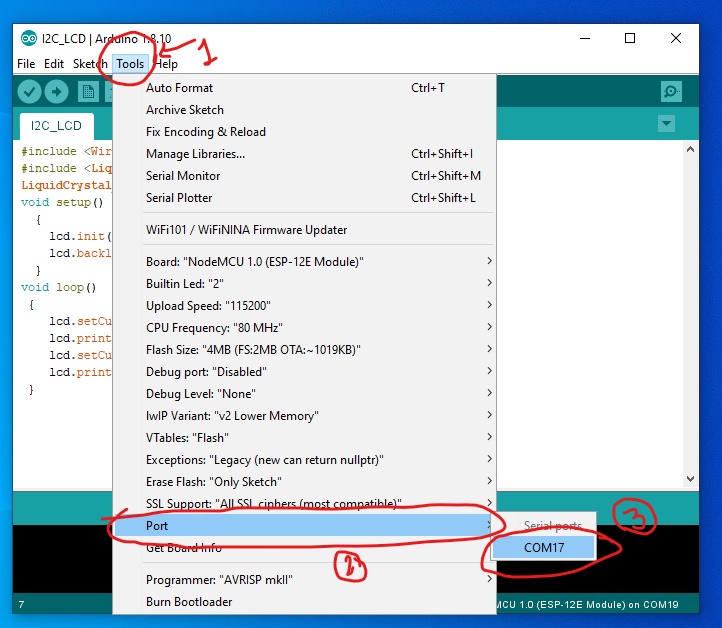
Step 7:-
In the last step, you have to select the system port in which the node is connected. to upload the code you need to mention the port to the software so the software can send the data to the right port where the nodemcu is connected. Click on the tool then click on the port option after that select the port com.
note:- if the COM is not showing in the port option there may PORT COM driver error. so, how to solve the port com driver error in Arduino esp8266 install sees the below-given image.
Materials required:
- NodeMCU (ESP8266 MOD)
- Nodemcu Cable
- Breadboard
- Go to the desktop search bar and search device manager now click on the port(Com and LPT) option if any error showing they’re right-click on the driver and update the driver


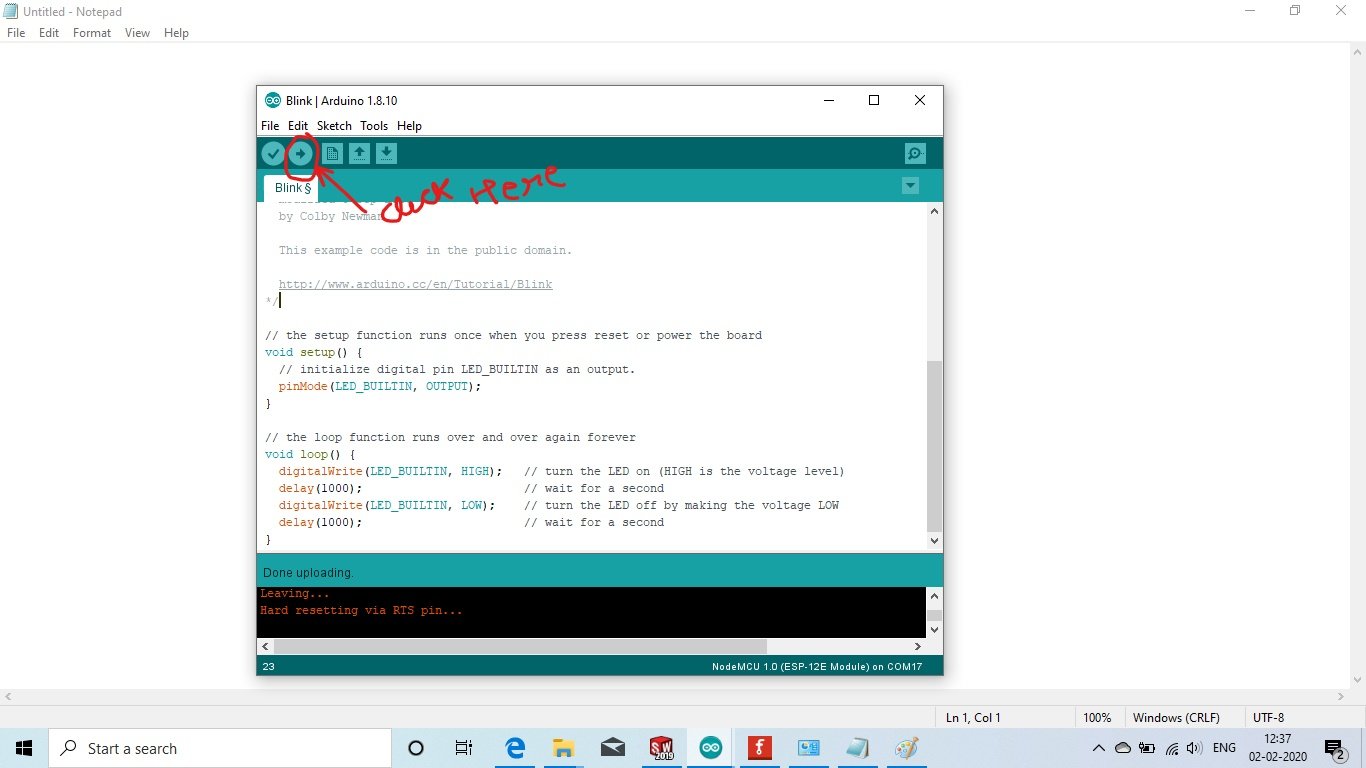
Now, you can check again and Upload an example code to the nodemcu, you need to connect nodemcu with the connecting cable to the pc and upload the code by following the above-given instructions. to upload the example code click on the file, click on the example, click on the basic and select the blink example
Now click on the given button to upload the code.
Now after uploading the code a blue color light will start to blink in the Node MCU. All the best guys if you have any query you can ask us in the comment section we already have the IoT home automation project there with the esp8266 you can check it too if you want to make the project with this device.