
Hey Guys, Welcome back to the techatronic. We are here with a very new article in this article we are going to make a tutorial on how to use stepper motor with ESP8266. A lot of tutorial about arduino with stepper motor but there is no tutorial for stepper motor with ESP8266. So that’s why we have this tutorial. Stepper motor the most widely used motor type in the motor industries which can we interface with any of the controller but but as of now all we know this is the error of smart and iot best devices so in this project we interface ESP8266.
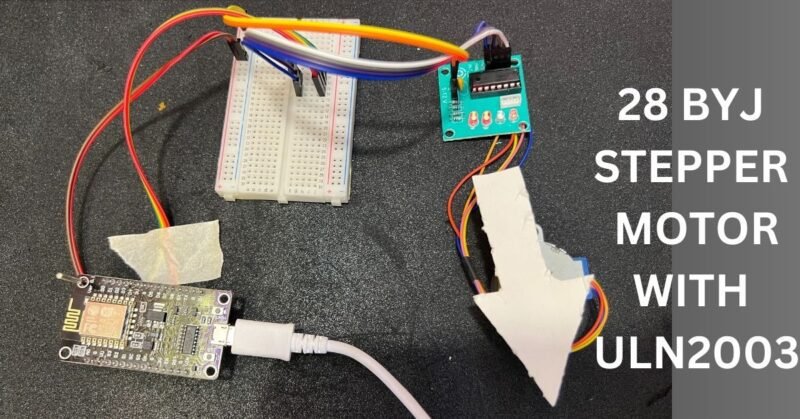
So if in future you want to make this system in the iot you can easily interface. This maybe the first step to interact iot with the stepper motor for first already should know about word how Stepper Motor with ESP8266 can be work with the ESP modules esp32, esp8266 and much more. So the motor were using 28 BYJ stepper motor. Which has the operating voltage 5 volt. There is 1 more version of 28BYJ is 24BYJ. 24BYJ motor runs on 12v. so, we avoid to use this motor. Because in this case we need an external power supply of 12v.
ESP8266 or nodeMCU is normally give the 3.3 voltage on Vcc pin but there is only one pin by which you can get the 5v voltage. the stepper motor 28BYJ required 5v supply. which can get from the vv pin of ESP8266. and if you can’t get the enough supply you can use a external power supply. in this case you need to disconnect the +ve wire from the arduino. but the -ve wire remain the same.
To make this activity work wee need the components required and a circuit diagram. we have shared all the details here. components details, circuit diagram code and all the required steps to make this project. now, you need to read the full article to learn and make how can we interface Stepper Motor with ESP8266.
Components Required
| ESP8266 | BUY LINK |
| 28 BYJ Stepper motor | BUY LINK |
| 5Vpower supply | |
| breadboard | BUY LINK |
| Jumper Wire | BUY LINK |
| ULN2003 Stepper driver | BUY LINK |
ESP8266 is an IoT-developed microcontroller board. for more information on ESP8266 you can see our.
How to setup NodeMCU Arduino IDE
28 BYJ Stepper Motor:-
this 28 BYJ Stepper motor is used for precision rotation control. The 28BYJ motor is widely use in various types of applications. where ewe need an adequate amount of controlling for example a robotics hands. or a machine arm where it is using in manufacturing plant and etc.
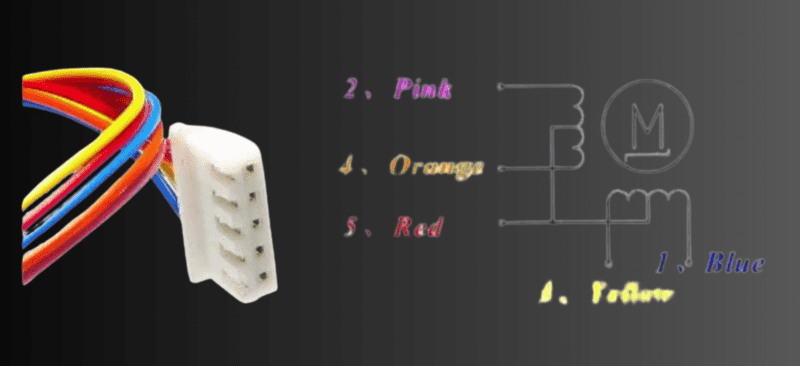
This 28 BYJ stepper motor 5V operating voltage and has a step angle of 5.625 degrees. Thus, 64 steps make 360 degrees of complete rotation of the motor. The friction torque and pull in torque of the motor is 1200 gf.cm and 300 gf.cm respectively.
ULN2003 Stepper driver:-
ULN 2003 motor driver having 4 input IN1, IN2, IN3,IN4 for four input from the controller. There is 4 led at the board which help us to identify whether the output from the controller are coming or not. for power input there you can give the 5-12v DC.

The motor driver has the connector itself so you can easily connect all the wires.
The issue with the board. sometimes we notice that the motor driver connector is place is wrong direction which result the stepper motor not working. even it can damage your controller too. so, to check the motor driver connector is placed opposite. check the last wire of the connector would be red not the blue. if the connector is not placed is right direction you need to soldered the wired from backside of board.
ESP8266 with Stepper motor Circuit diagram
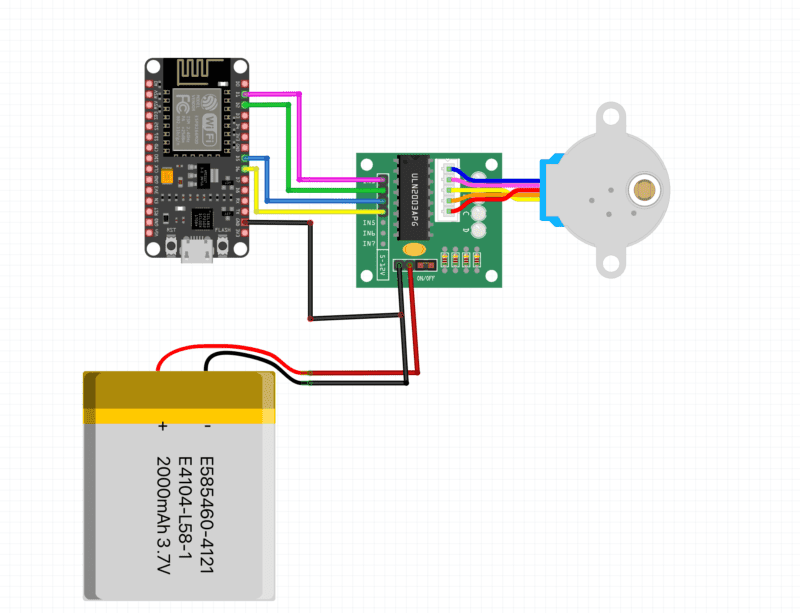
Connect ESP8266 D1,D2, D,5,D6 to Stepper Driver IN1 , IN2,IN3, IN4 Respectively.
Connect external 5v battery Positive wire with 5v input of stepper driver
Connect external battery negative wire with stepper driver -ve wire and Arduino ground wire.
Make sure not to connect battery 5v to the 3.3v of ESP8266.
Connection Table
| ESP8266 | ULN2003 STEPPER DRIVER | 5V BATTERY |
| D1 | IN1 | |
| D2 | IN2 | |
| D5 | IN3 | |
| D6 | IN4 | |
| GND | GND | NEGATIVE BLACK WIRE |
| 5-12V | POSITIVE RED WIRE |
After completing all the connections of Stepper Motor with ESP8266 now it’s time to code.
Stepper Motor with ESP8266 Code
#include <AccelStepper.h>

const int stepsPerRevolution = 2048;  // change this to fit the number of steps per revolution

// ULN2003 Motor Driver Pins
#define IN1 5
#define IN2 4
#define IN3 14
#define IN4 12

// initialize the stepper library
AccelStepper stepper(AccelStepper::HALF4WIRE, IN1, IN3, IN2, IN4);

void setup() {
  // initialize the serial port
  Serial.begin(115200);

  // set the speed and acceleration
  stepper.setMaxSpeed(500);
  stepper.setAcceleration(100);
  // set target position
  stepper.moveTo(stepsPerRevolution);
}

void loop() {
  // check current stepper motor position to invert direction
  if (stepper.distanceToGo() == 0){
    stepper.moveTo(-stepper.currentPosition());
    Serial.println("Changing direction");
  }
  // move the stepper motor (one step at a time)
  stepper.run();
}
Before upload the code you need to import the library for stepper motor driver. we have given the link here from you can download the stepper motor library.
import the given library into the Arduino ide and upload the code.