
DHT11 is the best sensor for small-scale projects, which involves both Temperature & Humidity values.
Table of Contents
What is DHT11 Sensor?
- This DHT11 temperature and humidity sensor comes in a very small package and can be found very easily in online & offline market as it is very popular among beginners and hobbyist.
- It can easily be connected to any microcontroller available in the market like Arduino & Raspberry Pi. Only some libraries needs to be installed as the data is retrieved from the single output.
- This sensor is available in more version like DHT22. Apart from this, many other sensors like DHT11 for more accurate measurements for temperature and humidity can be used for professional works.
- The data may vary slightly due to old components or overusing of the dht11sensor. So for accurate measurement, don’t use an old sensor or worn out one from a long time. if you are want to know how to use dht11 sensor with arduino you can see it on our website. Also, disassembly of the module and replacing components are not recommended for repair.
- WARNING: If you are measuring values of intense heat then make sure to dissipate the heat evenly from the DHT11 temperature and humidity sensor as it may lead to meting of the plastic covering of the sensor.
DHT Sensor Construction
- The sensor is built out of simplicity and not very durable material but of adequate quality. I neither recommend to open sensor for repairing nor opening sensor dht11 for having a view of internals.
- The sensor or module main working parts are enclosed inside the plastic case so as to protect it from environment factors. In the above picture, I have opened thi DHT11 temperature and humidity sensor available at my place to show you all its internals. Due to complexity.
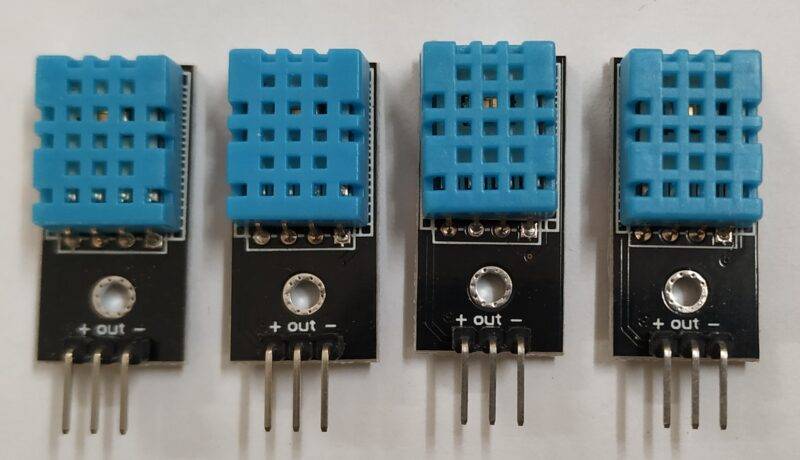
- There is no particular difference between other model, other than range and accuracy of the values. So you can use any of the models without any problem but keep in mind to change the libraries used for respective models. if you are making some big project on raspberry pi you can easily interface dht11 with the raspberry pi.
- Try to keep the sensor away from sources like dust, direct sunlight, rain or any other which can affect the value of the dht sensor.
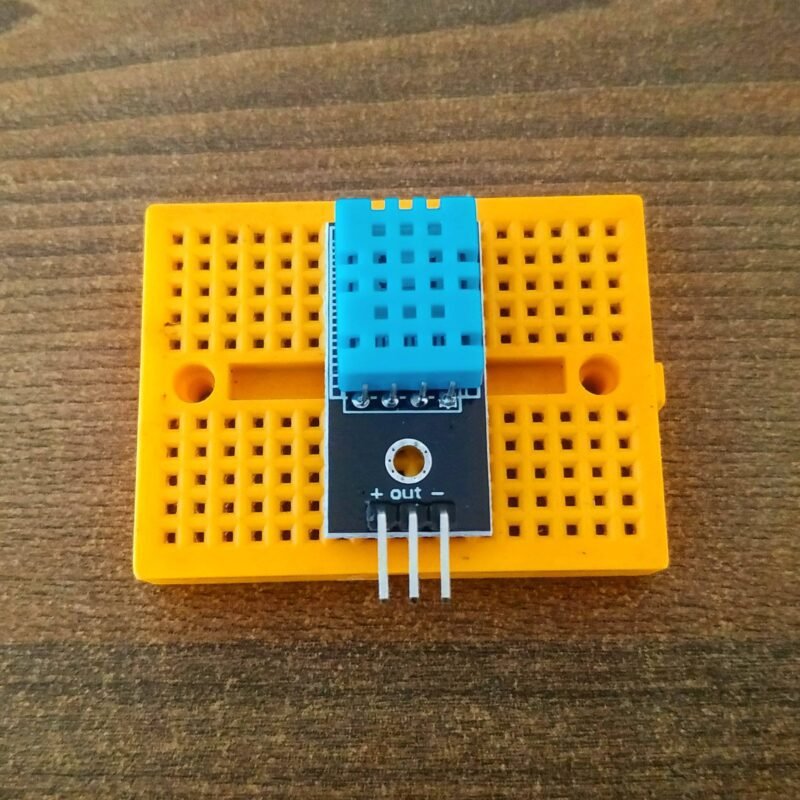
DHT11 sensor pin diagram
DHT11 sensor has four pins you can see in the above dht11 pin diagram. there are 4 pins. VCC, GND, and a data pin. VCC and ground are to be connected to the power. from these two pins, you have to give power to the dht11 sensor. and there is one data pin from which you can extract the data. from this single pin, you can extract both humidity and temperature. but first, you have to install the library to make the code. don’t give more than 5v from VSS pin. and gnd pin always connects to the ground pin of the power source.
Price & Availability:
- This sensor is very easily available in the offline and the online market. As always the online dht11 sensor price may be a bit higher that the offline so try to find this near your residence at low cost. But I have also given links for some of the popular sites for buying.
DHT11 Sensor Working
- The working of this DHT11 temperature and humidity sensor is very simple for all the models available in the market. As the data is given out via a single pin. So adequate delay must be given between retrieving two consecutive values.
- The 4th pin on the module is the NC pin, which is not connected generally to any pin of the microcontroller. But you can use this to provide structure strength to the module, as it is rather compact.
- The sensor gives output in the binary format which need to be converted using dht librariy. So. you’ll need a library to convert data in between you need to give delay.
- there is sanwidth design inside the dht11 sensor the thin polymer film between two electrode which is reactive to the moisture and by this polymer material so, it react to the humidity and convert this variablity to the numbers by the calculation.
- There is one temperature sensor inside the dht11 sensor which help us to monitor the temperature.

How to use DHT11 Sensor
DHT11 is a typical sensor that is a little tough to use. so, here I am going to share how to use the dht11 sensor. first, you have to connect the sensor with your device. mostly use this sensor with the Arduino and esp8266. and here we have given all the step-by-step information to the interface. for which I have given the link in the above paragraph.
Connect DHT11 to 5v
connect DHT11 gnd to gnd
Connect DHT11 data pin to to any GPIO pin
Install library if you are using it with esp8266 or Arduino
Print temperature and humidity on the serial monitor first.
after that print the same things on the display which you are using
DHT11 Applications:
- For your better understanding and projects based on the DHT11 sensor. We have made various projects based on DHT11 sensor which you can view as reference.
This is the complete explanation of the DHT11. For more information, comment down below I’ll surely give all answers related to your queries.

dht11 sensor Advantage:
- The main advantage of the sensor is easy to use and portability. Many other sensors, which are used to measure the temperature, like AH10 & NTC, are composed of SMD components and are a bit bulky.
- The second advantage of the sensor is that it gives data out via a single pin. This reduces complexity, but it is also a disadvantage of the sensor.
- Thirdly it is cheap and easily available also it comes with the combination of measuring Humidity (AH10 exception).
- this dht11 sensor is very easy to use so, you can use this sensor into any of your iot project when you have to use this dht11 sensor with nodemcu. you can use easily.
dht11 sensor Disadvantage:
- The main disadvantage of the sensor is the covering in which the sensor is enclosed. As it is made of plastic, so it is prone to melt due to intense heat.
- Secondly, due to long time exposed to high humid environment the sensor can accumulate the water vapors due to heat and humidity, as water inside the covering after condensation.
- The third which is the largest is that of the delay which is required for the sensor to work and be detected by the microcontroller. As it is stated in the datasheet for reference which you can read it.
FAQ
Q. What is the minimum delay to be made between two successive value readings in dht11?
The minimum delay you should be made between two successive value readings is 20μs-40μs.
Q. Is there a need of pull-up resistor with the dht11 sensor Data Pin?
It is recommended to use the pull-up resistor of 5 kΩ if a connecting wire is less than 20 meters, as stated in the datasheet. But it is not always necessary.
Q. Is power filter capacitor reqiured for dht11 sensor?
Again it is stated in the datasheet to use a power filter capacitor of 100nF, but I have never used it, so I can’t say anything sure about it.

DHT11 Sensor latest project
DHT11 with Arduino Temperature sensor Interfacing
DIY Arduino Weather Station | DHT11 Sensor
Arduino Weather Station | DHT11