

LDR sensor with Arduino Tutorial. What is Arduino Light Sensor?
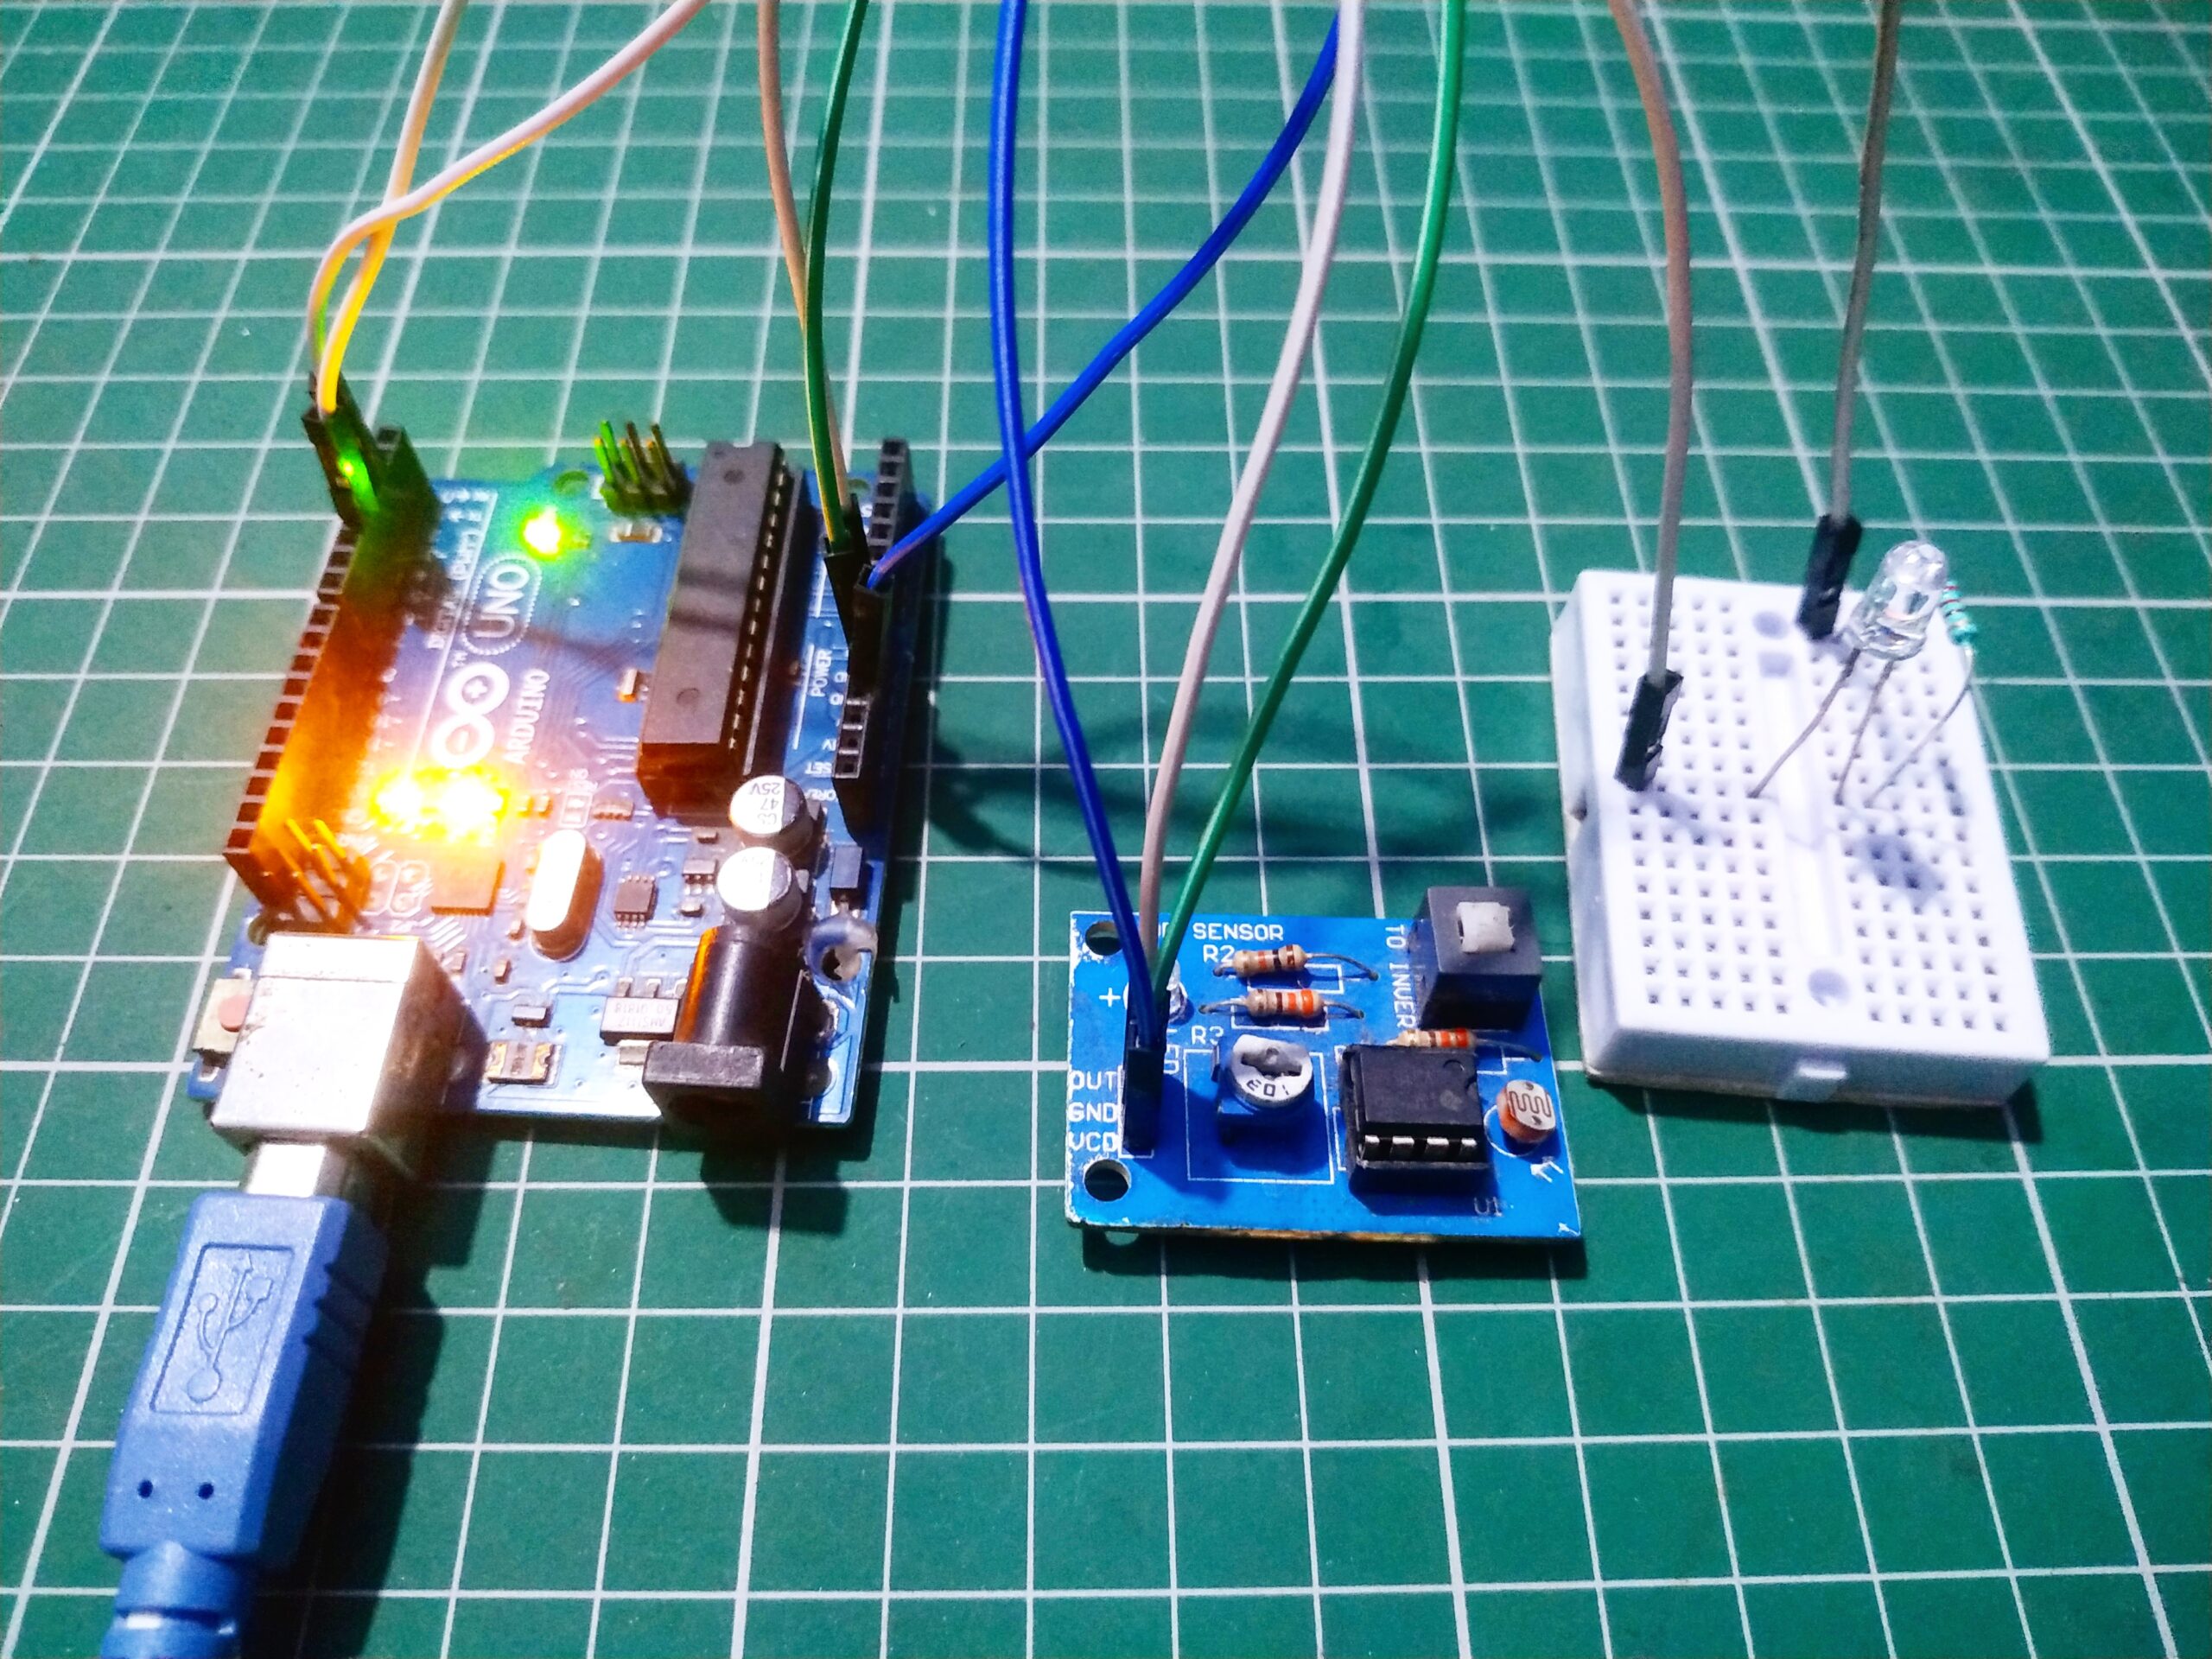
Hey guys, welcome back to Techatronic. today we are making this activity to learn you the LDR sensor working and interfacing. LDR sensor full form is a Light-dependent Resistor. the resistor which works on the Intensity of light. We are sharing the full detailed course on Arduino and this is the 10th tutorial on that course. in this post, we will teach you how to connect the LDR sensor with Arduino. Basically, this is the Interfacing tutorial in which you will learn how to make connections and how to do coding with the LDR sensor.
It is basically a variable resistor. in which the resistivity varies with the intensity of light. more light the resistance is low. Resistivity is inversely proportional to the intensity of light. The LDR sensor interfacing is the same as the IR sensor interfacing with Arduino. there are also two options with it if you want to interface it. one is with the output digital pin and another is with the analog pin. LDR sensor with Arduino works in an analog mode more perfectly. if you are using this sensor then we would prefer you to use the Analog pin of Arduino. because there are 0 to 1023 values to make the project more accurate. because if you are working with the digital pin then you can’t make more conditions and more accurate projects but with the analog output pin you can easily make this accurate.
And if you are interfacing LDR sensor with Arduino then you should know how to observe the analog value in the serial monitor. first, you need to mention the serial monitor to begin in the code. and after uploading the code into the Arduino you need you open the serial monitor. and if you are not aware of the progress then you can prefer the below-given images.

Click on the area which is pointed in the image.
and then select the baud rate at 9600 and no line ending
Now you can observe the analog value in the Serial monitor of your sensor and now you can calibrate the sensor easily. because without calibration the sensor will not work properly with the conditions. the sensor analog value is always more sensitive than the digital value. LDR Arduino light sensor project may be the laser security system we will make this project also. you can use this LDR arduino technology in many places such as street lights. whenever the sunlight is not coming the light will start automatically. we are using the same concept in the automatic street light. where when any vehicle comes near the street light then the light will be on.
Components Required LDR Arduino
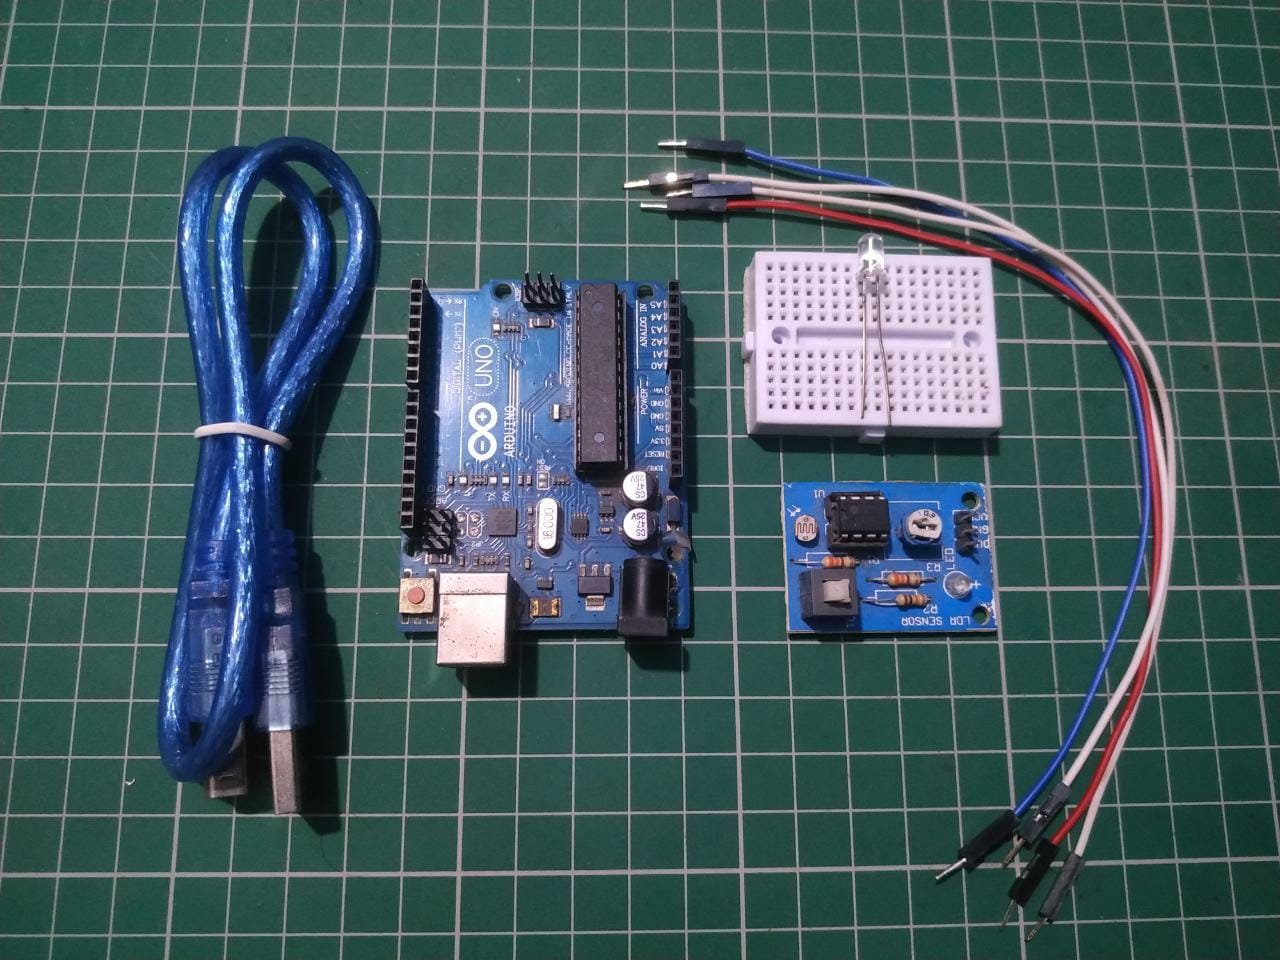
- Arduino Uno
- LDR sensor
- Breadboard
- LED
- 220-ohm resistor
- Arduino cable
- Jumper wire
LDR Arduino Circuit(digital output pin)
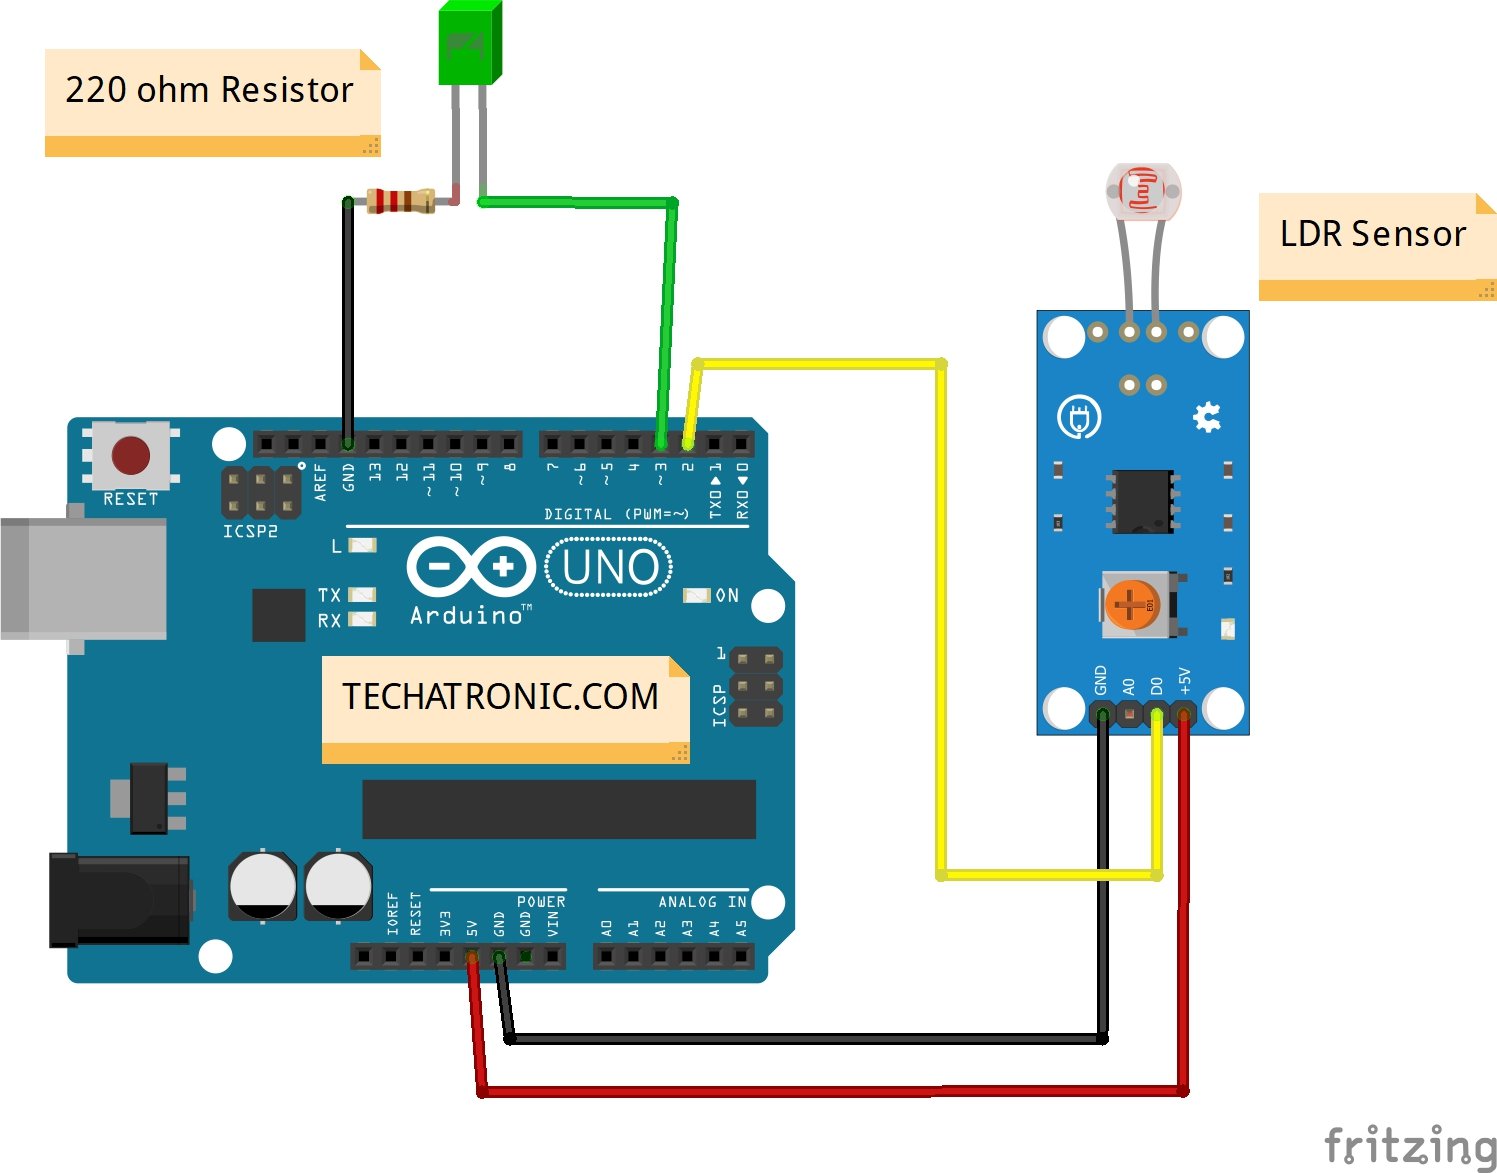
| Arduino UNO | LDR Sensor | |
| ( +5V ) | VCC | |
| GND | GND | |
| D2 Pin | OUT Pin | |
| Arduino | LED R | 220 Ohm Resistor |
| D3 Pin | Anode Pin | |
| GND | Terminal 1 | |
| Cathode Pin | Terminal 2 |
LDR Arduino Code:-
 // Techatronic.com
 int val = 0 ;
 void setup()
 {
   Serial.begin(9600); // sensor buart rate
   pinMode(3,INPUT);  // LDR Sensor output pin connected
   pinMode(4,OUTPUT); //  LED PIN
 }
 void loop()
 {
  val = digitalRead(3); // LDR Sensor output pin connected
  Serial.println(val); //  see the value in serial mpnitor in Arduino IDE
  delay(10);
  if(val == 0 )
  {
   digitalWrite(4,HIGH); // LED ON
   delay(1000);
  }
  else
  {
   digitalWrite(4,LOW); // LED OFF
  }
  }
LDR Arduino circuit diagram (analog)
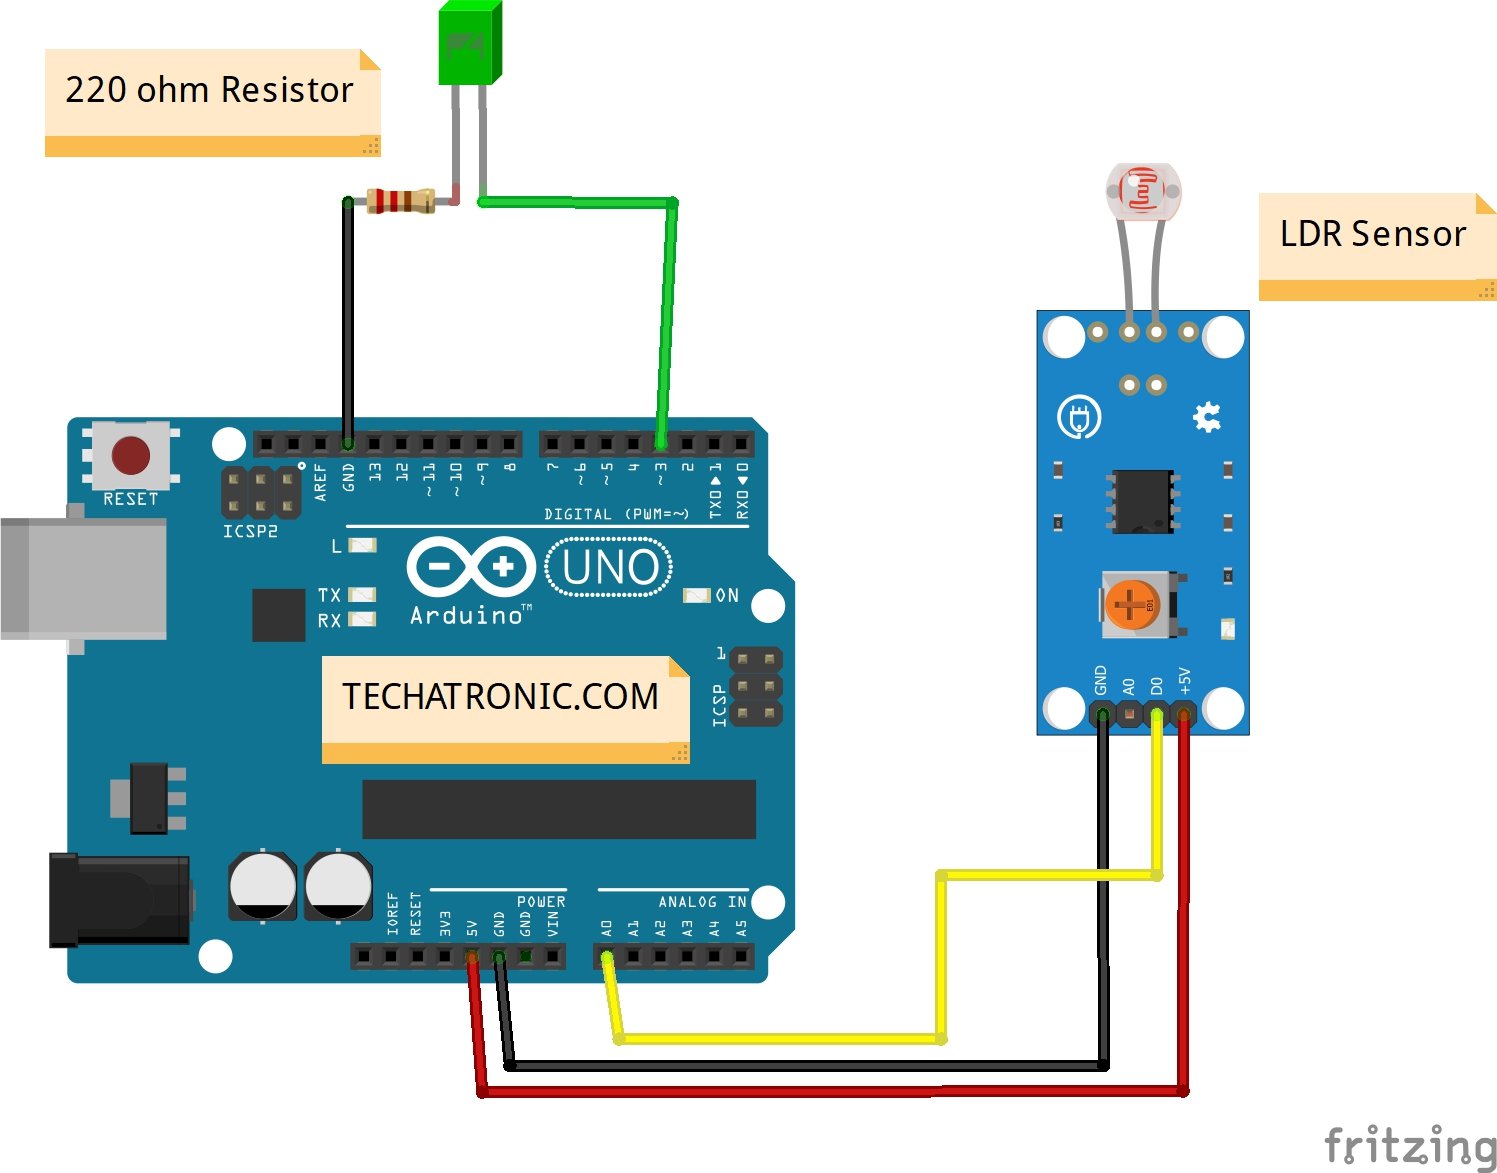
| Arduino UNO | LDR Sensor | |
| ( +5V ) | VCC | |
| GND | GND | |
| A0 Pin | OUT Pin | |
| Arduino | LED R | 220 Ohm Resistor |
| D3 Pin | Anode Pin | |
| GND | Terminal 1 | |
| Cathode Pin | Terminal 2 |
LDR Arduino code analog
// ldr arduino
// Techatronic.com
 void setup()
 {
 Serial.begin(9600); // sensor buart rate
 pinMode(4,OUTPUT); // led pin
 }
 void loop()
 {
 int s1=analogRead(A0); // LDR Sensor output pin connected
 Serial.println(s1);
 delay(50);
 if(s1< 500 )
 {
 digitalWrite(4,HIGH); // led ON
 }
 else
 {
 digitalWrite(4,LOW); // Red led OFF
 }
 }
Upload gave code into the Arduino with the help of ldr Arduino IDE. All the best.
