
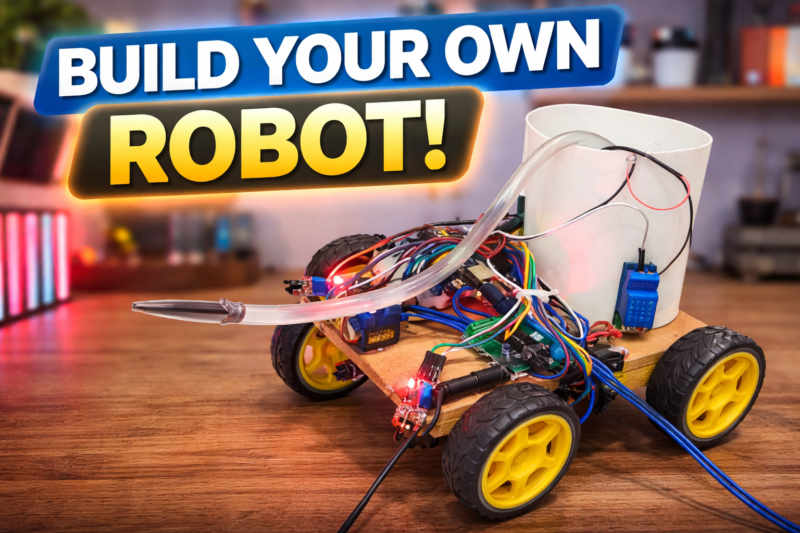
Hey, guys welcome back to Techatronic. I think all you have heard about the fire fighting Vehicle. This time we are going to make an advanced fire fighting vehicle which is also a robot and we called it a Fire fighter Robot. It is simply a machine that works automatically that’s why we called it a robot. We made this robot like it will go near to the fire and start its work. The fire fighter robot is very impressive and can be used in place of a vehicle.
Now a days if any fire accidents happens in Power plants, Buildings, etc., the time and consumption of human power is high. So there may be a possibility of Heavy damage to human beings.
By the help of this Amazing Robot we can control the fire without hurt a single person. This is able to find the fire by the help of this three sensor. that works very well.
This is our. without bluetooth variant which always run autonomously. wheeen it find the fire then. it will turn toward the fire and extinguish the fire in time. Now we have upgraded this robot to a bluetooth control Fire fighting robot which also can control by the phone too.
Table of Contents
Objective
- Design and development of low-cost firefighting robot.
- Run firefighting robot automatically.
- Extinguish fire.
Introduction to Fire Fighter Robot
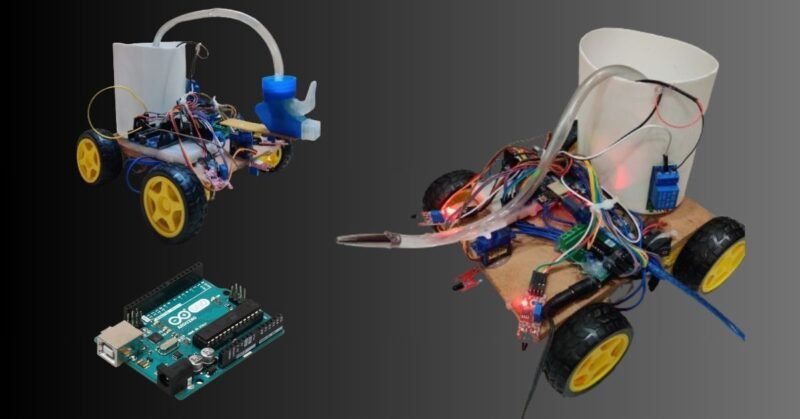
Fire fighter robot can be used to control the fire. this robot can detect the fire by itself and control the fire by throwing water. there are some sensors we are using that can detect fire and robots can move there to fire extinguish.The fire fighting robot has the same structure as Bluetooth control RC car. the robot has 3 sensors 1 sensor at the front side which see if there is anything in front of the robot.
the other two at the both front corner which also searches for fire. if any sensor detects fire at any site the robot will sensor and move towards it. the fire fighting robot has 4 wheels, 3 sensors, one water tank, one nozzle, and a computer which help him to take decision according to the Arduino code.

The robot is a small version till the date post published and there is only some basic feature when you will start the robot it will move forward first until it gets fired anywhere. if any sensor of the robot will find the flame anywhere it will start moving toward the flame and with the help of the water nozzle of the fire fighting robot using Arduino will start watering the particular area. Fire fighter robot and line follower robot have the same sensor but the working in both conditions are different.
Construction
To make this Fire fighter robot using Aruino I am going to upload all the required detail to make this robot. Components required a code circuit and all the instructions. so, you can make this easily only you need to follow all the steps. If you want to learn some basic you can learn it from our website.
Components Required
| Arduino Uno | BUY LINK |
| flame IR Sensor | BUY LINK |
| Robot Chassis | BUY LINK |
| 12v Battery | BUY LINK |
| Jumper Wire | BUY LINK |
| Nozzle for water | BUY LINK |
| Water pump 5v | BUY LINK |
| Single channel relay | BUY LINK |
| Servo Motor | BUY LINK |
| Wheel4- | BUY LINK |
| Bo motor | BUY LINK |
| L298N Motor driver | BUY LINK |
| on off switch | BUY LINK |
Can you buy all components together-BUY LINK
Fire fighter robot Circuit Diagram
Make all the connection as the given in the circuit diagram.
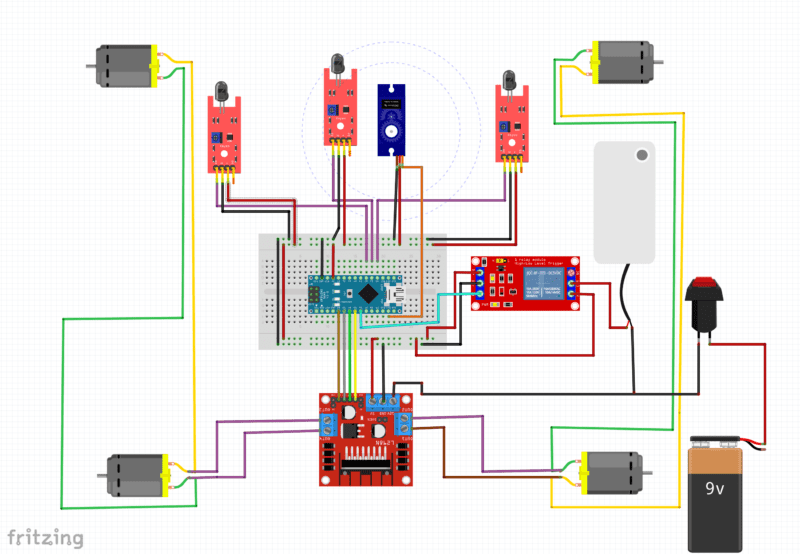
After completing the Connection next step is to write the code and program for our project.
Arduino Nano (Main Controller)
The Arduino Nano is the brain of the circuit.
All sensors and modules are connected to it.
Power:
- 5V → Sensors + Servo + Relay
- GND → Common ground for all components
⚠ Important: All grounds must be connected together.
IR Flame Sensors (3 Units)
Each IR sensor has 3 pins:
- VCC → 5V
- GND → GND
- OUT → Arduino Analog Pins
Connections:
| IR Sensor | Arduino Pin |
|---|---|
| IR 1 | A0 |
| IR 2 | A1 |
| IR 3 | A2 |
These sensors detect nearby objects (person/hand).
When object is close → Analog value becomes LOW (below threshold in code).
Servo Motor
Servo has 3 wires:
- Red → 5V
- Brown/Black → GND
- Orange/Yellow → Digital Pin 11
Connection:
Signal wire → D11
In code:
myservo.attach(11);
This servo rotates between 60° and 120° to open and close the lid.
L298N Motor Driver Module
This module controls the 4 DC motors.
Arduino to L298N connections:
| Arduino Pin | L298N Pin |
|---|---|
| D2 | IN1 |
| D3 | IN2 |
| D4 | IN3 |
| D5 | IN4 |
These pins control motor direction.
Motor Connections:
- Two motors connected to Motor A output
- Two motors connected to Motor B output
Power:
- 9V Battery → L298N 12V input
- GND → Common ground with Arduino
If 5V jumper is enabled on L298N, it can supply 5V to Arduino (optional).
Relay Module (Pin 6)
Relay has:
- VCC → 5V
- GND → GND
- IN → Arduino Pin 6
Fire Fighter Robot using Arduino Code
#include <Servo.h>

Servo myservo;  // create servo object to control a servo
// twelve servo objects can be created on most boards

int pos = 0;

void setup() {
  // put your setup code here, to run once:
 myservo.attach(11);
pinMode(2, OUTPUT);
pinMode(3, OUTPUT);
pinMode(4, OUTPUT);
pinMode(5, OUTPUT);
pinMode(6, OUTPUT);
pinMode(A0, INPUT);
pinMode(A1, INPUT);
pinMode(A2, INPUT);
Serial.begin(9600);
digitalWrite(6, HIGH);
}

void loop() {
  // put your main code here, to run repeatedly:

int a = analogRead(A0);
int b = analogRead(A1);
int c = analogRead(A2);
Serial.print(a);
Serial.print("    ");
Serial.print(b);
Serial.print("    ");
Serial.print(c);
Serial.println("    ");
delay(50);

if (a<=250)

{
  digitalWrite(2, LOW);
  digitalWrite(3, LOW);
  digitalWrite(4, LOW);
  digitalWrite(5, LOW);

  digitalWrite(6, LOW);

  for (pos = 60; pos <= 120; pos += 1) { // goes from 0 degrees to 180 degrees
    // in steps of 1 degree
    myservo.write(pos);              // tell servo to go to position in variable 'pos'
    delay(15);                       // waits 15 ms for the servo to reach the position
  }
  for (pos = 120; pos >= 60; pos -= 1) { // goes from 180 degrees to 0 degrees
    myservo.write(pos);              // tell servo to go to position in variable 'pos'
    delay(15);                       // waits 15 ms for the servo to reach the position
  }
  //delay(200);

  }


  else if(b<=450)

{

digitalWrite(2, LOW);
  digitalWrite(3, LOW);
  digitalWrite(4, LOW);
  digitalWrite(5, LOW);

  digitalWrite(6, LOW);
for (pos = 60; pos <= 120; pos += 1) { // goes from 0 degrees to 180 degrees
    // in steps of 1 degree
    myservo.write(pos);              // tell servo to go to position in variable 'pos'
    delay(15);                       // waits 15 ms for the servo to reach the position
  }
  for (pos = 120; pos >= 60; pos -= 1) { // goes from 180 degrees to 0 degrees
    myservo.write(pos);              // tell servo to go to position in variable 'pos'
    delay(15);                       // waits 15 ms for the servo to reach the position
  }
  for (pos = 60; pos <= 120; pos += 1) { // goes from 0 degrees to 180 degrees
    // in steps of 1 degree
    myservo.write(pos);              // tell servo to go to position in variable 'pos'
    delay(15);                       // waits 15 ms for the servo to reach the position
  }
  for (pos = 120; pos >= 60; pos -= 1) { // goes from 180 degrees to 0 degrees
    myservo.write(pos);              // tell servo to go to position in variable 'pos'
    delay(15);                       // waits 15 ms for the servo to reach the position
  }

  }
  else if(c<=250)

{

digitalWrite(2, LOW);
  digitalWrite(3, LOW);
  digitalWrite(4, LOW);
  digitalWrite(5, LOW);

  digitalWrite(6, LOW);
for (pos = 60; pos <= 120; pos += 1) { // goes from 0 degrees to 180 degrees
    // in steps of 1 degree
    myservo.write(pos);              // tell servo to go to position in variable 'pos'
    delay(15);                       // waits 15 ms for the servo to reach the position
  }
  for (pos = 120; pos >= 60; pos -= 1) { // goes from 180 degrees to 0 degrees
    myservo.write(pos);              // tell servo to go to position in variable 'pos'
    delay(15);                       // waits 15 ms for the servo to reach the position
  }
  for (pos = 60; pos <= 120; pos += 1) { // goes from 0 degrees to 180 degrees
    // in steps of 1 degree
    myservo.write(pos);              // tell servo to go to position in variable 'pos'
    delay(15);                       // waits 15 ms for the servo to reach the position
  }
  for (pos = 120; pos >= 60; pos -= 1) { // goes from 180 degrees to 0 degrees
    myservo.write(pos);              // tell servo to go to position in variable 'pos'
    delay(15);                       // waits 15 ms for the servo to reach the position
  }
  for (pos = 60; pos <= 120; pos += 1) { // goes from 0 degrees to 180 degrees
    // in steps of 1 degree
    myservo.write(pos);              // tell servo to go to position in variable 'pos'
    delay(15);                       // waits 15 ms for the servo to reach the position
  }
  for (pos = 120; pos >= 60; pos -= 1) { // goes from 180 degrees to 0 degrees
    myservo.write(pos);              // tell servo to go to position in variable 'pos'
    delay(15);                       // waits 15 ms for the servo to reach the position
  }

  }


else if(a>=251 && a<=700)

{
 digitalWrite(6, HIGH);


digitalWrite(2, LOW);
  digitalWrite(3,HIGH);
  digitalWrite(4, HIGH);
  digitalWrite(5, LOW);


  delay(500);

  digitalWrite(6, HIGH);

digitalWrite(2, HIGH);
  digitalWrite(3, LOW);
  digitalWrite(4, HIGH);
  digitalWrite(5, LOW);
  delay(500);

  }


else if(b>=251 && b<=800)

{


digitalWrite(2, LOW);
  digitalWrite(3,HIGH);
  digitalWrite(4, HIGH);
  digitalWrite(5, LOW);

  digitalWrite(6, HIGH);


  }


else if(c>=251 && c<=800)

{


  digitalWrite(2, HIGH);
  digitalWrite(3, LOW);
  digitalWrite(4, LOW);
  digitalWrite(5, HIGH);


  digitalWrite(6, HIGH);
delay(500);
  digitalWrite(6, HIGH);

digitalWrite(2, HIGH);
  digitalWrite(3, LOW);
  digitalWrite(4, HIGH);
  digitalWrite(5, LOW);
  delay(500);

  }

else

{
digitalWrite(6, HIGH);

digitalWrite(2, HIGH);
  digitalWrite(3, LOW);
  digitalWrite(4, HIGH);
  digitalWrite(5, LOW);


  }


  }
Upload this Code using Arduino IDE
Working
So, there in the working of Fire fighter robot using arduino we are providing the algorithm first so you can have the idea about the basic working of the robot.
There are we are using 3 IR flame sensor which are continuously seeking for fire or flame. The IR Flame sensor sense the warm and heat from any body. and we coded this sensor that it can sense the flame around it. All three sensor always searching for fire. if any of the sensor will find it. the robot will turn and start walking toward the fire.
How does it work? The flame sensor sense the fire and send the information to the Arduino which is the brain of this robot. The brain will take the action according to the condition and information getting from the sensor. Arduino will give the commands to the Motors to start in the walk in the desired direction. if left sensor give the information about the fire then the Arduino will run the motor in left direction. same for the front and right side motor.
The robot will stop near to the fire and start watering to it till the fire will be under control.
Algorithm

Video Sample
Application
Fire fighter robot can be used in the Area where a can’t go
Fire fighter obot use in war
Fire fighter robot can be used at big kitchen
Fire fighter robot can be used it Restaurent
FAQ (Frequently ask Questions:-
1. What is a Firefighter Robot?
A firefighter robot is a type of robotic system designed to help or replace human firefighters in dangerous environments, particularly during firefighting and rescue operations. These robots are equipped with sensors, cameras, and firefighting equipment to help detect and extinguish fires safely.
2. How does a firefighter robot detect fire?
Firefighter robots use a combination of sensors to detect fires, including:
- Infrared (IR) sensors: Detect Infrared heat flames from the fire.
- Flame sensors: Identify flames based on their light properties.
- Smoke sensors: It can detect the smoke with the help of smoke sensor
3. What kind of sensors are used in a firefighter robot?
Common sensors used in firefighter robots include:
- Thermal cameras
- Flame sensors
- Gas sensors
- Proximity sensors
- Smoke detectors
In our Fire fighter Robot, we are using the Flame senor which can easily detect the flame nearby.
4. How is the robot controlled?
Firefighter robots can be controlled in various ways:
- Remotely controlled :- We can use a remote to control the robot.
- Autonomous control we have made a automatic program by which the robot can easily detect the flame and run toward the flame autonomously.
- Semi-autonomous mode, where the robot can perform specific tasks but still requires human intervention.
5. What extinguishing methods does the robot use?
Firefighter robots may use different extinguishing methods depending on their design and the type of fire:
- Water cannons for conventional fires.
- Foam sprayers for oil-based or chemical fires.
- CO2 or dry chemical extinguishers for electrical or industrial fires.
6. What are the main challenges in designing a firefighter robot?
Some key challenges include:
- Navigation in unpredictable, dangerous environments (e.g., debris, collapsing structures).
- Heat resistance to withstand extreme temperatures.
- Power supply and ensuring the robot has sufficient battery life.
- Autonomous decision-making in real-time emergency situations.
- Communication in environments with smoke, heat, or obstacles.
7. Can firefighter robots operate in hazardous environments?
Yes, firefighter robots can be operate in hazardous environments where it may be too dangerous for humans.
8. What are the benefits of using fire fighter robot?
- Safety: Reduces the risk to human firefighters by entering dangerous environments.
- Efficiency: Robots can work continuously without fatigue.
- Precision: Advanced sensors and cameras allow robots to detect fires early and respond more effectively.
- Access to unreachable areas: Robots can go into confined spaces or areas where human entry is impossible or dangerous.
9. What are the different types of firefighter robots?
There are several types of firefighter robots, including:
- Ground-based robots that can navigate through rough terrain.
- Aerial drones equipped with cameras and sensors to survey the fire from above.
- Crawler robots for moving through narrow or debris-filled areas.
- Amphibious robots designed for firefighting in water-based environments like ports.
10. What materials are firefighter robots typically made from?
Firefighter robots are often constructed from heat-resistant materials such as:
- Steel or aluminum alloys for structural durability.
- Ceramic coatings or fireproof insulation to protect electronics.
- Reinforced rubber for shock absorption and insulation from heat.