

Hey Guys, Today we’re back again with another important tutorial on Raspberry Pi. Today we’ll interface I2C LCD with Raspberry Pi.
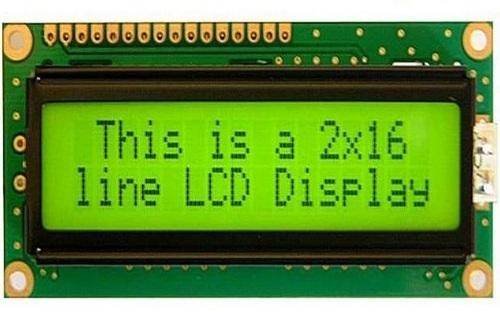
The common 16×2 Display usually used with different projects can also be used with Raspberry Pi projects. Also in today’s article,
we’ll discuss various commands we use with the Python Module to make 16×2 display work via the I2C port on Raspberry Pi. So, let’s start today’s discussion. so , you can python too from this pyhton tutorial.
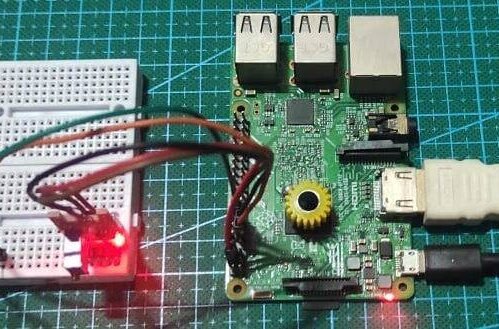
Table of Contents
I2C 16×2 LCD
You’ll have use this LCD module either wither Arduino and NodeMCU Boards, might also with others. But to interface this with Raspberry Pi requires Python modules and code.
So, in order to make the display work like in Arduino Boards, we have to define certain modules.
This LCD has 13 pins out of which 7 pins are used for making communication with the microcontroller. But as this can reduce the availability of the pins on Raspberry Pi, ironically.
Or you can say that it can be a bit complicated in python to code the 7-pin communication to make LCD work.
So to ease this process,
we use an I2C module for the 16×2 LCD which uses the I2C protocol. We can use Raspberry Pi I2C Port to make communicate with LCD and to make it work.
Make sure to power the module with 5V power pins as in some cases the LCD won’t work or may malfunction sometimes.
Also, the Address of the Module may differ, so make sure to check the address of the module.
Use sudo i2cdetect -y 1 command in the terminal to check the address of the display. Make sure to change the code in the Library below.
Material Required for I2C LCD Raspberry PI
| Raspberry pi Combo | BUY LINK |
| 16*2 LCD | BUY LINK |
| I2C Module | BUY LINK |
| Jumper Wire | BUY LINK |
| Breadboard | BUY LINK |
| Power supply | BUY LINK |
Circuit Design for I2C LCD Raspberry PI
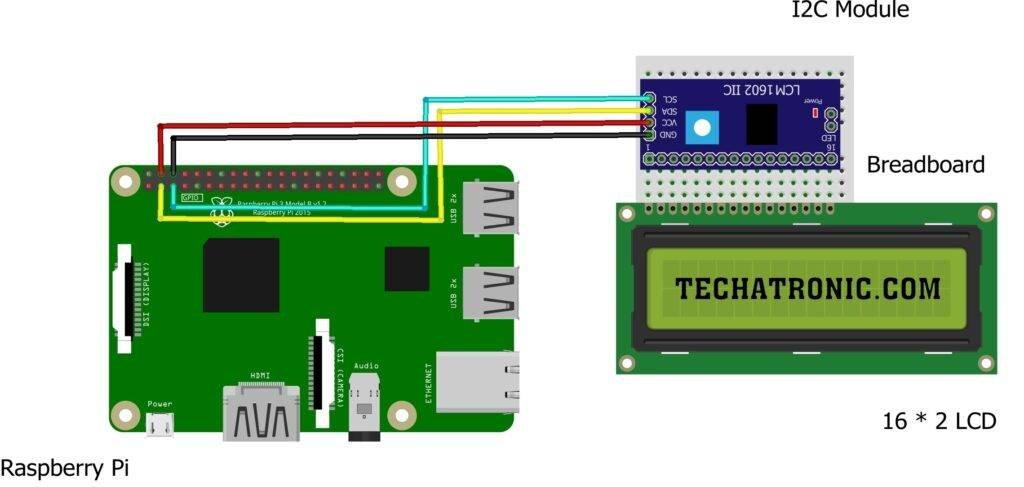
| Raspberry PI | 16*2 LCD |
| GPIO 2 ( SDA ) | SDA Pin |
| GPIO 3 ( SCL ) | SCL Pin |
| +5 Volt | VCC |
| GND | GND |
I2C LCD Raspberry PI Code & Modules
Modules
 import smbus
 from time import *
 class i2c_device:
   def __init__(self, addr, port=1):
    self.addr = addr
    self.bus = smbus.SMBus(port)
 # Write a single command
   def write_cmd(self, cmd):
    self.bus.write_byte(self.addr, cmd)
    sleep(0.0001)
 # Write a command and argument
   def write_cmd_arg(self, cmd, data):
    self.bus.write_byte_data(self.addr, cmd, data)
    sleep(0.0001)
 # Write a block of data
   def write_block_data(self, cmd, data):
    self.bus.write_block_data(self.addr, cmd, data)
    sleep(0.0001)
 # Read a single byte
   def read(self):
    return self.bus.read_byte(self.addr)
 # Read
   def read_data(self, cmd):
    return self.bus.read_byte_data(self.addr, cmd)
 # Read a block of data
   def read_block_data(self, cmd):
    return self.bus.read_block_data(self.addr, cmd)
 # LCD Address
 ADDRESS = 0x27
 # commands
 LCD_CLEARDISPLAY = 0x01
 LCD_RETURNHOME = 0x02
 LCD_ENTRYMODESET = 0x04
 LCD_DISPLAYCONTROL = 0x08
 LCD_CURSORSHIFT = 0x10
 LCD_FUNCTIONSET = 0x20
 LCD_SETCGRAMADDR = 0x40
 LCD_SETDDRAMADDR = 0x80
 # flags for display entry mode
 LCD_ENTRYRIGHT = 0x00
 LCD_ENTRYLEFT = 0x02
 LCD_ENTRYSHIFTINCREMENT = 0x01
 LCD_ENTRYSHIFTDECREMENT = 0x00
 # flags for display on/off control
 LCD_DISPLAYON = 0x04
 LCD_DISPLAYOFF = 0x00
 LCD_CURSORON = 0x02
 LCD_CURSOROFF = 0x00
 LCD_BLINKON = 0x01
 LCD_BLINKOFF = 0x00
 # flags for display/cursor shift
 LCD_DISPLAYMOVE = 0x08
 LCD_CURSORMOVE = 0x00
 LCD_MOVERIGHT = 0x04
 LCD_MOVELEFT = 0x00
 # flags for function set
 LCD_8BITMODE = 0x10
 LCD_4BITMODE = 0x00
 LCD_2LINE = 0x08
 LCD_1LINE = 0x00
 LCD_5x10DOTS = 0x04
 LCD_5x8DOTS = 0x00
 # flags for backlight control
 LCD_BACKLIGHT = 0x08
 LCD_NOBACKLIGHT = 0x00
 En = 0b00000100 # Enable bit
 Rw = 0b00000010 # Read/Write bit
 Rs = 0b00000001 # Register select bit
 class lcd:
   #initializes objects and lcd
   def __init__(self):
    self.lcd_device = i2c_device(0x3f)  # I2C module LCD Address
    self.lcd_write(0x03)
    self.lcd_write(0x03)
    self.lcd_write(0x03)
    self.lcd_write(0x02)
    self.lcd_write(LCD_FUNCTIONSET | LCD_2LINE | LCD_5x8DOTS | LCD_4BITMODE)
    self.lcd_write(LCD_DISPLAYCONTROL | LCD_DISPLAYON)
    self.lcd_write(LCD_CLEARDISPLAY)
    self.lcd_write(LCD_ENTRYMODESET | LCD_ENTRYLEFT)
    sleep(0.2)
   # clocks EN to latch command
   def lcd_strobe(self, data):
    self.lcd_device.write_cmd(data | En | LCD_BACKLIGHT)
    sleep(.0005)
    self.lcd_device.write_cmd(((data & ~En) | LCD_BACKLIGHT))
    sleep(.0001)
   def lcd_write_four_bits(self, data):
    self.lcd_device.write_cmd(data | LCD_BACKLIGHT)
    self.lcd_strobe(data)
   # write a command to lcd
   def lcd_write(self, cmd, mode=0):
    self.lcd_write_four_bits(mode | (cmd & 0xF0))
    self.lcd_write_four_bits(mode | ((cmd << 4) & 0xF0))
   # write a character to lcd (or character rom) 0x09: backlight | RS=DR<
   # works!
   def lcd_write_char(self, charvalue, mode=1):
    self.lcd_write_four_bits(mode | (charvalue & 0xF0))
    self.lcd_write_four_bits(mode | ((charvalue << 4) & 0xF0))
   # put string function
   def display_line(self, string, line):
    if line == 1:
      self.lcd_write(0x80)
    if line == 2:
      self.lcd_write(0xC0)
    if line == 3:
      self.lcd_write(0x94)
    if line == 4:
      self.lcd_write(0xD4)
    for char in string:
      self.lcd_write(ord(char), Rs)
   # clear lcd and set to home
   def clear(self):
    self.lcd_write(LCD_CLEARDISPLAY)
    self.lcd_write(LCD_RETURNHOME)
   # define backlight on/off (lcd.backlight(1); off= lcd.backlight(0)
   def backlight(self, state): # for state, 1 = on, 0 = off
    if state == 1:
      self.lcd_device.write_cmd(LCD_BACKLIGHT)
    elif state == 0:
      self.lcd_device.write_cmd(LCD_NOBACKLIGHT)
   # add custom characters (0 - 7)
   def lcd_load_custom_chars(self, fontdata):
    self.lcd_write(0x40);
    for char in fontdata:
      for line in char:
       self.lcd_write_char(line)
   # define precise positioning (addition from the forum)
   def display(self, string, line, pos):
   if line == 1:
    pos_new = pos
   elif line == 2:
    pos_new = 0x40 + pos
   elif line == 3:
    pos_new = 0x14 + pos
   elif line == 4:
    pos_new = 0x54 + pos
   self.lcd_write(0x80 + pos_new)
   for char in string:
    self.lcd_write(ord(char), Rs)
Save this with LiquidCrystal_I2C.py
Commands
The commands mentioned below uses lcd (initialization object) as the prefix before . So, ignore this while writing your commands.
- lcd.clear() –> Clears the display
- lcd.display_line(“string”,y) –> Display string in the line number mentioned and continues to the next line
- lcd.backlight(state) –> Turns on backlight on or off, write either 0 or 1 in place of state
- lcd.display(“string”,y,x) –> Display the text on the position given in line y and place x
Code
 import LiquidCrystal_I2C
 from time import sleep
 lcd=LiquidCrystal_I2C.lcd()
 lcd.clear()
 lcd.display("Testing....",1,0)
 sleep(1)
 lcd.clear()
 for j in range(1,3):
     for i in range(16):
         lcd.display("*",j,i)
         sleep(0.1)
 lcd.clear()
 while True:
   try:
     lcd.display("Enter String you",1,0)
     lcd.display("want to display",2,0)
     sleep(1)
     lcd.display(input("Enter String You Want to Display"),1,0)
     sleep(2)
     lcd.clear()
   except KeyboardInterrupt:
     break
This is the test code for displaying text on display. With this, we have completed I2C LCD Raspberry Pi Tutorial. I hope you enjoyed it and if you find any of the issues, let me know in comment below.