
Burning Arduino bootloader seems to be a tough task for a beginner, or for someone who hasn’t done it before. But today we’re going to ease it in simple steps so that everyone can do it.
- Whenever you buy a new ATMEGA328P IC not Arduino UNO(exception Sometimes), you need to burn the Arduino bootloader in order to make the IC in working state.
- This can be done very easily by an experienced one,same as how to use arduino. but any beginner may see IC as damaged or something else. That’s what I did with my first spare Atmega328P chip.
- The materials which we need are easy to find in any offline or online electronic store without any much difficulty. Links for all the products are provided in the material required section.
- Along with this, make sure you have a working system which will be used. All warning and precautions are mentioned in every step either in BOLD or with * sign.
Table of Contents
ATMEGA328P pin diagram
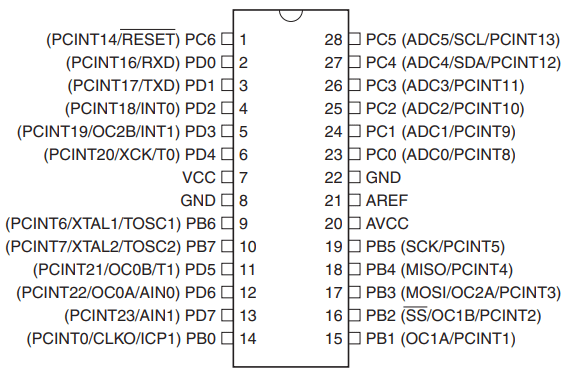
- This is the core of the Arduino UNO as well as this Bootload Arduino activity, or we can say that it is the main component of today’s tutorial. Many of you must be familiar with this but those who aren’t, for them, I’ll give a brief description.
- ATMEGA328P is the most famous 28 Pin (SPDIP, VQFN) ,32 Pin (TQFP,VQFN), 8-bit microcontroller of the AVR family. It’s Development Boards i.e., Arduino UNO, Nano are mostly used in most of the tutorials or projects.
- It has a 32 KB of ISP Flash with 1 KB of EEPROM and 2 KB of SRAM. For more details about partition, refer to it’s datasheet for a detail description.
- It has 23 I/O (28 pin DIP Package) pins which can be programmed accordingly. Out of 23, 13 are Digital pins with 6 PWM pins and 6 Analog Pins.
- It runs at 16MHz crystal oscillator at 4.5V-5.5V. Also, it has 10-bit ADC which is used which analog and digital conversion during read and write operations of PWM.
- Furthermore, it supports SPI, I2C, USART, Serial types of communication between devices, which is enough for most of the sensors.
Material Required for Bootload Arduino:

- A Working Arduino Board
| Arduino uno | BUY LINK |
| uno cable | BUY LINK |
| Breadboard | BUY LINK |
| jumper wire | BUY LINK |
| 16 MHz crystal | BUY LINK |
| 2. 22pf capacitor | BUY LINK |
| A 10 kΩ Resistor | BUY LINK |
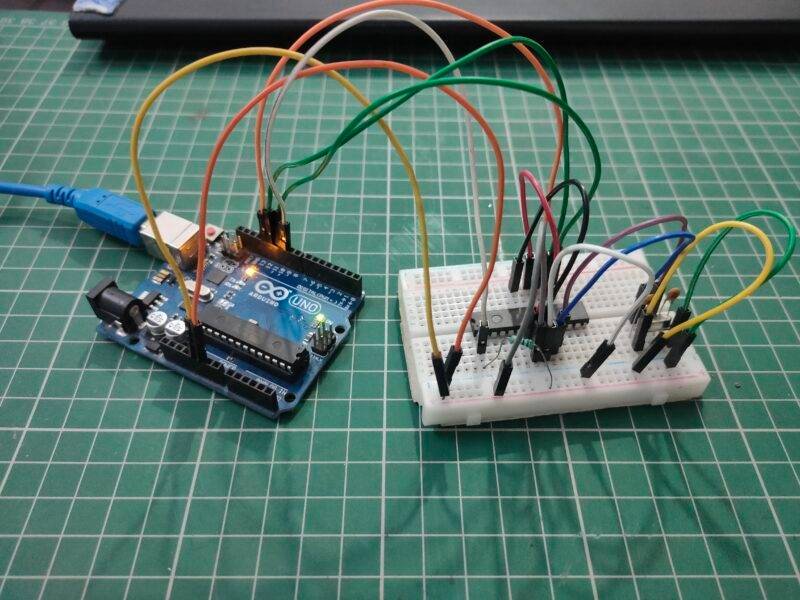
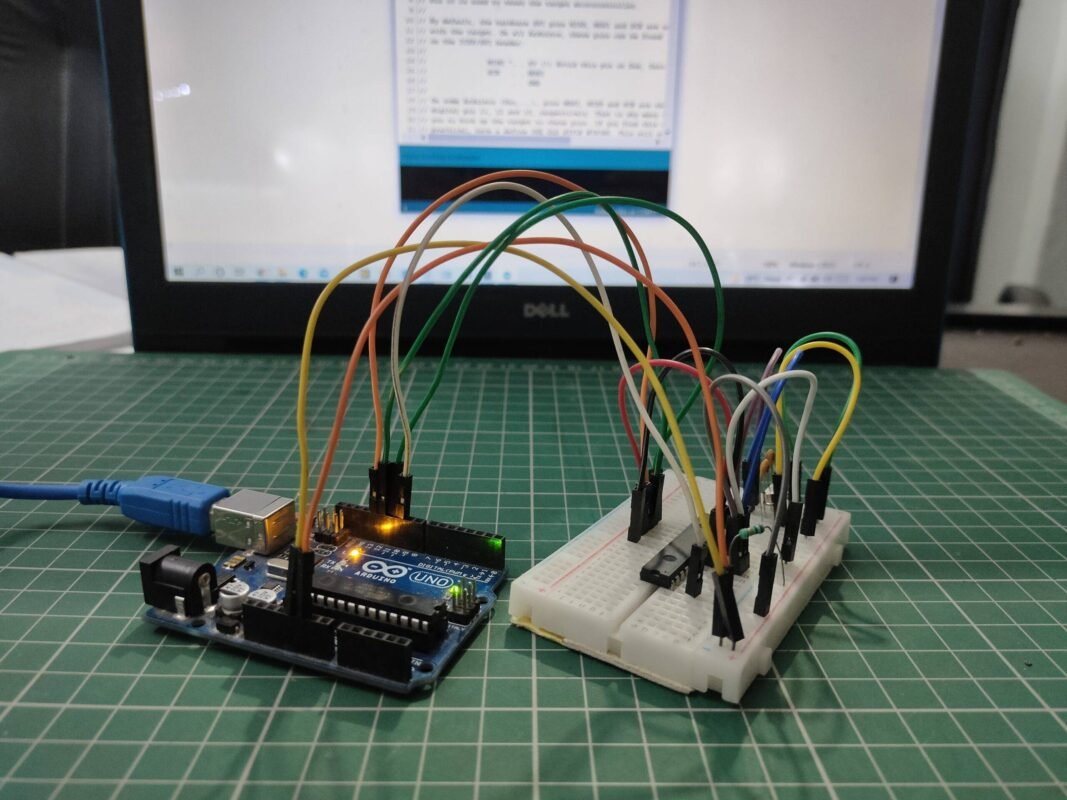
Arduino Bootloader Circuit Diagram | Connection :

Make the connection as the same as in the above picture. If you use a resonator in place of crystal, then connect as same as crystal and the middle pin of the resonator to GND.
Bootload Arduino Procedure:
Preparations
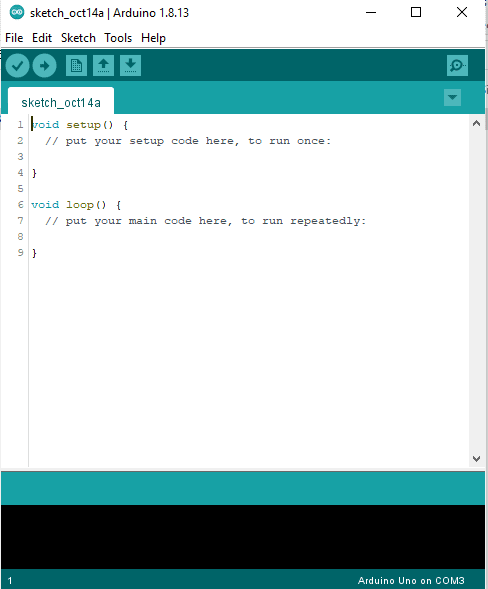
- First open a new sketch in Arduino IDE like as shown in the picture adjacent to it.
- First, make sure you have made all the connection in the previous step.
- Also make sure after you plug in the USB cable, nothing should heat-up or assume that you have mess something.

- Now Click Tools tab in the Menu Bar. A drop-down list of various other options will open.
- Now either hover your mouse pointer over or click Board: “BOARD NAME”. Again, a side list of options will open.
- Now carefully select the Board which you are using to burn the Arduino uno bootloader to the new Atmega328P chip

- Just like in the previous step, either hover or click on Port: and select the port to which the board is connected.
- If the name of the Arduino board doesn’t appear or worse than this the board doesn’t get detected as in above picture then don’t worry I’ll help you in this also.
- If the Board doesn’t get detected, then your Arduino Board is the Clone version. Which uses a FTDI chip to upload or to make Serial communication between Main microcontroller and your system.
- For this, either search on Google for CH340G driver for your system or just download this zip file from here.

- Now, similar to previous step, select the Programmer type from the side -drop list to ArduinoISP.
Uploading Code

- Now Click on File menu in Menu Bar. A drop-down list similar to the Tools Menu will appear.
- Now under the examples, scroll down and search for the example ArduinoISP as shown above.
- Select that example and a new window or same window will load with the code.
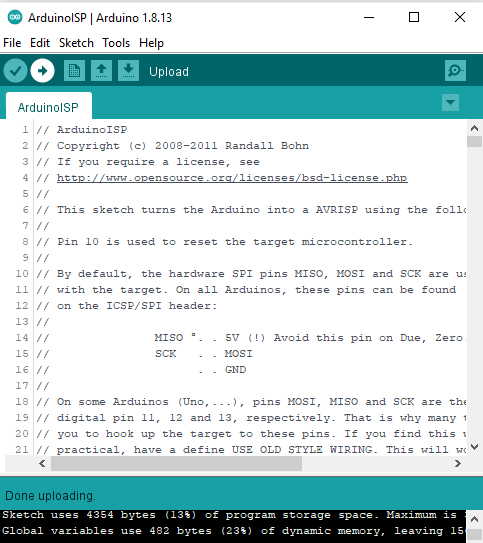
- Click on Upload button, this will upload the code to the Arduino Board used to burn bootloader to the new ATMEGA328P Chip.
- After uploading the code, you are good to go to burn the bootloader. Check every connection finally and check that anything doesn’t heat up.
Burning Arduino Bootloader

- Now Again under Tools Menu, select the burn bootloader option and wait for process to begin.
- This will burn the Bootloader to the new ATMEGA328P chip via ICSP Pins or SPI Protocol

- If you have turned on the verbose output during compilation and uploading in the Arduino IDE preferences, then you may be able to see the process line unlike above.
- And wait patiently for the process to complete.
- Make sure not to disconnect the power supply in the middle of the process due to impatience. This may damage the new ATMEGA328P chip.

- After the process is complete, you’ll see the Done Burning Bootloader like the above image.
- This confirms that the process of Burning the Arduino Bootloader to the new chip has been completed, and now you cann disconnect the chip.
- For safety, first disconnect the Arduino board from the System (connected via USB). After that you can release the new chip and use it to upload code to it either via ICSP or using a FTDI programmer like RS232.
JLC PCB Prototype & PCB Fabrication Service
I have assembled the whole circuit on a breadboard. As you know breadboard assembly is not effective for this type of projects. So, JLCPCB offers Rapid PCB Prototyping for Your Research Work. I personally, recommend JLCPCB because you can get your first-try boards right in 24 hours!
The prototyping stage is the most critical period of time for engineers, students, and hobbyists. JLCPCB not only makes your boards quick but also makes your job right as well as cost-effective. This greatly reduces your cost and shortens the time for developing your electronic products.
I am impressed with the quality of the boards, the delivery time, and the cost-effectiveness
Latest Arduino Articles
What is Arduino brief Description- Tutorial #1
How To Operate Arduino Software- Tutorial #2
Types Of Arduino Boards | Arduino Uno | Mega | Mini | Specification