Hey guys, Are you aware of the IR technology? as all we saw television, home theater, and car stereo which all controlled by the remote which work on the Infrared wireless data transfer technology. welcome back to Techatronic. We are back again with this awesome project Arduino IR remote control project. which is very simple and useful. So, we are sharing all the detail needed to make this project. You need to know only some basic electronics and Arduino to make this project. we have uploaded the full Arduino course here you can learn all about the Arduino and the sensors interfacing. you should check it once. We are here to teach you how things are work and how you can use all these. this is one of the best wireless communication not need any requirement to connect like Bluetooth or any other. we always try to share all the knowledge we have.

What is Arduino IR remote Control system?
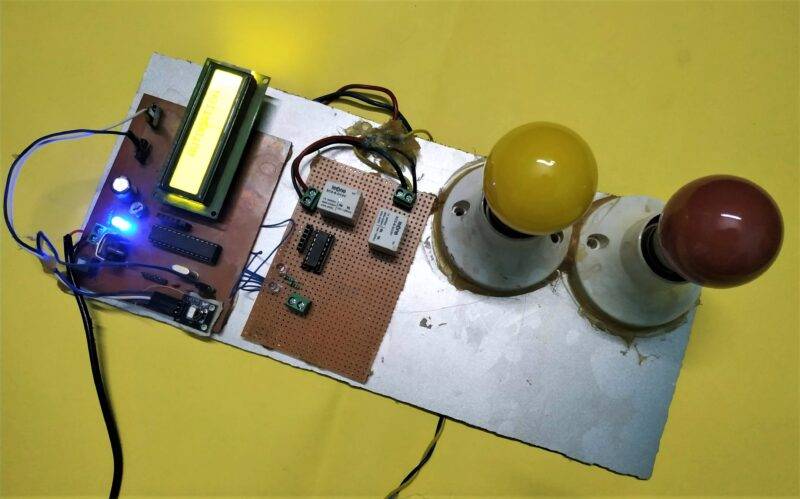
in this system, we must have an input remote which is known as the IR transmitter remote which does have many keys and there is also a receiver that receives the data from the remote. remotely send the different data value on the different button and receiver receive that value. when we press any key the associated led will be glow. and the rest of the LED will not glow. and in the next process, we will add the relay and the ac load with the system so the Arduino ir remote can operate the AC load too. the different buttons will associate with the different sources so that we can operate many appliances. that is cool to operate the thing via remote. as you all sew the center lock car key. the car key uses radiofrequency but this system uses IR frequency. we need to make the remote front facing towards the receiver.
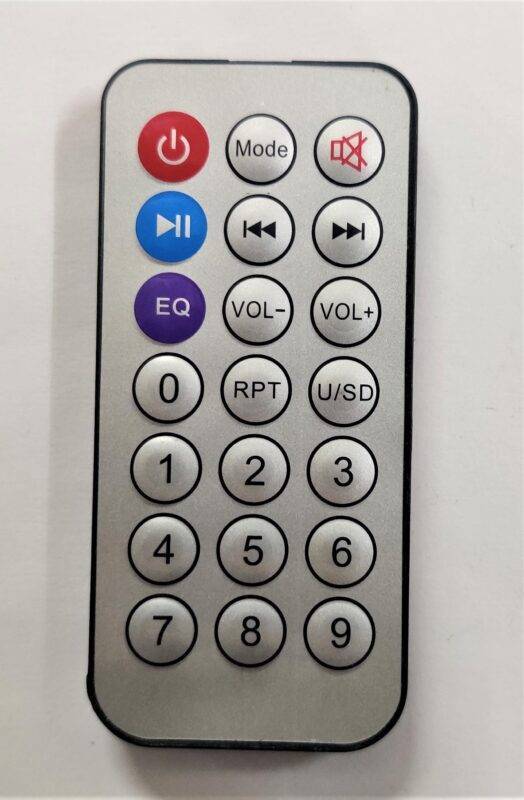
IR transmitter
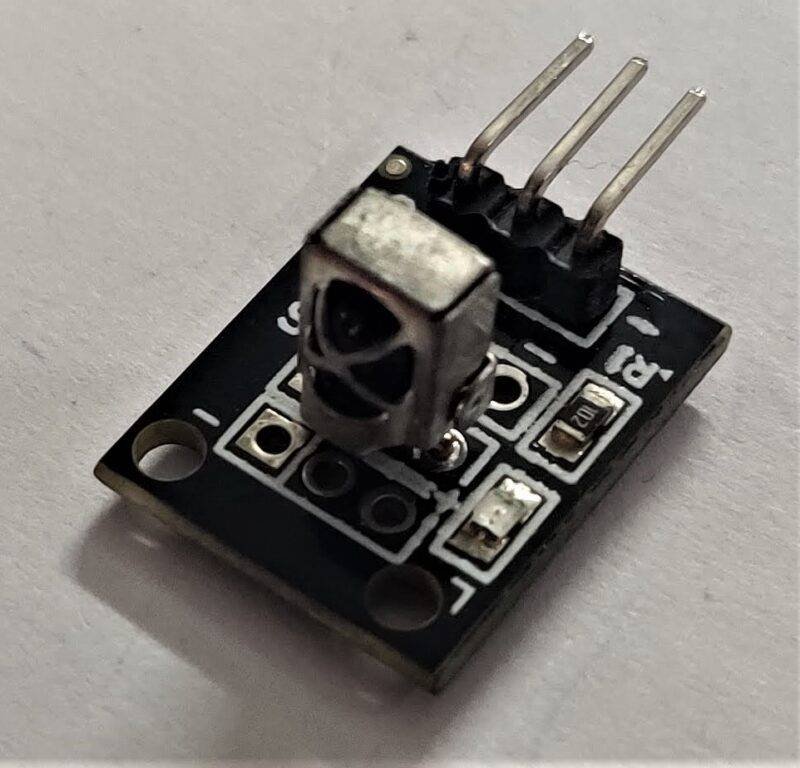
IR Receiver
How does IR remote control works?
IR technology dominant the market of television, home theatre, and many more. in Infrared wireless communication, the light carries some information which transmits by the IR transmitter and receives by the receiver. which decode that light to some information. there are some buttons given on the remote as we have given below. each button carries different information. in Arduino IR remote control project. each information is associated with a different output which is here the led. when we press the key the associated led will start to glow.
How we will Proceed toward the project?
first, we will make the basic IR project with some LEDs on the breadboard which will be controlled by the Tsop sensor interface with the Arduino, and after that, we will interface the all system with the relay’s and the AC sources so that we will learn the basic process to make the higher project with the smaller one. if you proceed in the major one direction it will make some errors. that is the way to make the major project we make it step by step. so, first we will make the sensor connection on the breadboard to check the connection and errors and after that, we upload the program into the Arduino and interface the Arduino with ir sensor.
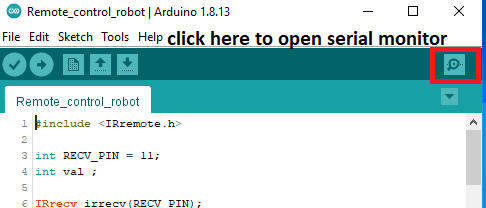

then how we can check the output at the Arduino. we have to download the Arduino and open the serial monitor of the software and then check the output. Now, according to the output we will use the value. on the ir remote we can see there are many of the buttons. when we pressed the button over the remote every time we get a different value according to the value we will assign the output. for example, if we press button A the serial monitor shows “RRR” value then we assign this value in the database if the value is equal to the “RRR” then the red led will be on. same as this we will assign all led and buttons.
Components Required:-
| Arduino Uno | BUY LINK |
| TSOP Sensor module | BUY LINK |
| Jumper wire | BUY LINK |
| Breadboard | BUY LINK |
| LED | BUY LINK |
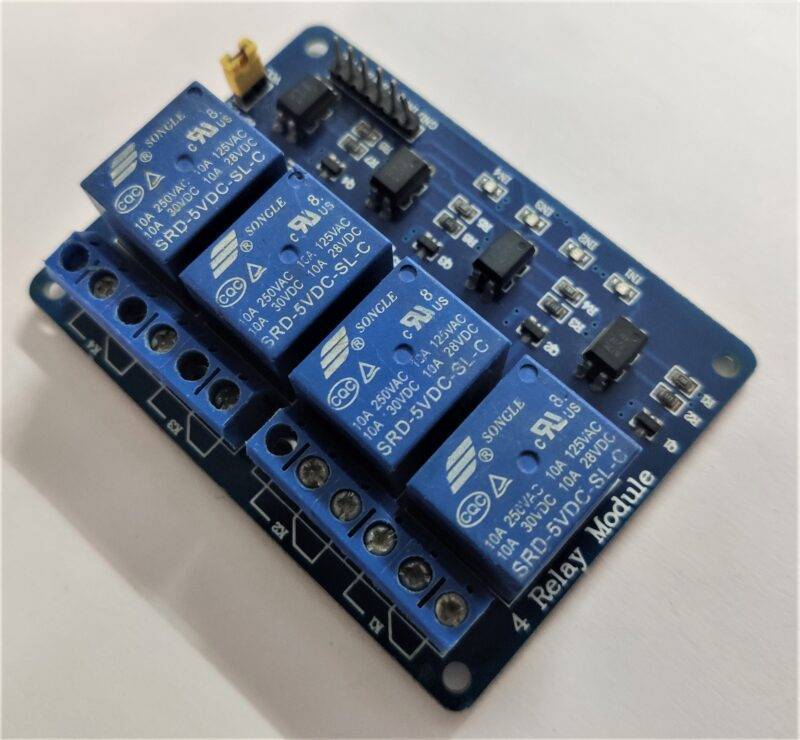
| Relay module 4 channel | BUY LINK |
Can you buy all components together-BUY LINK
IR Sensor Arduino Circuit Diagram:-

IR Sensor Arduino Code
// TECHATRONIC.COM
// IR LIBRARY LINK
// https://github.com/Arduino-IRremote/Arduino-IRremote

#include <IRremote.h>
// Inializing the variable for storing the last status of Relay_pins
int val1=0;
int val2=0;
int val3=0;
int val4=0;

int RECV_PIN = 8;
int Data ;

IRrecv irrecv(RECV_PIN);

decode_results results;

void setup()
{
  Serial.begin(9600);
  // In case the interrupt driver crashes on setup, give a clue
  // to the user what's going on.
  Serial.println("Enabling IRin");
  irrecv.enableIRIn(); // Start the receiver
  Serial.println("Enabled IRin");

  pinMode(3,OUTPUT);    // LED 1
  pinMode(4,OUTPUT);    // LED 2
  pinMode(5,OUTPUT);    // LED 3
  pinMode(6,OUTPUT);    // LED 4

  pinMode(9,OUTPUT);    // Relay1
  pinMode(10,OUTPUT);   // Relay2
  pinMode(11,OUTPUT);   // Relay3
  pinMode(12,OUTPUT);   // Relay4


  digitalWrite(9,HIGH);  // Relay1
  digitalWrite(10,HIGH); // Relay1
  digitalWrite(11,HIGH); // Relay1
  digitalWrite(12,HIGH); // Relay1
}

void loop() {
  if (irrecv.decode(&results))

  {
    Data = results.value, HEX ;
    Serial.println(Data);
    irrecv.resume(); // Receive the next value

    if(Data==18615)
    {
      val1=digitalRead(3);
      val1=digitalRead(9);
      if(val1==0)
      {
        digitalWrite(3,HIGH); // Led1 ON
        digitalWrite(9,HIGH); // Relay1 OFF
        val1=1;
        delay(500);
      }
      else
      {
        digitalWrite(3,LOW);  // Led1 OFF
        digitalWrite(9,LOW);  // Relay1 ON
        val1=0;
        delay(100);
      }
    }


    if(Data==22695)
    {
      val2=digitalRead(4);
      val2=digitalRead(10);
      if(val2==0)
      {
        digitalWrite(4,HIGH);  // Led2 ON
        digitalWrite(10,HIGH); // Relay2 OFF
        val2=1;
        delay(500);
      }
      else
      {
        digitalWrite(4,LOW);   // Led2 OFF
        digitalWrite(10,LOW);  // Relay2 ON
        val2=0;
        delay(100);
      }
    }


    if(Data==30855)
    {
      val3=digitalRead(5);
      val3=digitalRead(11);
      if(val3==0)
      {
        digitalWrite(5,HIGH);   // Led3 ON
        digitalWrite(11,HIGH);  // Relay3 OFF
        val3=1;
        delay(500);
      }
      else
      {
        digitalWrite(5,LOW);    // Led3 OFF
        digitalWrite(11,LOW);   // Relay3 ON
        val3=0;
        delay(100);
      }
    }


    if(Data==-32641)
    {
      val4=digitalRead(6);
      val4=digitalRead(12);
      if(val4==0)
      {
        digitalWrite(6,HIGH);   // Led4 ON
        digitalWrite(12,HIGH);  // Relay4 OFF
        val4=1;
        delay(500);
      }
      else
      {
        digitalWrite(6,LOW);    // Led4 OFF
        digitalWrite(12,LOW);   // Relay4 ON
        val4=0;
        delay(100);
      }
    }
  }
  delay(100);
}
Upload the given code into the Arduino with the help of the Arduino ide application.