

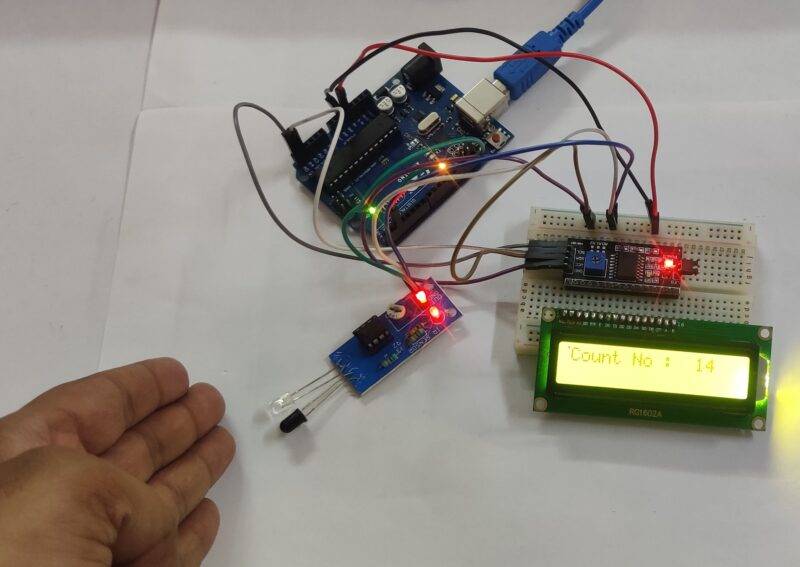
Hey techies, welcome back to Techatronic. Are you looking for an IR object counter project? if so then this article is for you in which we are going to make an Object counter using an IR sensor and Arduino. For making this we are using an Arduino UNO development board and an IR sensor module.
We are also using a 16×2 LCD to display the total counts. You can check out more projects on Arduino and Raspberry Pi made by us. The IR sensor emits and receives infrared rays in order to detect the object near it. Usually, in the infrared spectrum, all objects radiate some form of thermal radiation which is not detected by human eyes but an IR sensor can detect it.
Also, check the Automatic Railway Gate Control project made by us using an IR sensor. You have to make the connections first and then upload the given Arduino code.
How Does counter using ir sensor Work?
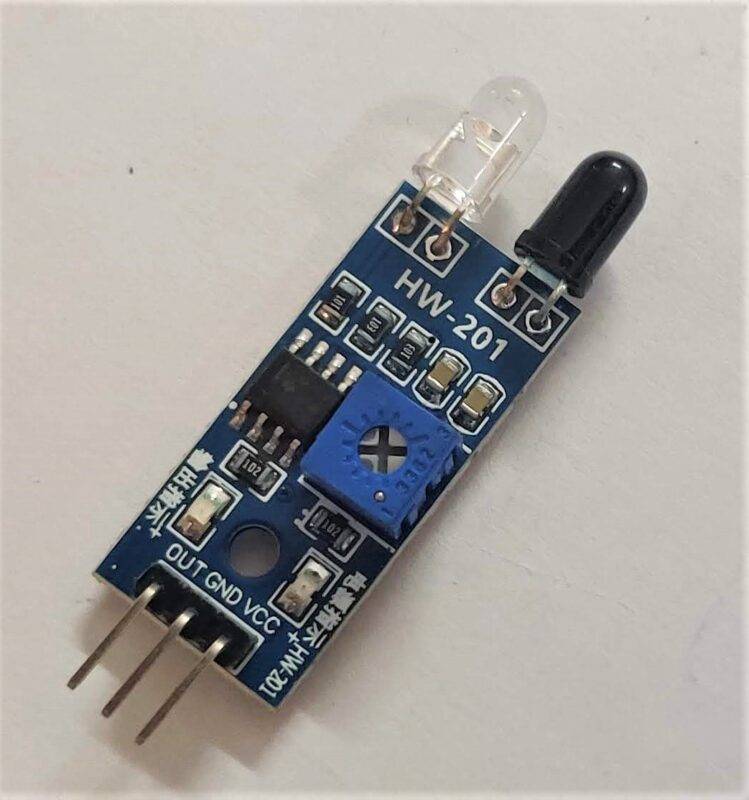
This project counts the number of obstacles that pass in front of the IR sensor in one direction only. The value of the total counts or the count number is displayed on a 16×2 LCD display module. The module has an emitter which is an IR LED and a detector which is an IR photodiode. The IR sensor that we are using in this project is an active IR sensor. Whenever it detects an object inside its range the output generated by it is high otherwise the output is low. You can also adjust the range of the sensor by rotating the inbuilt trim pot. The count is zero initially and then incremented by one whenever something passes in front of it. You can also make iot base obstacle detector

Components Required
- Arduino UNO
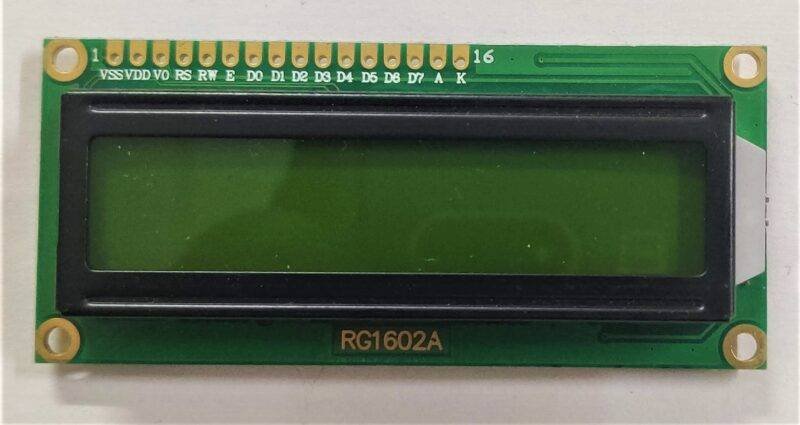
- 16×2 LCD display
- IR sensor
- Jumper wires
- Breadboard
- A Potentiometer
- USB cable for uploading the code

counter using ir sensor Circuit Diagram
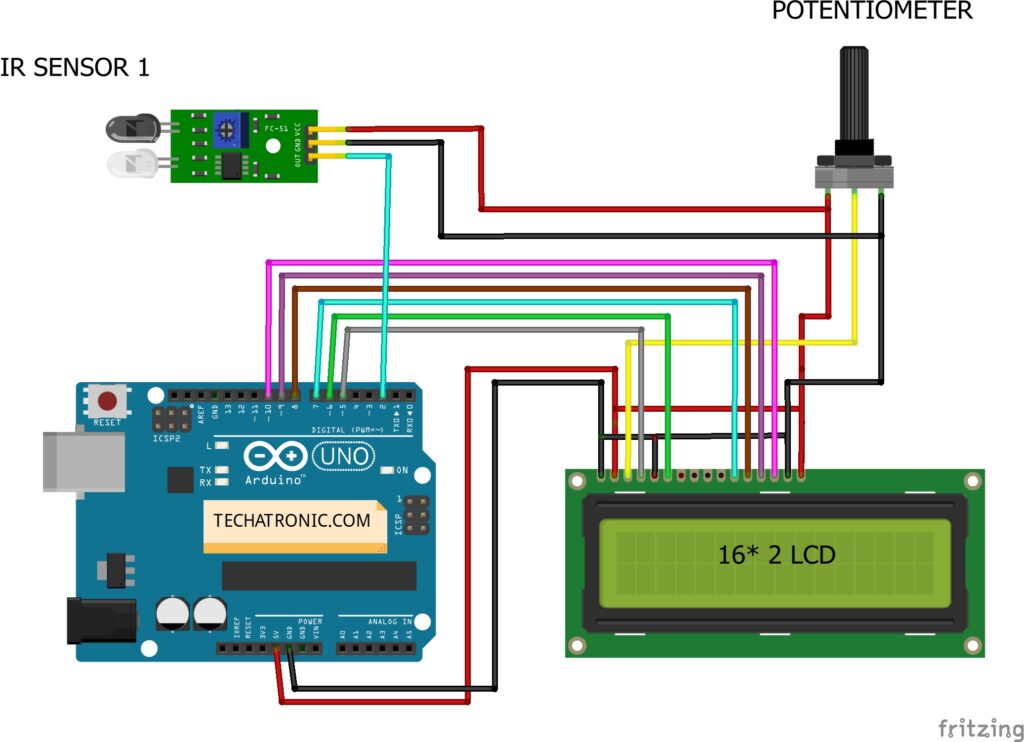
Please make the circuit according to the given diagram.
Connect the 5-volts pin of the Arduino with the VCC pin of the IR sensor and also with the LCD display module.
Attach the GND pin of the Arduino to the GND pin of the IR sensor and also with the LCD display module.

You can use a breadboard for making the common connections.
Connect the pins of the LCD module with the digital-5 to digital-10 pins of the Arduino as shown above.
Then connect a potentiometer with the LCD module. You can take the help from our previous article on the interfacing of a 16×2 LCD with Arduino. Join the OUT pin of the IR sensor with the digital-2 pin of the Arduino.
Code for the Project
Note: Please upload the given code to the Arduino. You have to install <LiquidCrystal.h> library first. Check here how to install a zip library in the Arduino IDE application.
 // TECHATRONIC.COM
 #include "LiquidCrystal.h"
 LiquidCrystal lcd(5,6,7,8,9,10);
 int irPin=2;
 int count=0;
 boolean state = true;
 void setup()
 {
  Serial.begin(9600);
  lcd.begin(16,2);
  pinMode(irPin, INPUT);
  lcd.setCursor(0,0);
  lcd.print("Count No : ");
 }
 void loop()
 {
  if (!digitalRead(irPin) && state){
    count++;
    state = false;
    Serial.print("Count: ");
    Serial.println(count);
    lcd.setCursor(12,0);
    lcd.print(count);
    delay(100);
  }
  if (digitalRead(irPin))
  {
    state = true;
    delay(100);
  }
 }
Obstacle Detector By IR Sensor with Arduino
Smart Dustbin With Arduino and IR Sensor
IR Sensor Working With Nodemcu | Nodemcu Tutorial
IoT Projects for final year – IR sensor Notification IoT
We hope that you learn the procedure for making this project and please try to make it now on your own. If you are facing any problems do inform us in the comments section below. You can also check more tutorials on Arduino.IR Sensor Working With Nodemcu | Nodemcu Tutorial
HAPPY LEARNING!