
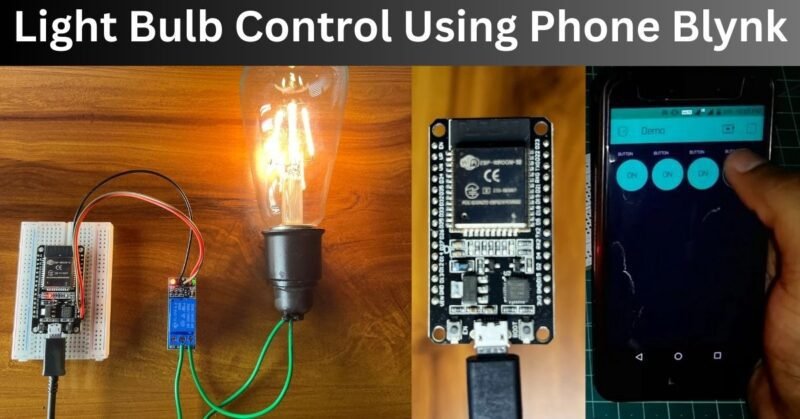
Hey Guys, Welcome back again. This is Mohd Shahid from Techatronic and I brought this useful article Light bulb control using IoT for you this time. ESP32 is a microcontroller development board with inbuilt wifi and Bluetooth. Which are very popular in term of engineering, learning or making a project or product. we are using this powerful board in IoT device.
As we all know ESP32 is a powerful chip that has many features. As I mentioned above this has built-in wifi and Bluetooth so, we don’t need this external device to make any IoT project.
Before ESP32 we have made many IoT Projects on Arduino and Bluetooth and Arduino plus wifi module for example
Bluetooth control home automation
But now, we are upgrading to esp32 which is more powerful and more reliable controller. But there is some completion to use this controller. like libraries and board installation. also how to setup esp32 with Arduino IDE.

So, this time we are making this Led control using blynk and esp. Now, you know some basic about the esp32 but blynk is new!.
Blynk is Software which have its own server. Blynk is available on mobile application as well as on web application. so, you can control your Light Bulb Control using IoT from both side.
Now, we are starting the tutorial.
First we need to know the components Required to make this project.
Components Required
Now we have all the components. and we need to make the connections first.
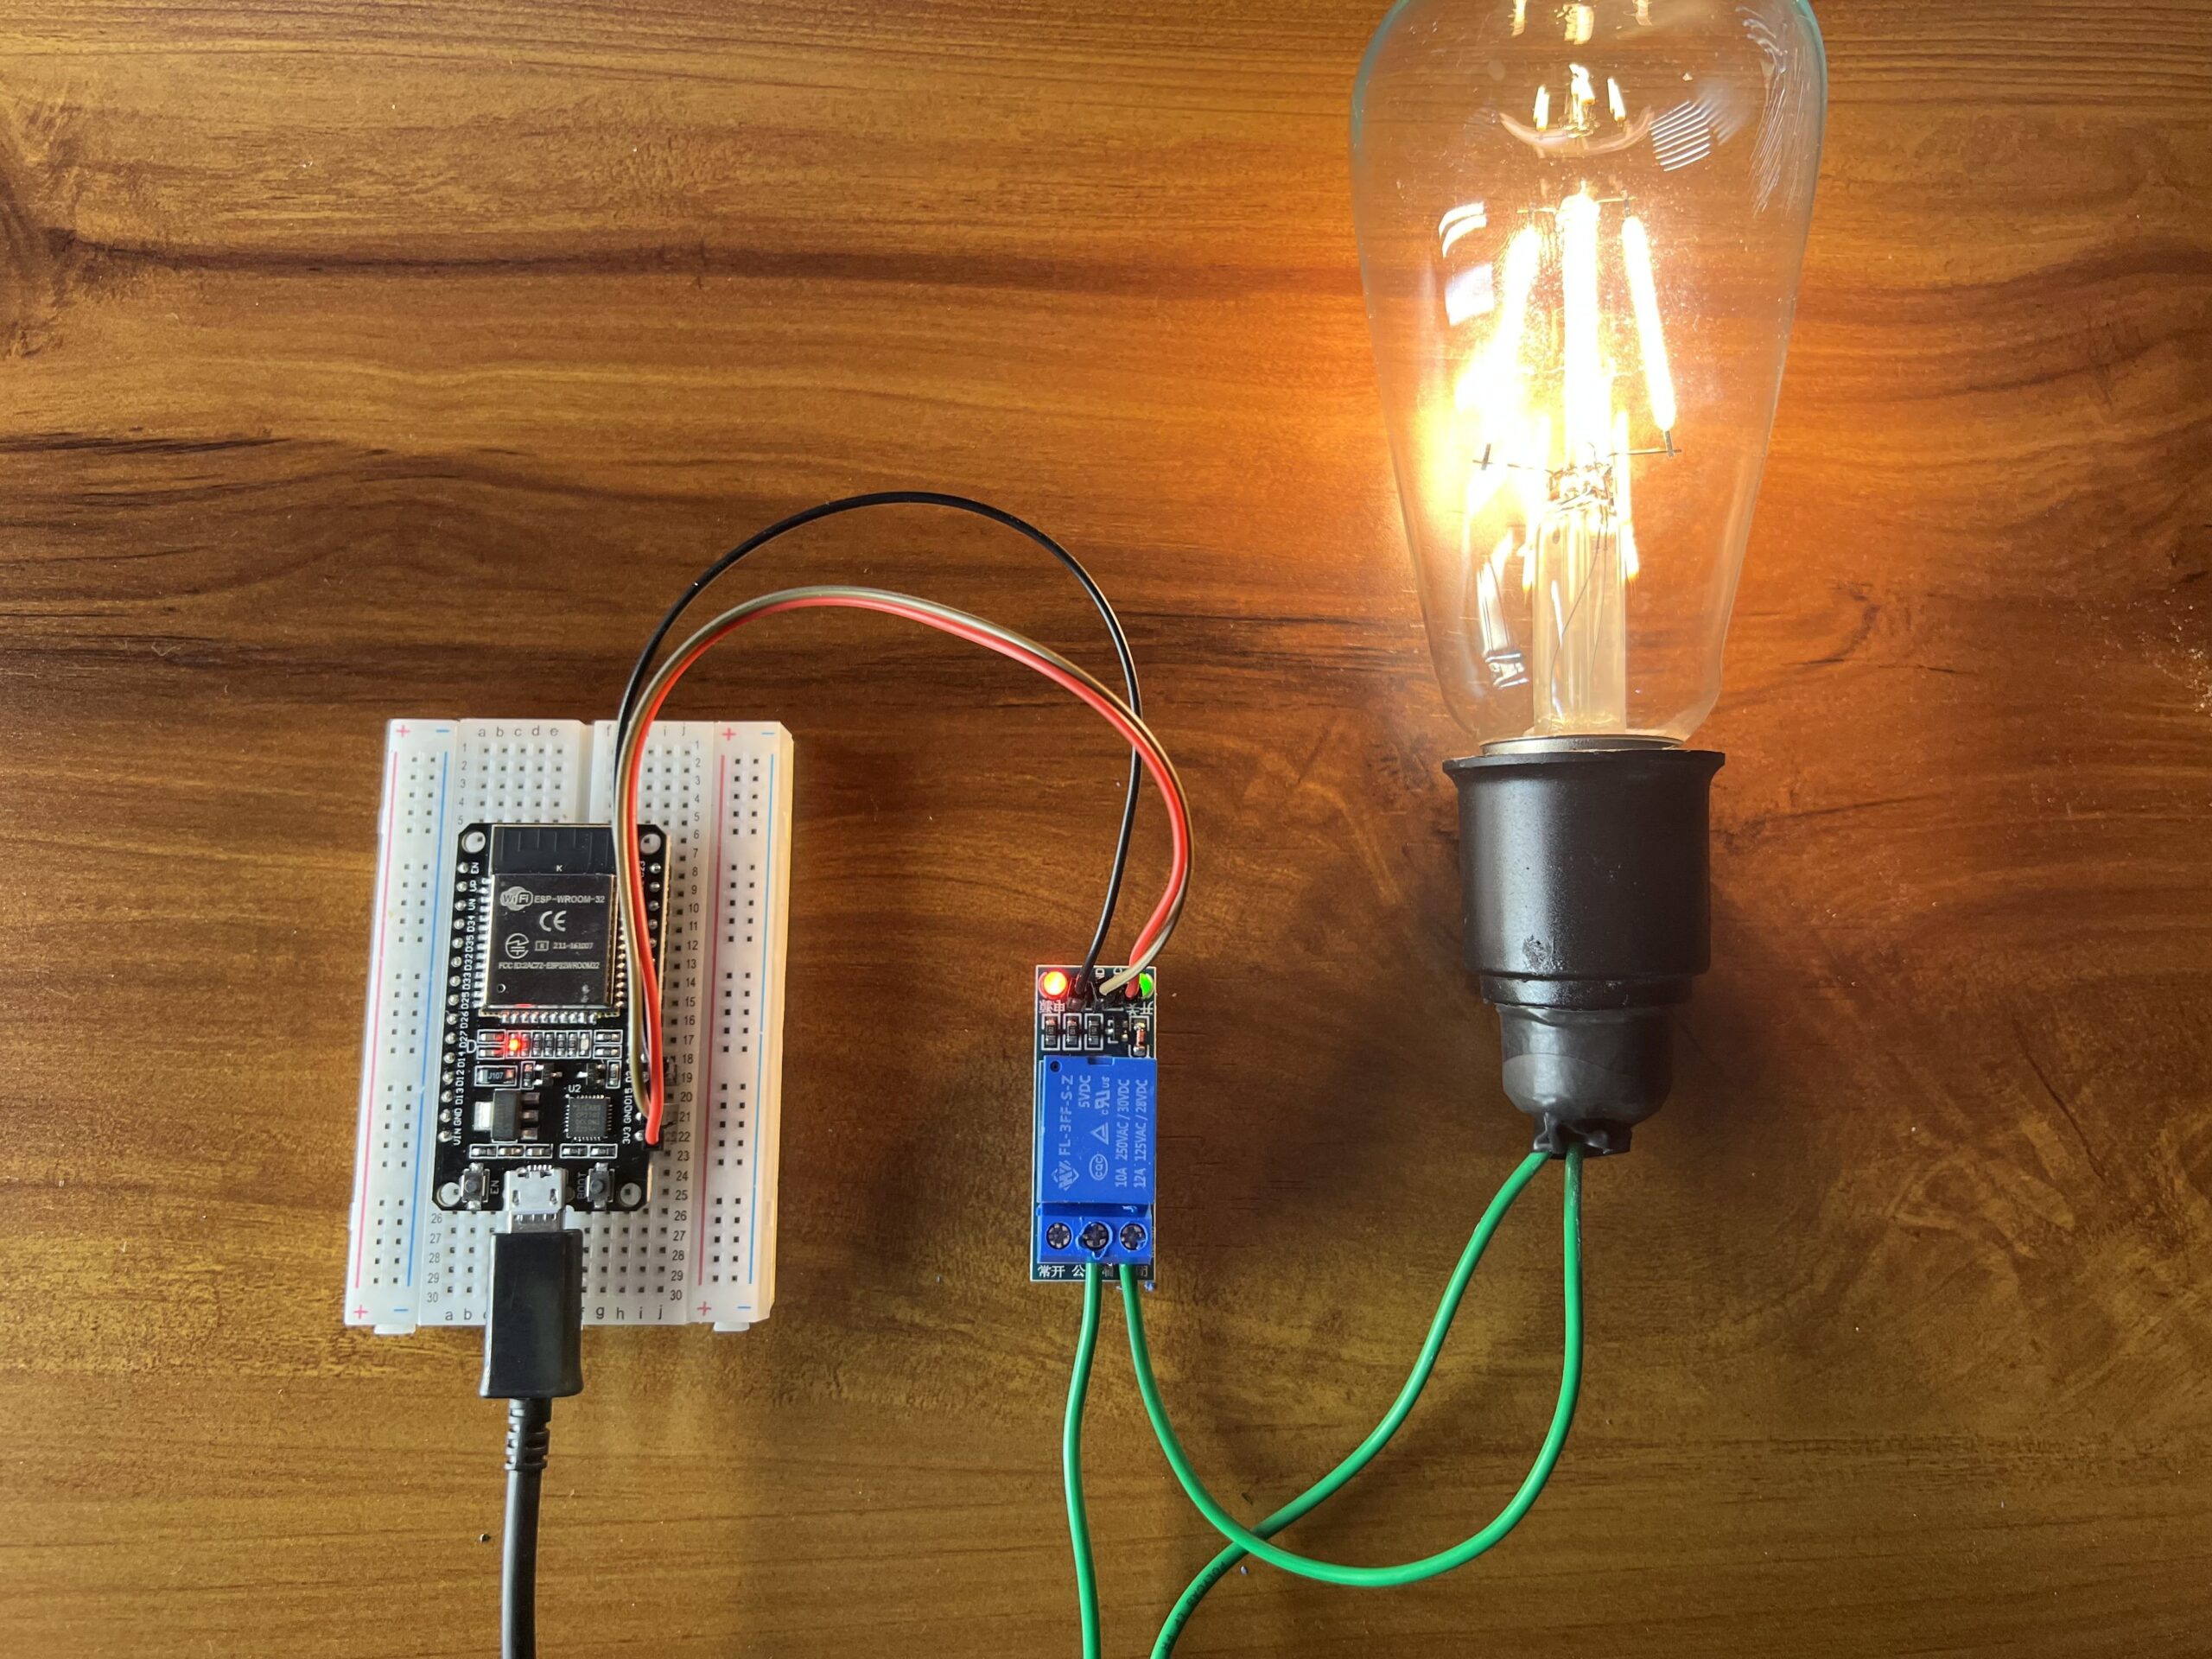
Light Bulb Control using IoT Circuit Diagram

- Connect pin2 with relay input pin
- Connect the esp32 ground pin to the relay ground
- connect esp32 3v3 pin to relay v+ pin
- connect bulb one terminal to the power supply
- connect bulb 2nd terminal to the relay com pin
- connect relay NO pin to the power supply free pin
Make sure the power is not connected while making the connection.
Now, set up the Arduino IDE with esp32. here is the article which can help you to setup the esp32 with Arduino ide.
How to set up esp32 in Arduino IDE | Arduino esp32 setup
There is all the required steps and information given which can be required to setup the arduino ide with esp 32.
The next step is to install the Blynk library in the arduino IDE.
here is the link, Blynk Library
Install the library into the Arduino by following steps.
- download the library from the given link
- open the Arduino Ide and click on the sketch and add library.
- select the zip file

After installing the Library. Open Blynk website and Login there with your credentials.
After Login in your Account click on the Add template.
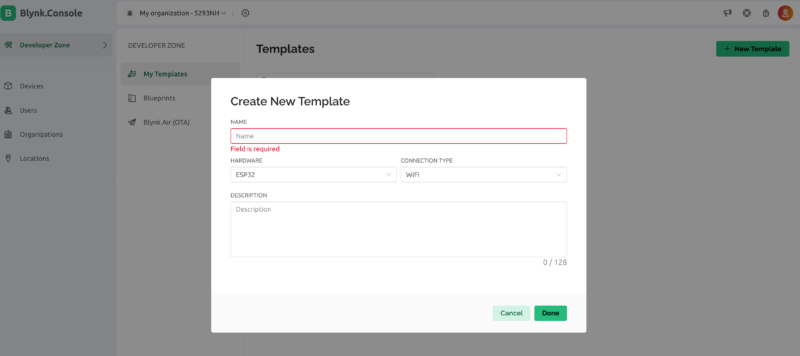
give name to your project and select esp32 in hardware block and save it. now. click on the add device and select from template select your recent template add your device there.
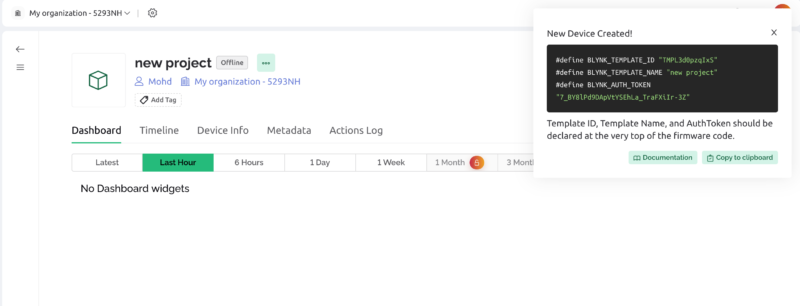
Copy the given authorizatihe on code and device id to put in the code the code is given below.
Light Bulb Control using IoT esp code
#define BLYNK_PRINT Serial

/* Fill in information from Blynk Device Info here */
#define BLYNK_TEMPLATE_ID           "TMPxxxxxx"
#define BLYNK_TEMPLATE_NAME         "Device"
#define BLYNK_AUTH_TOKEN            "YourAuthToken"


#include <WiFi.h>
#include <WiFiClient.h>
#include <BlynkSimpleEsp32.h>

// Your WiFi credentials.
// Set password to "" for open networks.
char ssid[] = "YourNetworkName";
char pass[] = "YourPassword";

void setup()
{
  // Debug console
  Serial.begin(9600);

  Blynk.begin(BLYNK_AUTH_TOKEN, ssid, pass);
}

void loop()
{
  Blynk.run();
}
SO, there you need to copy and paste the device name , device id and authorization code. also you need to write there the SSID and password fo your available working wifi.
#define BLYNK_TEMPLATE_ID “TMPxxxxxx”
#define BLYNK_TEMPLATE_NAME “Device”
#define BLYNK_AUTH_TOKEN “YourAuthToken”
There you need to write the given template id, template name and authorisation token given by the blynk configuration website.without this you device will not be configured. after this,
char ssid[] = “YourNetworkName”;
char pass[] = “YourPassword”;
You need to write there your wifi network name and password. you have to make sure the wifi name and password should be simple. many time complex password does not work properly by the device.
then upload the code as given in this article.
Getting Started with ESP32 | ESP32 LED Blink Tutorial #1
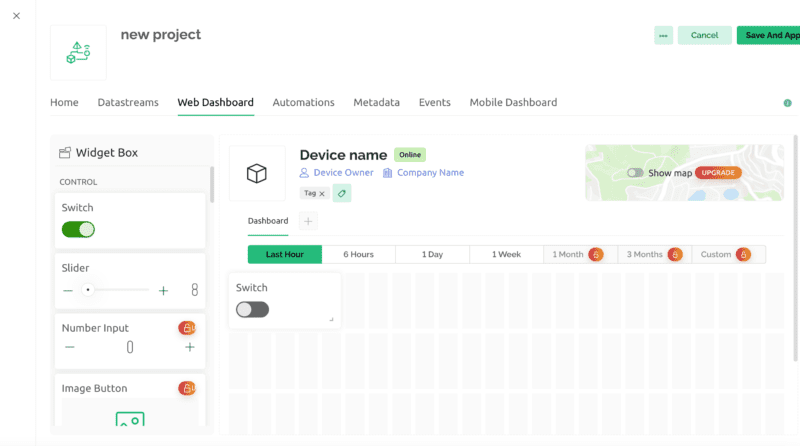
Now, come again on the webpage and configure the datastream and web dashboard. as given in the screenshot.
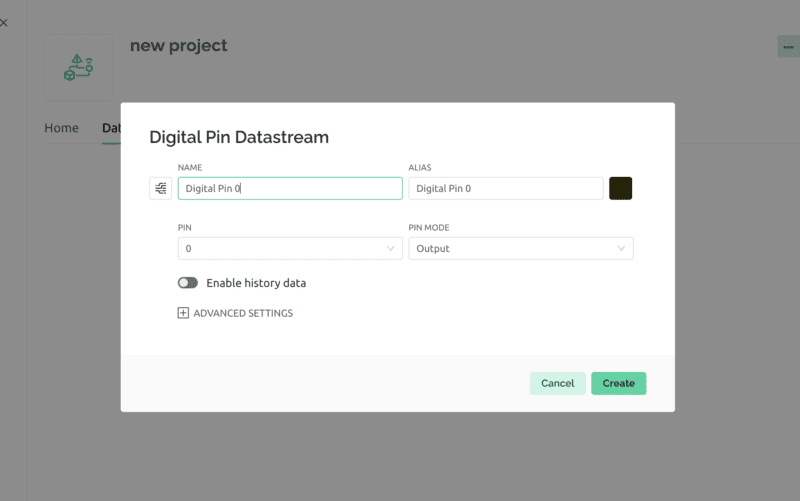
Select digital Pin 2 for your project.
now go to the dashboard and select the button and configure that button with pin 2
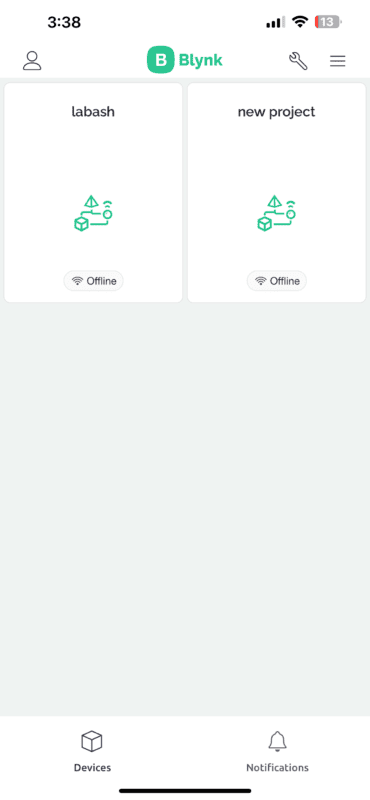
Now to operate this system with your mobile phone. download the blynk application to your mobile phone and login with the same credentials.

After completing the given configuration you can control your system with your mobile phone. still if any error occurs you can ask us in the comment section.
Blynk IOT is the easiest way to unlock your project with IoT. You need to sign up and start the work.