
Hey guys, welcome back to the Techatronic. Today we are going to start a new series of controllers which is the ESP32 module family. so, in this article, we are going to elaborate on how to Arduino esp32 setup. ESP family devices can be easily programmed with the Arduino IDE. there are many compatible libraries available on the internet so you can program your ESP32, ESP32S, and ESP8266 with the Arduino IDE. if you wanna check the ESP8266 set up with Arduino IDE you can check our previous article.

ESP32 is the most powerful device from the ESP family. there is also two variant of esp32. one is simple ESP32 and other is ESP32S. ESP32S is more advanced than ESP32. but the setup in Arduino ide esp32 is the same for both. we are going to share all the steps here you can do it yourself by following all the steps. esp32 setup in Arduino IDE is very simple.
Introduction
ESP32 is a series of low-power modules or microcontrollers with inbuilt wifi and Bluetooth. which is more advanced than esp8266 in terms of speed and memory. it does have 312kb RAM and 400 kb ROM which support I2C, I2S, SPI, and UART protocol. if you are going to program this microcontroller directly you need to know the AT command but if you want to make it easy and with the Arduino IDE then you can setup esp32 with Arduino IDE.
First, you need to download the Arduino IDE to your computer with the given link. download Arduino ide
and install the software into your PC. if you face any difficulty to download and install the software you can refer to our operate Arduino software article. here we are giving all the steps here.
Setup Arduino ESP32 setup
Step 1
Download Arduino IDE and install the software.
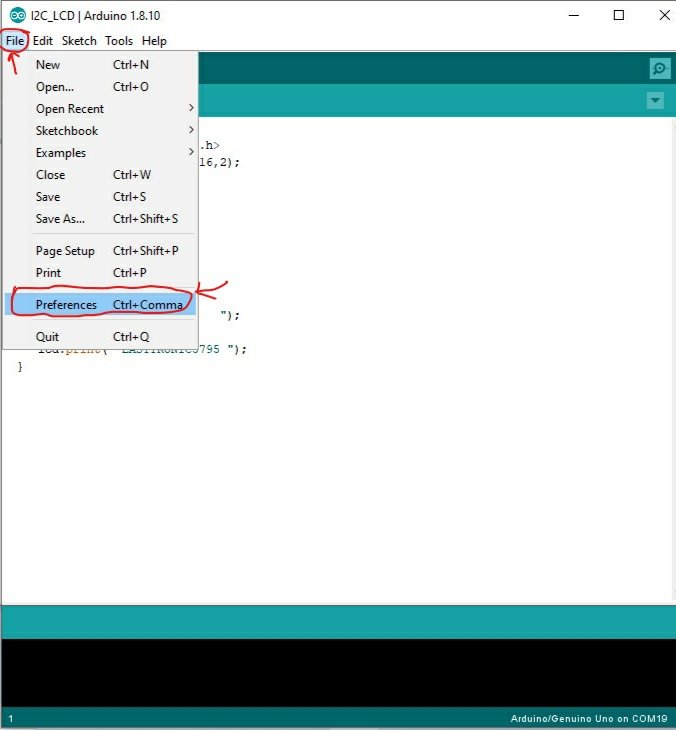
Open Arduino IDE software click on the file and select the preference
step 2
paste the given link into the box
https://raw.githubusercontent.com/espressif/arduino-esp32/gh-pages/package_esp32_index.json
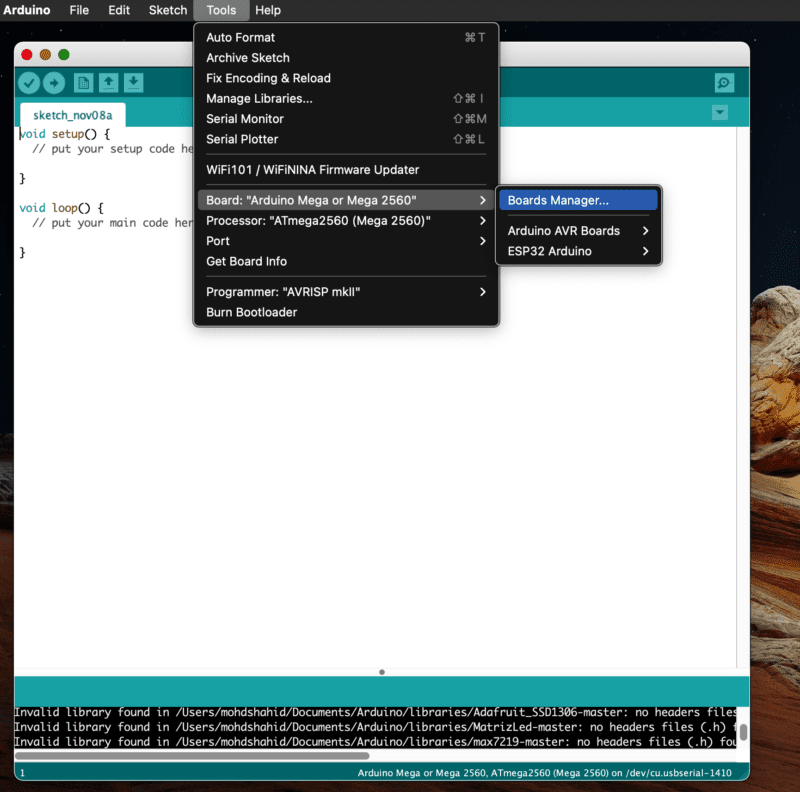
Step 4
Click on the tool and select the board manager
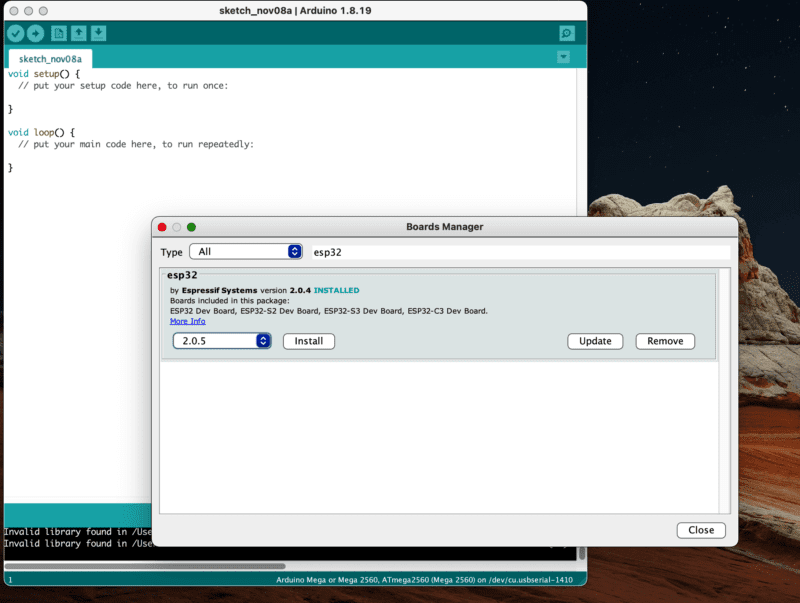
Step 5
Write esp32 in the search box and install the board given there as given image.
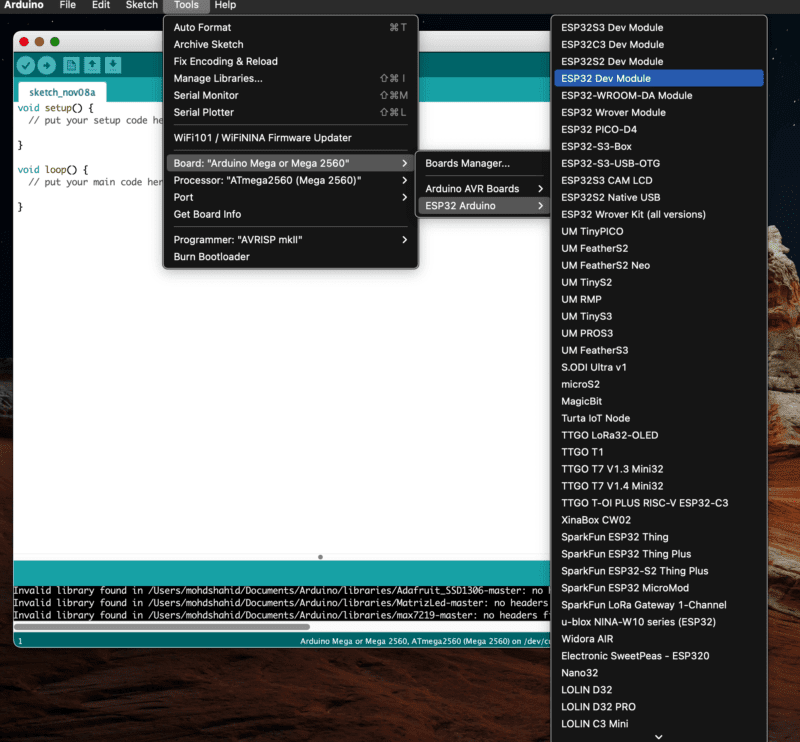
Step 6
Connect your ESP32 to your computer. and select the esp32 dev module from the board as given.
Step 7
Again go to the tools and select the board Port after connecting your esp device to your computer.

Here we have shared all the steps and you can make the setup of esp32 with Arduino easily still if you have any difficulty you can ask in the comment section.