Introduction
Today we are here demonstrating to you how to set up RASPBERRY PI for the first time. Getting started with Raspberry Pi with step by step guide. Install various OS on it also configuration with 7-inch HDMI touch display. Here I am using Raspberry pi 3B+ lying around at my place. You can use any of them but not Pi4 because for pi 4 there will be a different blog. So, let us begin our journey for beginners of getting started with raspberry pi. Raspberry pi the smallest computer you can use by making. as much as you will learn projects like face recognise using raspberry pi.
What is Raspberry pi?
Raspberry pi is one of the most famous single board computers available in the market also seems to be quite cheap and handy rather than others like latte panda, orange pi board, or several other single board computers. It can be used as a small-scale, low-power machine for programming. Also, we can use it in various smart projects which we’ll discuss with you in future posts.
Specifications of RPI Board:
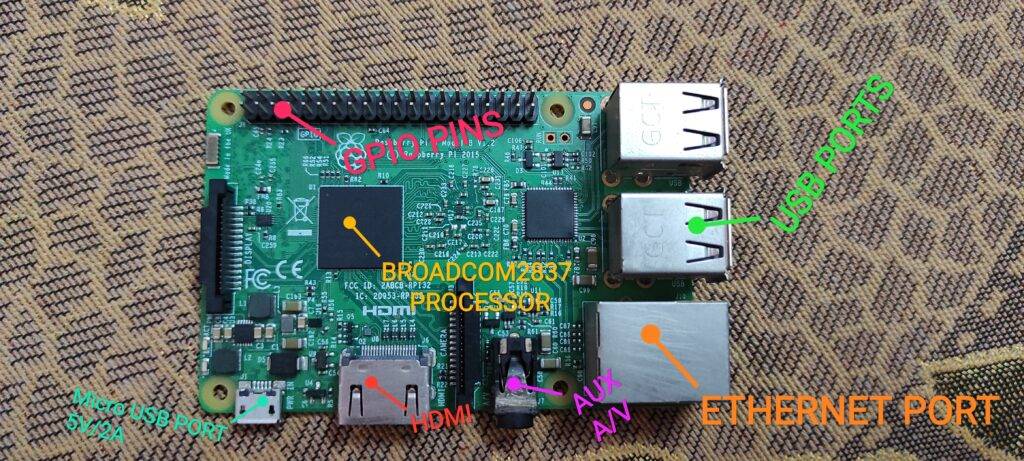
As in the below image you can see a Raspberry pi 3B+ with its various parts labeled. As for knowledge of beginners, I may alert you that there are two versions of Pi available MODEL A is always without Bluetooth and Wi-Fi and Model B+ is always with Wi-Fi and Bluetooth chip.
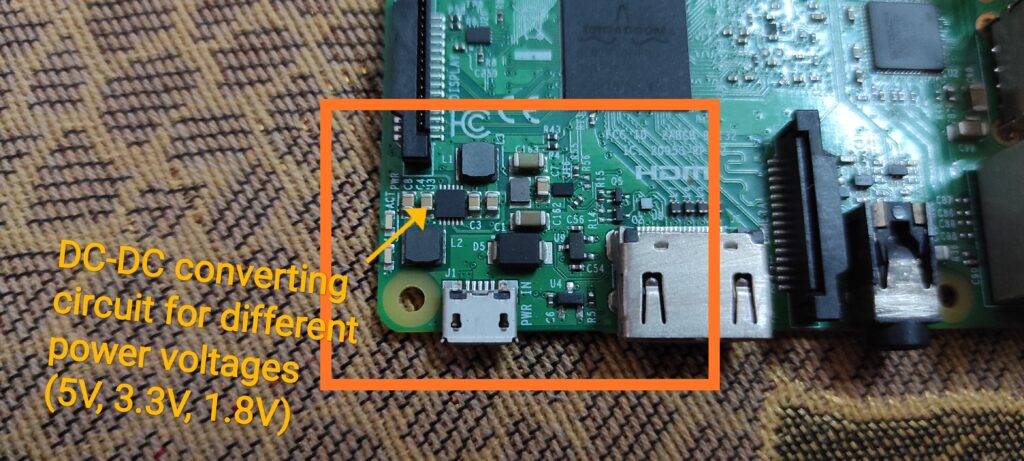
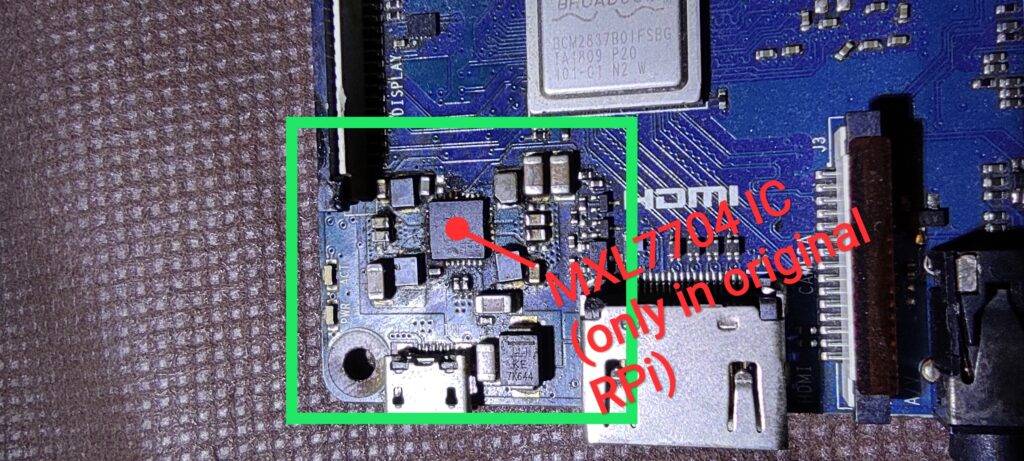
NOTE: There is a major identification for the original raspberry pi is that in original pi you will see MXL7704 power IC which is responsible for driving out power to all parts but in duplicate, once you will see various dc-dc converter circuits made out differently to provide power to all parts here also I have attached picture of both. I have experienced it so be careful.
Components required:-
- Any model of raspberry pi (Pi 3B+ in my case)
- A 16GB or more SD card
- Heatsink with fan (for heat dissipation)(currently I didn’t have)
- Internet connection
- USB mouse and keyboard
- HDMI output type monitor or screen
Components Table/buy link
| S.No | Component Required | Quantity | Buy Link |
| 1. | Raspberry pi 3B+ | 1 | https://amzn.to/302g5xZ |
| 2. | Raspberry pi Combo | 1 | https://amzn.to/3uXW5rP |
| 3 | Raspberry pi Metal Case | 1 | https://amzn.to/3lamnDH |
| 4. | RPI Official Case | 1 | https://amzn.to/3uMZcSZ |
| 5. | Raspberry pi Cable | 1 | https://amzn.to/3DegaNh |
| 6. | RPI Power Adapter | 1 | https://amzn.to/3oBONsz |
| 7. | 16 GB SD Card | 1 | https://amzn.to/3Fp1SuY |
| 8. | Heatsink with fan | 1 | https://amzn.to/3ldN4r2 |
| 8. | USB Mouse & Keyboard | 1 | https://amzn.to/3BsADxa |
| 9. | HDMI Cable | 1 | https://amzn.to/3Bi6pNp |
| 10. | HDMI to VGA Adapter | 1 | https://amzn.to/2Youxzf |
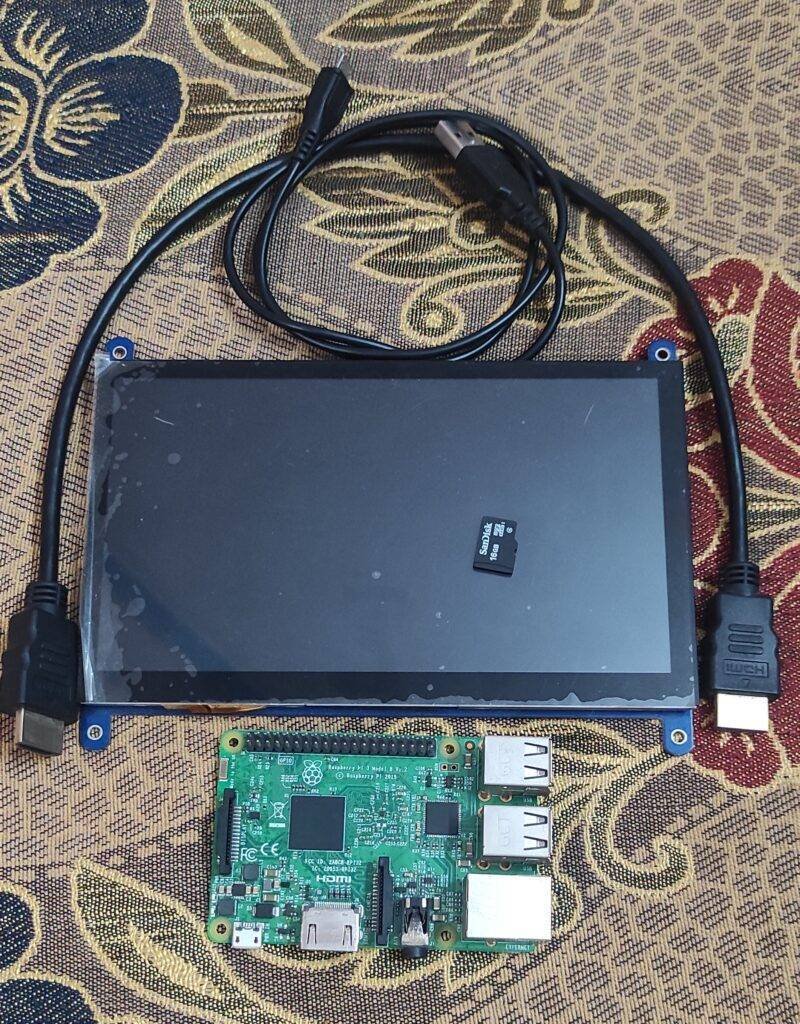
After you have these all things you are ready to go, but if you did not have a screen or any output then we’ll also tell you the SSH method to set up your Pi.
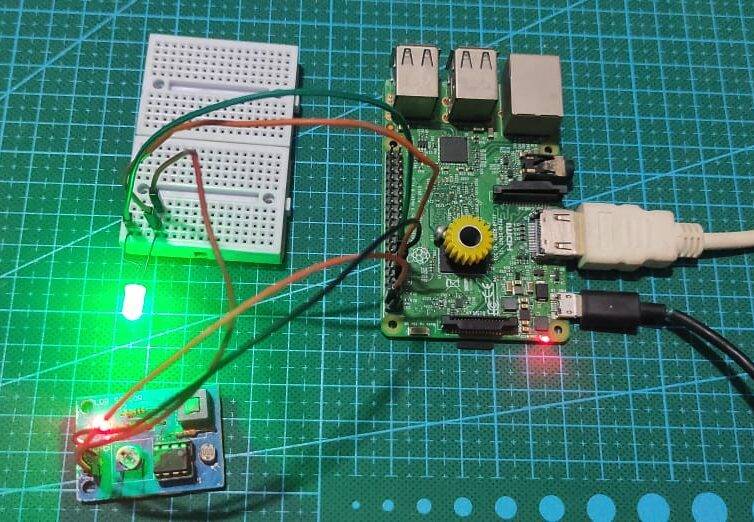
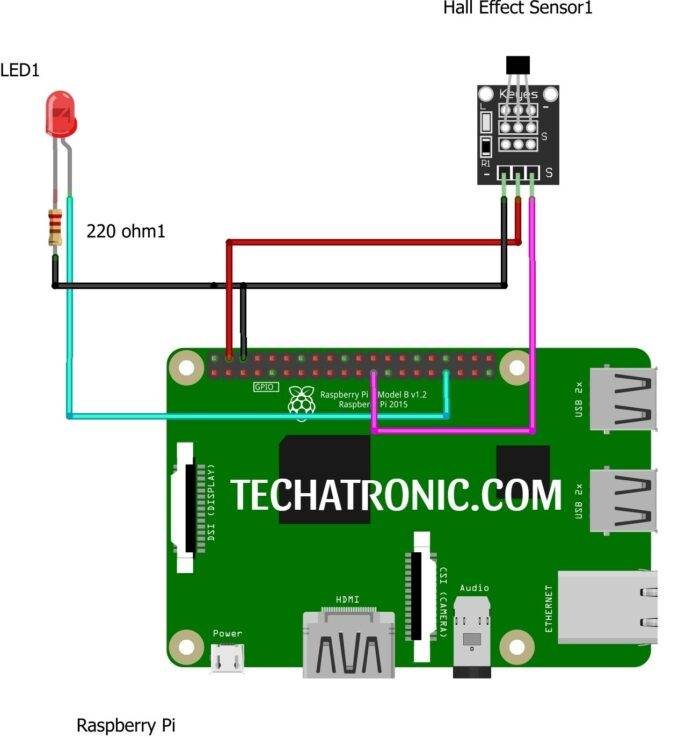
Make all the required connections as shown below.

Installing the OS on Raspberry Pi:
For the operating systems, the most common is Raspbian OS which you can get from their official website or click here for a direct link to the page.
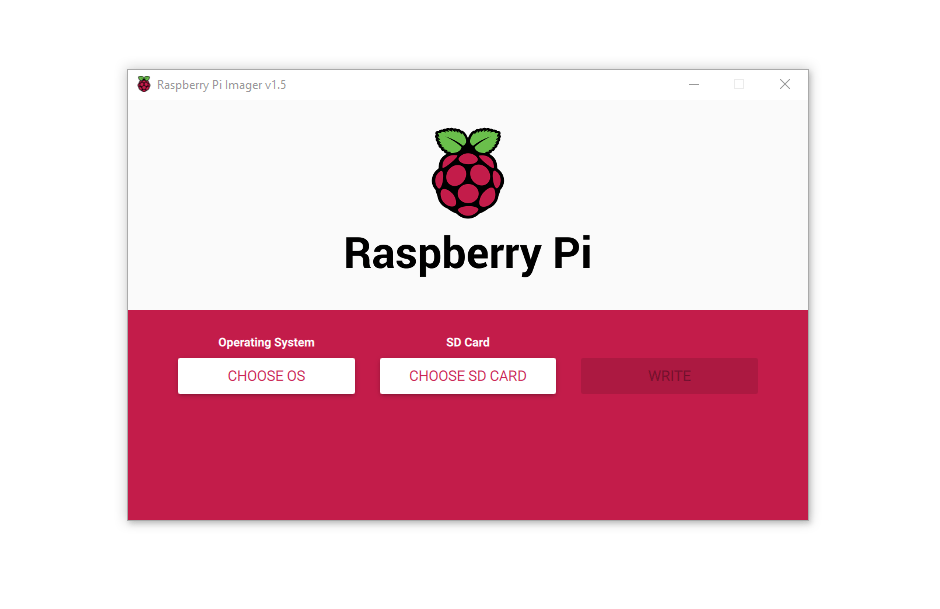
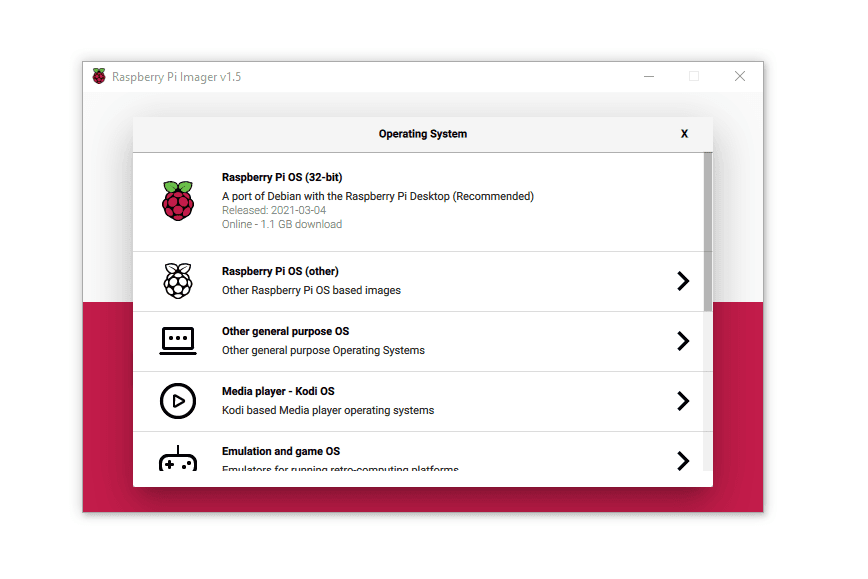
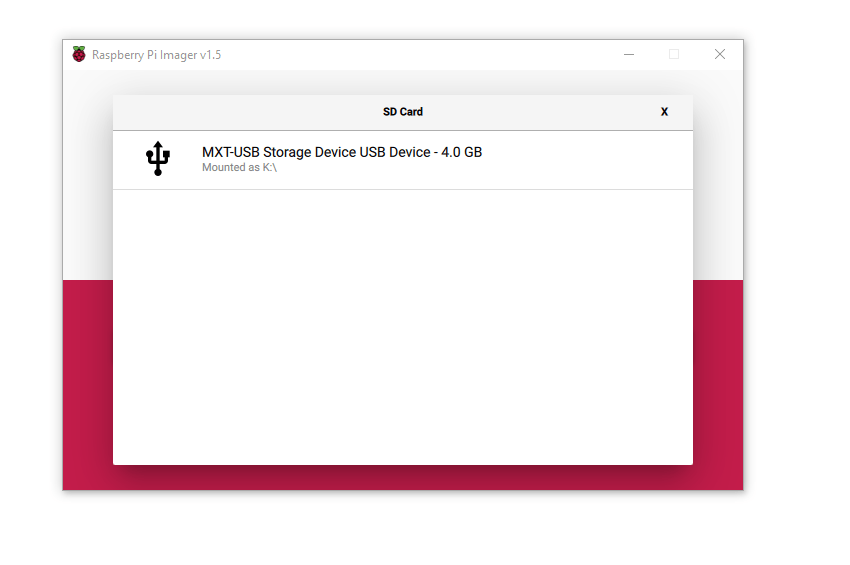
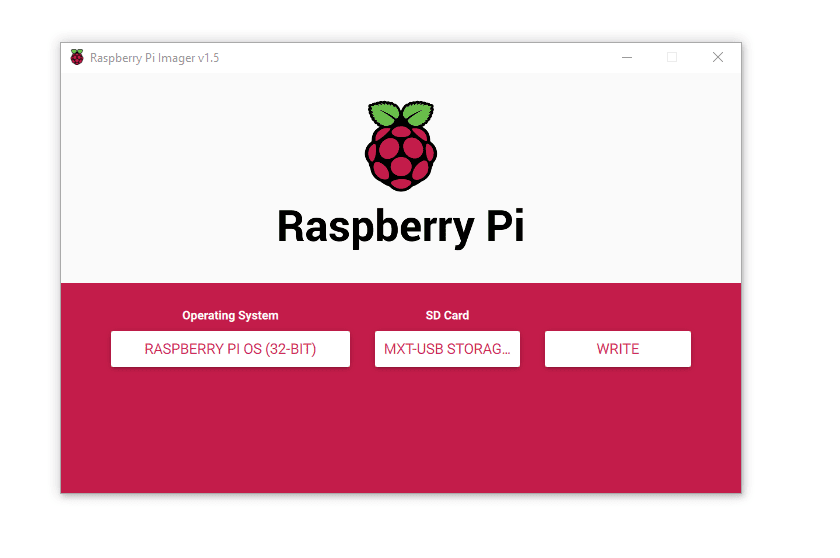
Now the better option will be using Raspberry Pi Imager software which is one tool for downloading and flashing your SD not only with Raspbian but with other various open-source OS present for Raspberry pi, So I’ll go with it and with the help of few snapshots below you can easily flash your SD card.
After OS is successfully installed. Plug the power cable (adapter must be 5V,2A sufficient) to the micro USB port of raspberry pi. It’s done you have successfully set up your pi, now you only need to sit back and wait for installation. Later follow up the instructions to completely set it up.
NO DISPLAY RPI !!-TROUBLESHOOTING:
If no display occurs on starting up Pi then first carefully notice whether or not powering up Pi green LED on the side of PI lights up or not, if it lights up then you may need to edit the config.txt file on the SD card so as to enable display on the pi for this purpose you may refer to this page and try out something or if you need my help then comment below I’ll always be ready to help
I hope you find this one interesting and informative for and suggestions or request you may comment below I’ll reply you shortly.
Sponsor:
Want to make a professional-looking PCB at a low price, then go to NextPCB. They provide professional high quality PCB at a very reasonable price. Also, with multiple testing along with AOI and X-Ray testing. If you want to make a compact PCB for a small project then, just take their PCB Assembly service along with Manufacturing PCB. I personally recommend NextPCB for the projects I have developed so far.


