
Hi there, I hope you find my previous post interesting and knowledgeable. So today I am back with another useful tutorial on raspberry pi. Raspberry Pi servo control. You all are familiar with servo motor, if someone is not then google it and see its working principle. In short words, it is a motor that rotates only 180°. It is useful in precise projects like plotting or radar projects which need to be perfectly directed. So let’s continue to our today’s topic.
What is a servo motor:
Servo motor is very common among Arduino hobbyist and Electronics interested persons. But if you are a beginner in this field then first have a look at this post for the most conceptual understanding of how servo motors work. Also, I would recommend you first see the Arduino tutorial for servo control. Here I am using SG90 servo which is very easily available and Raspberry PI 4 | 4GB variant for this tutorial.
Material Required:
- Raspberry Pi with screen, keyboard, and mouse
- SG90 servo
- Jumper wires
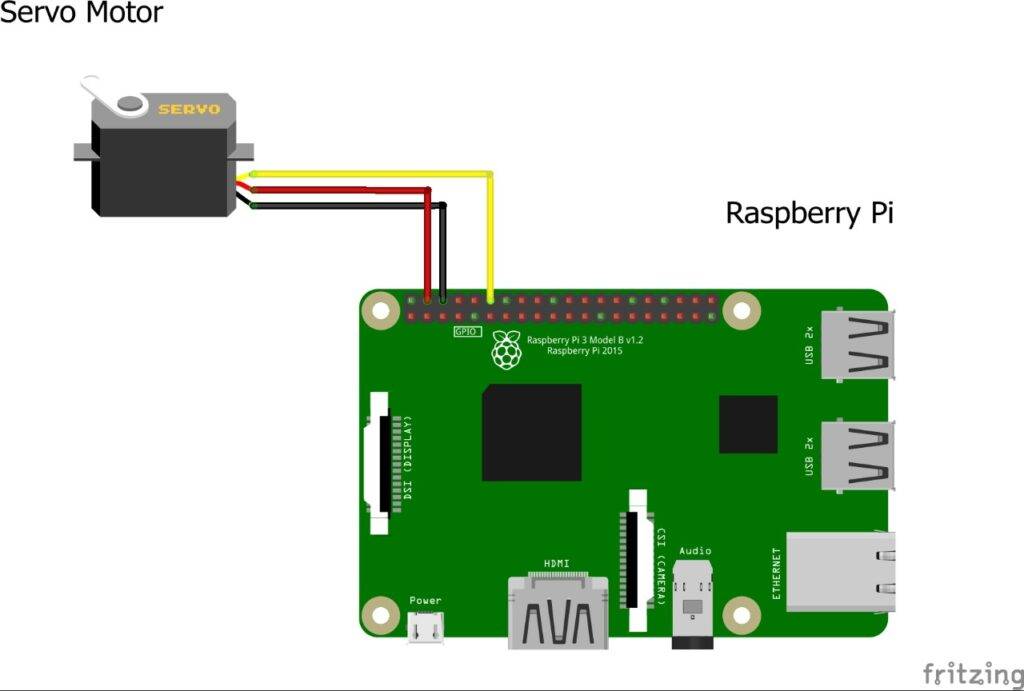
Circuit design:
Programming:
For programming, First, connect the servo motor as shown in the picture above and make sure all connections are insulated. Now for programming code, you need to open Thonny Python IDE or terminal (if Linux user-friendly).
Make sure you always update and upgrade your OS repository by
 sudo apt udate
 sudo apt-get upgrade
Also, make sure you have installed RPi.GPIO in your Raspberry Pi. The code below can be downloaded in zip format for the easy tasks also I will explain each line for better understanding.
 import RPi.GPIO as gp
 from time import sleep
 gp.setmode(gp.BOARD)
 gp.setup(12,gp.OUT)
 pwm=gp.PWM(12,50)
 pwm.start(0)
 for i in range(0,181):
   sig=(i/18)+2
   pwm.ChangeDutyCycle(sig)
   sleep(0.03)
 for i in range(180,-1,-1):
   sig=(i/18)+2
   pwm.ChangeDutyCycle(sig)
   sleep(0.03)
 pwm.stop()
 gp.cleanup()

Explanation & Output:
So, as we know that servo works on PWM signal in the range of 20ms starting from 2ms so as to start the PWM we initialize pin 12 as PWM pin. Then we convert 180° in terms of PWM by the formula angle/18 + 2. Then with the help of ChangeDutyCycle function, we change the signal to sig pin of the servo.
Below I have attached the demonstration video. Hope you’ll find it helpful.
<video link>##########################################################
So it’s now time to sum up this tutorial of Raspberry Pi servo control. If you need any help from my side then comment below. I’ll try to reply them as soon as possible.