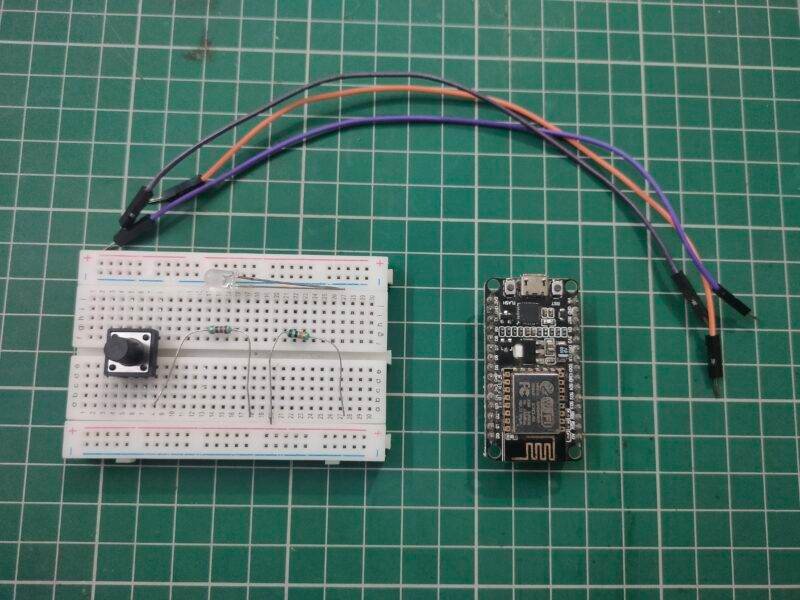
Hello guys, we are back with another new post in the series of esp8266 led tutorials. We have already discussed some basic and interesting projects made using nodemcu. In this mini-project, we are going to teach you how you can control an LED using ESP8266 nodemcu. You can also check out more projects on IoT and Arduino. In this project, we are using a pushbutton for turning the LED on and off. A pushbutton is a small type of switch that can complete the circuit while we push it else the circuit is broken by it. For making the connections we are using jumper wires and a breadboard. It is easy to make any circuit on a breadboard as you can replace the components as per your choice. We have our E-book on Arduino in which we discuss the making of 10+ projects with well-labeled diagrams and code. Well, let’s move to the working procedure of this project.

You have to press the push button in order to turn the LED on. In normal cases when the pushbutton is in its natural state and the LED will remains off until the button is pressed. Let’s move towards the code for this project, so we are using an if-else condition for continuously checking the state of the pushbutton. The digital read function will read the state of the pushbutton. Either the state is HIGH or it is LOW. So in the code, we have specified already that if the pushbutton state is high then turn the LED on, and if the state of the pushbutton is found to be low then turn the LED off. About the esp8266 led

Components Required
| ESP8266 nodemcu | BUY LINK |
| 10K ohm and 220-ohm resistor | BUY LINK |
| Jumper wires | BUY LINK |
| breadboard | BUY LINK |
| LED | BUY LINK |
| Pushbutton | BUY LINK |
| Breadboard | BUY LINK |

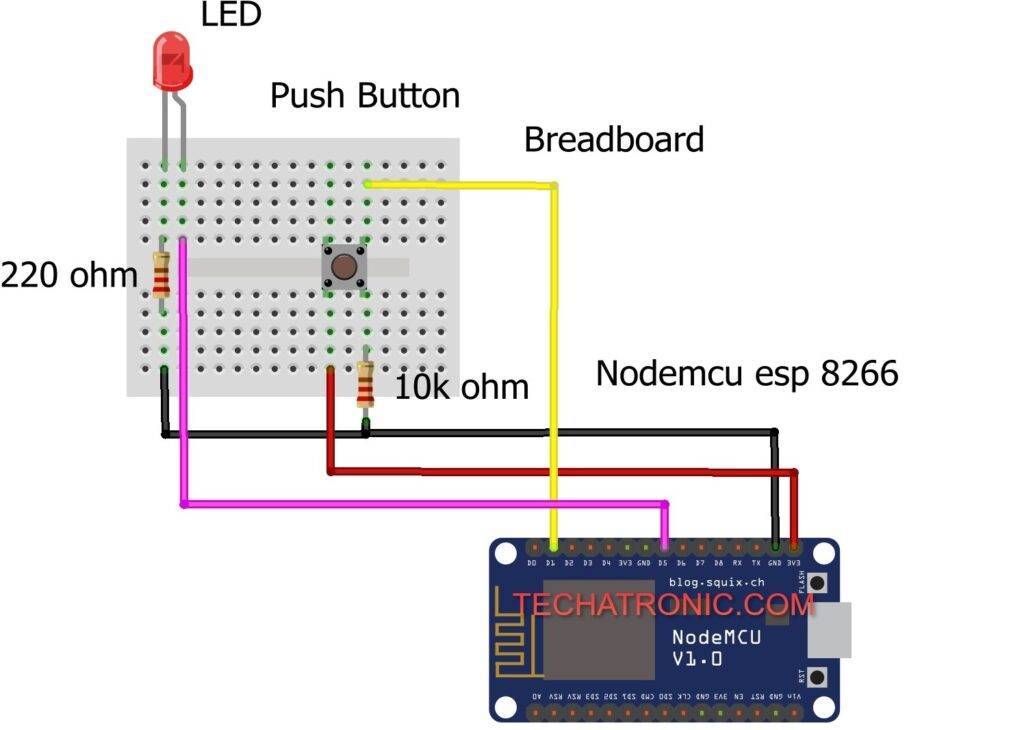
 esp8266 led Circuit Diagram
| Nodemcu esp8266 | LED | 220 Ohm Resistor |
| D5 Pin | Anode Pin | |
| Cathode Pin | Terminal 1 | |
| GND | Terminal 2 | |
| Nodemcu | Push Button | 10K Ohm Resistor |
| 3V3, Vin | Terminal 1 | |
| GND | Terminal 1 | |
| Terminal 2 | Terminal 2 | |
| D1 Pin | Terminal 3 |
First, take a pushbutton and place it on the breadboard with one pair of interconnected pins on one side and another pair of interconnect pins on one side as shown in the diagram. Connect the 3v3 pin of the nodemcu with one pin of the pushbutton and the GND pin of the nodemcu with another pin of the push button via a 10K resistor. Attach the digital-1 pin of the nodemcu with the one side pin of the pushbutton. Take an LED and place it on the breadboard. Join the positive leg of the LED with the digital-5 pin of the nodemcu. Connect the GND pin of the nodemcu with the negative leg of the LED via a 220-ohm resistor. Use a USB cable to power the nodemcu. You can also check how to make a music reactive LED strip using a transistor.
esp8266 led Code
NOTE: Please upload the code which is given below to the nodemcu.
 // Techatronic.com
 int val = 0 ;
 void setup()
 {
   Serial.begin(9600); // sensor buart rate
   pinMode(14,HIGH);  // D5 PIN FOR LED
 }
 void loop()
 {
  val = digitalRead(5); // Push Button output pin connected D1
  Serial.println(val);  // see the value in serial m0nitor in Arduino IDE
  delay(100);      // for timer
  if(val == 1 )
  {
   digitalWrite(14,HIGH); // LED ON
  }
  else
  {
   digitalWrite(14,LOW); // LED OFF
  }
  }
We hope that you understand the project completely and for better understanding try to make it on your own. If you have any doubts regarding the project then ping us in the comments section below. You can also check some interesting tutorials on Arduino and Raspberry Pi.
HAPPY LEARNING!


 esp8266 led Circuit Diagram