
Hey Tech Folks, I’m back here to share with you all another important and DIY projects based on Raspberry Pi PICO. Today we’re going to discuss LDR with Raspberry PI PICO |raspi pico LDR Sensor, with is very simple and useful in projects which require task to be performed on the basis of light. This article may be a bit tough for the people who are starting with Pi PICO or for python beginner. So for your easiness have a look at my other articles based on PI PICO also for more explanation continue reading below.
Table of Contents
LDR
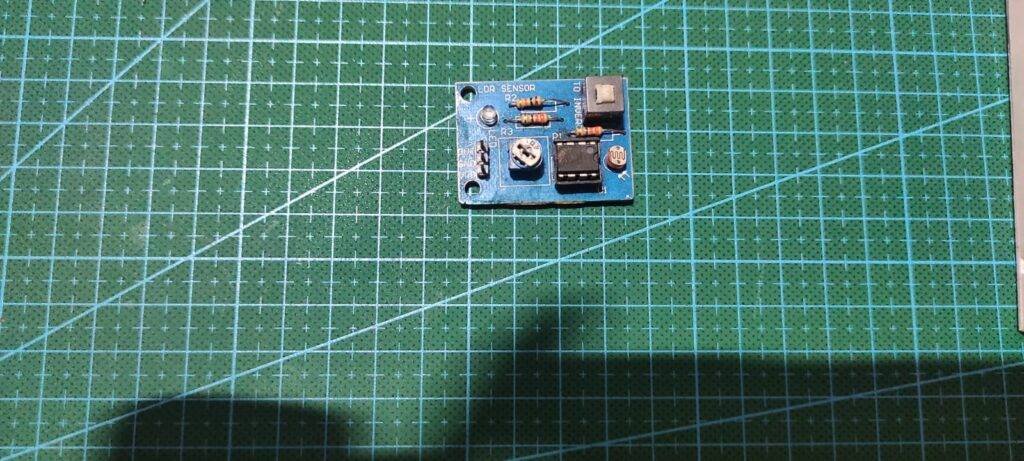
LDR- Light Dependent Resistor is a type of Resistor which is also very common among creators and electronics lovers. Despite using photodiode, you can use this resistor for fulfilling some tasks which seems to be more complex while using photo diode. The construction of this resistor is very simple and easy to understand. It has a zigzag groove which is filled with a photoelectric sensitive material.
When this material is exposed to light, photoelectric effect takes place and electron in the atom of material shift from which causes changing their resistance to a great difference. LDR come in various resistance ranges, t6he one which I’m using here is 0kOhm to 1MOhm. Also, shape and size may differ for different value resistances and all are easily available in online as well as offline market.
Material Required for LDR with Raspberry PI PICO

- Raspberry Pi PICO
- LDR module
- Breadboard
- Jumper Wires
|
S.No |
Component Required |
Quantity |
Buy Link |
|
1. |
Raspberry PI PICO |
1 | BUY LINK |
|
2. |
LDR Sensor |
1 | BUY LINK |
|
3 |
LED |
1 | BUY LINK |
|
4. |
220 Ohm Resistor |
1 | BUY LINK |
|
5. |
Jumper Wire |
40 | BUY LINK |
|
6. |
Breadboard |
1 | BUY LINK |
|
7. |
Power supply |
1 | BUY LINK |
LDR with Raspberry PI PICO Circuit Diagram
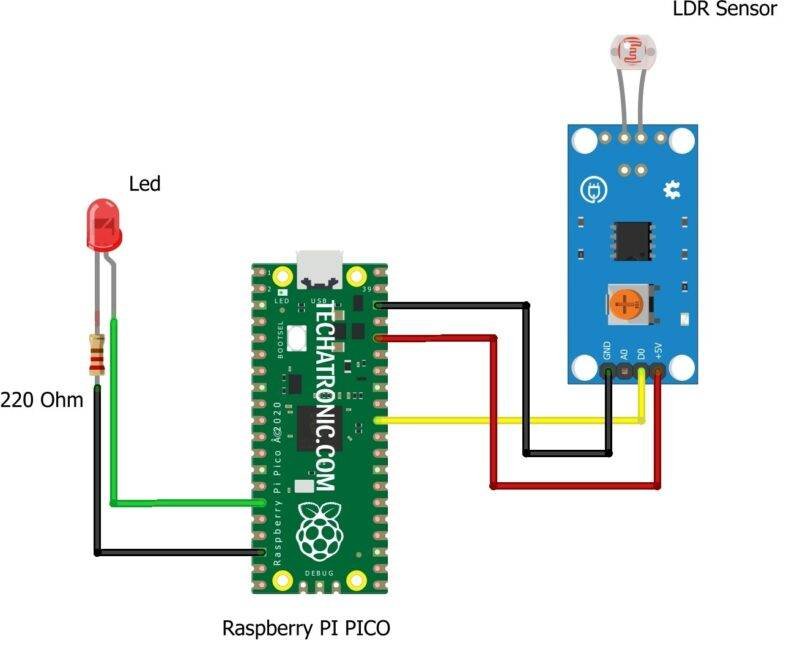
|
Raspberry PI PICO |
LDR Sensor | |
|
GPIO 26 Pin |
D0 | |
|
3.3V |
VCC | |
|
GND |
GND | |
|
Raspberry PI PICO |
LED | 220-ohm Resistor |
|
GPIO 11 Pin |
Anode Terminal ( + ) |
|
|
GND |
|
Terminal 1 |
|
|
Cathode Terminal ( – ) |
Terminal 2 |
LDR Module OUT Pin to GPIO 26 of the Pi PICO & GND, VCC to power ponints i.e., GND & 3.3V/VBUS
Explanation & Code
Explanation
As always as the first we import some basic and important modules which are required for thw program to run. Mchine and time modules are few of these in start of the micropython programming. Such modules are required for defining pin , performing time claculation and many more. Apart from this you can also create your own modules for other further upcoming programs for LDR with Raspberry PI PICO.
In next lines we define pins for ldr and led as input and output which w’ll use in program. then in while loop we use try and except method to to put our main code which chwck for the condition when the input of ldr is HIGH and LOW and according to it toggles the led.
Code
 from machine import Pin,ADC,PWM
 import time,utime
 ldr=Pin(26,Pin.IN)
 led=Pin(11,Pin.OUT)
 while True:
   try:
     if he.value() == 0:
       led.value(0)
     elif he.value()==1:
       led.value(1)
   except KeyboardInterrupt:
     break
With this we have completed LDR PI PICO project with complete code and explanation. I hope you like it and if you face any problem comment down below.