

Hello Guys, I’m back with another interesting Tutorial on Raspberry Pi. In this article, we’ll discuss interacting DHT11 with Raspberry Pi and see it working using Python code. Also, we’ll display real-time Data on the 16×2 LCD. The code and explanation used in the code will be explained further below also all the modules regarding 16×2 LCD will be included with its article home page. So let’s begin.
Table of Contents
DHT11
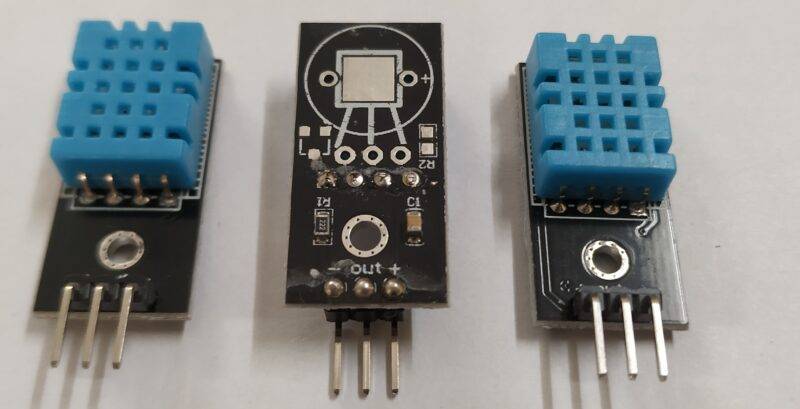
- It is the most common and famous temperature and humidity combined sensor you’ll ever come to know. It has many tutorials with boards similar to Arduino.
- You may visit It’s Arduino Tutorial to have a more clear Idea of Its working if you are working so, here we are giving you the tutorial on how to connect dht11 with Raspberry Pi.
- DHT11 is a simple sensor and has a very simple structure for measuring temperature and humidity. Basically, it is an enclosed structure that consists of two wires which are responsible for checking humidity and temperature.
- DHT11 sensor actually measures the resistance, which changes with respect to temperature and humidity, and gives the output via a single data pin.
- The sensor gives accurate data of both and can be used for small-scale projects, but for large-scale ones you can use a more advanced version for more accuracy and without error. The working of the sensor is the same with Raspberry Pi as Arduino.
- As this sensor, DHT11 gives data output out of a single pin, so we need one wire library like in Arduino for Raspberry Pi. The link to the Python library for the Raspberry Pi is given below.
- The data samples for two consecutive samples needs some time in between, so make sure to give appropriate delay between any two consecutive readings, just like Arduino.
- Some sensor might have 4 pins but the useful are only three so make sure to check carefully. Also, if you want the whole detailed explanation for the sensor, then read DHTT11 detailed article mentioned in Basic electronics.
Material Required
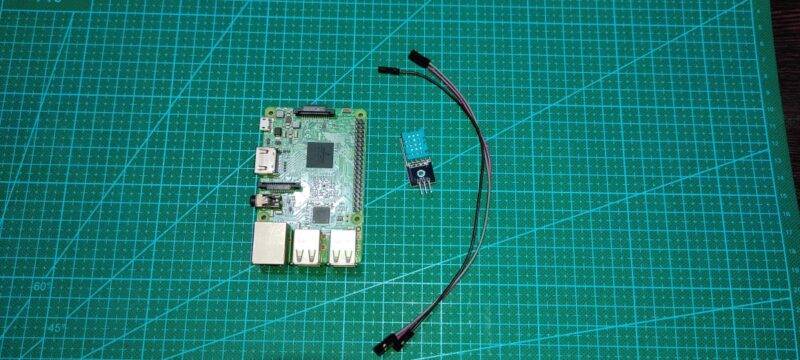
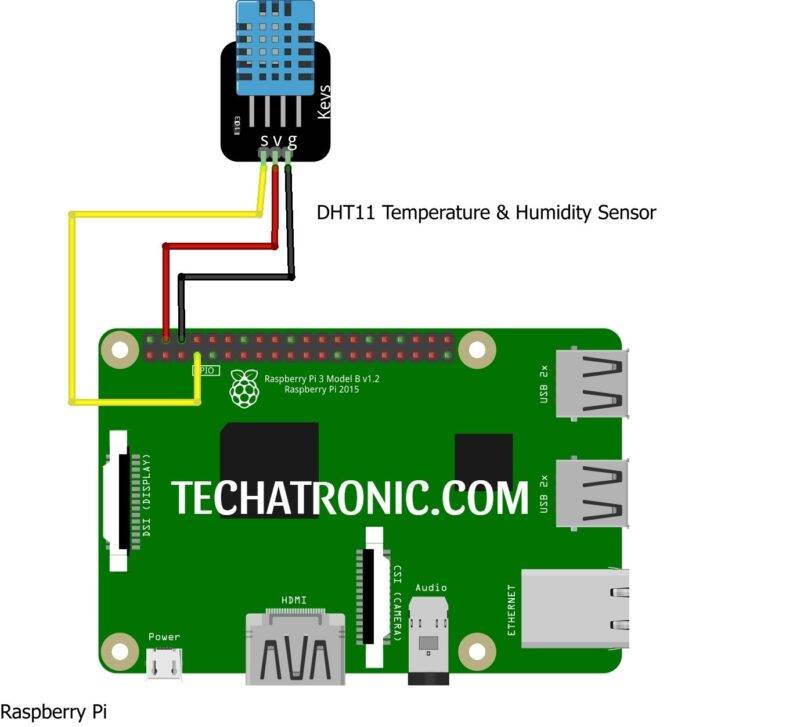
DHT11 with Raspberry pi Circuit Diagram
|
Raspberry Pi |
DHT11 Sensor |
|
GPIO 4 Pin |
S ( Signal Pin ) |
|
5 Volt |
V (Power) |
|
GND |
G (Ground ) |
DHT11 with Raspberry pi python Code
Explanation
- First to make the program work we have to install some modules i.e., the Adafruit module for the DHT11 sensor.
- To install the required module, Adafruit_DHT from the link provided in Adafruit_Python_DHT-master (zip form). Then extract this module and install this using this line:
 sudo python setup.py install
 or
 sudo python3 setup.py install
- Then Open Thonny IDE and start typing your code or create a new file by clicking the new icon.
- First, in the beginning, we import some important modules like Adafruit_DHT. Then we define a DHT11 sensor and finally put our main code in a while loop using try and except condition.
Code
 import Adafruit_DHT
 DHT11=Adafruit_DHT.DHT11  # Adafruit_DHT.DHT22 for DHT22 sensor.
 while True:
   try:
     temp,humid=Adafruit_DHT.read_retry(DHT11,4) # 4 is ithe GPIO number you can change this to your required need
     print("TEMP={0:0.1f}°C HUMIDITY={1:0.1f}%".format(temp,humid))
   except KeyboardInterrupt:
     break
- In the first line as we have said we have imported the library for the DHT11 Sensor to work i.e., Adafruit_DHT. You can use this library with DHt22 also, but you need to change the DHT11 object line.
- Then we create a DHT object which store the DHT11 sensor configuration details and further in code we use this object name to refer to all working statements.
- Next we create an infinite while loop within Try and except method to create a keyboard interrupt terminating condition i.e., Ctrl+C
- In next line we read data from the DHT11 sensor and stores it in two variable as two values are being received, one for temperature and other for humidity.
- Next, we print the values in the Python IDE. The statement written is used for printing formatting more information and detailed tutorial video of this will be available on our YouTube Channel soon.
With this we have completed the DHT11 Tutorial with Raspberry Pi, I hope you like it. If you find any trouble, then comment down below.
Some latest Raspberry pi basic tutorials
ultrasonic sensor with raspberry pi
sound sensor with raspberry pi | Python Tutorial | Digital Value
Raspberry Pi soil moisture sensor