
Hey guys, welcome back to Techatronic. Have you ever imagined that you can control your home appliances remotely? You can on/off the bulbs, fans, etc using wifi. In this article, we are going to learn the making of wifi-based home automation using NodeMCU esp8266 IoT development board. You just need to upload the code provided below and make the correct connections so that the system works perfectly. Before starting please set up your Arduino IDE software so that it can upload the code to NodeMCU. Please check more amazing projects on IoT.

How Does it Work?
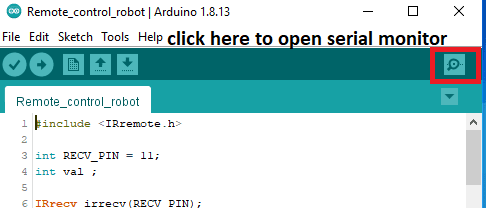
You can control four different AC or DC appliances using their project. This project is a local area network-based, so you can control it through one device. The link to the application is given in the article below. You have to write your mobile hotspots or network’s SSID and PASSWORD in the code. When the code is uploaded successfully to the NodeMCU then it will generate a local IP address which you can see on the serial monitor screen. When connected to the hotspot it will notify you on the serial monitor screen. Also, check the pulse oximeter using NodeMCU made by us.

copy the IP address and paste it to access the home automation.

On entering the correct IP just tap on the buttons you have seen in the app. For turning on an appliance tap on the ON button and in a similar way for the other three. Tap OFF for turning off the respective appliance.
follow the instruction to install app


now click on the install button

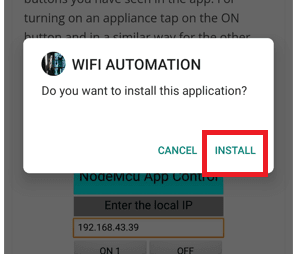


Application for Home Automation
operate with the Android app
wifi automation range is more than Bluetooth automation
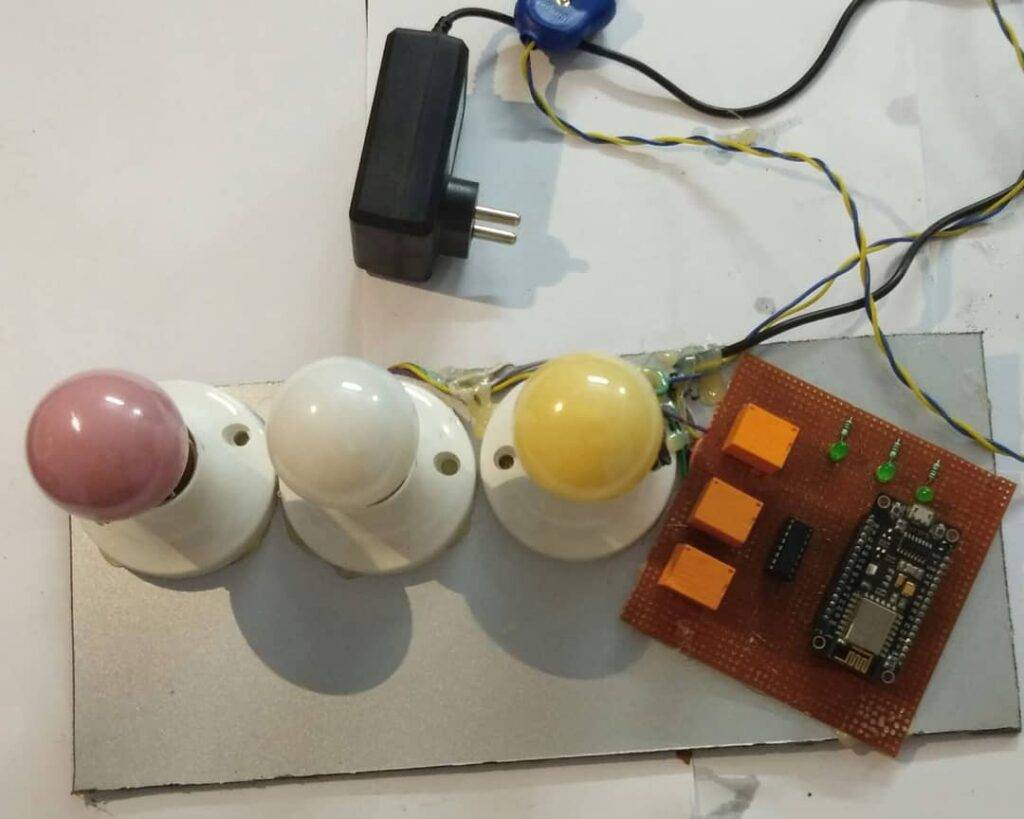
Components Required
- NodeMCU esp8266
- Four-channel relay
- Three AC bulbs
- AC Fan
- Jumper wires and a Breadboard
- 220-volts AC supply
- USB cable for uploading the code
- Nodemcu power supply

wifi based home automation Circuit Diagram for the Project
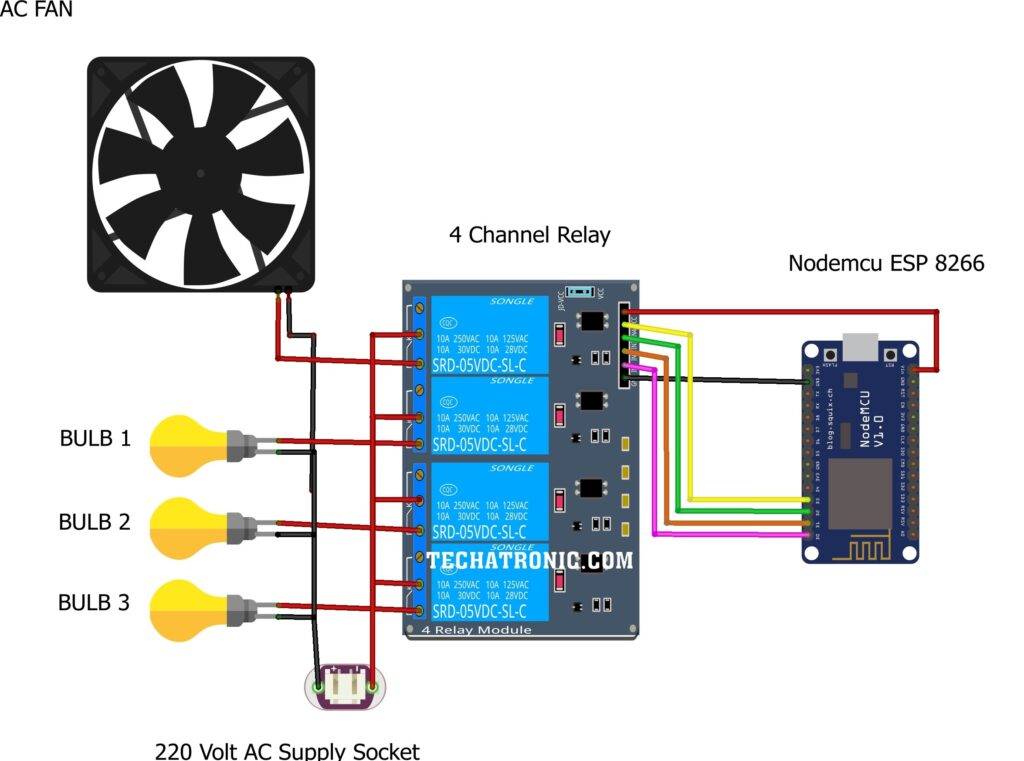
| Nodemcu esp 8266 | 4 Channel relay,5V | ||||
| D0 Pin | IN 1 | ||||
| D1 Pin | IN 2 | ||||
| D2 Pin | IN 3 | ||||
| D3 Pin | IN 4 | ||||
| Vin, VV | VCC | ||||
| G, GND | GND | ||||
| Bulb 1 | Bulb 2 | Bulb 3 | AC Fan | 4 Channel Relay | 220 V AC Supply |
| Normally open | |||||
| Common | Phase | ||||
| Terminal 1 | Terminal 1 | Terminal 1 | Terminal 1 | Normally closed | |
| Terminal 2 | Terminal 2 | Terminal 2 | Terminal 2 | Neutral |
Please take proper safety while working with AC current. Connect the VCC pin of the relay module with the VIN pin of the NodeMCU and the GND pin of the relay module with the GND pin of the NodeMCU. Join one wire of the AC bulb with the 220-volts AC supply and the other to a pin of the first relay module. Repeat this connection for the second and third relay modules. Attach the other wire of the AC supply to the other pin of all three relay modules. For the last relay connect a DC fan with a 9-volts battery connected to it as shown in the diagram. Now connect the IN-1, IN-2, IN-3, and IN-4 pins of the relay module with the digital-0, digital-1, digital-2, and digital-3 pins of the NodeMCU.
wifi based home automation Code
NOTE: Please upload the code given below to the NodeMCU. Before uploading please install <ESP8266WiFi.h> library to the IDE software. Click here to learn how to add a zip library to the Arduino IDE software.
 //TECHATRONIC.COM
 // ESP8266 LIBRARY
 // https://github.com/ekstrand/ESP8266wifi
 #include <ESP8266WiFi.h>
 const char* ssid = "DESKTOP"; // SSID i.e. Service Set Identifier is the name of your WIFI
 const char* password = "asdfghjkl"; // Your Wifi password, in case you have open network comment the whole statement.
 int R1=D0; // GPIO13 or for NodeMCU you can directly write D7
 int R2=D1;
 int R3=D2;
 int R4=D3;
 WiFiServer server(80); // Creates a server that listens for incoming connections on the specified port, here in this case port is 80.
 void setup() {
  Serial.begin(115200);
  delay(10);
  pinMode(R1, OUTPUT);
  pinMode(R2, OUTPUT);
  pinMode(R3, OUTPUT);
  pinMode(R4, OUTPUT);
  digitalWrite(R1,HIGH);
  digitalWrite(R2,HIGH);
  digitalWrite(R3,HIGH);
  digitalWrite(R4,HIGH);
  // Connect to WiFi network
  Serial.println();
  Serial.println();
  Serial.print("Connecting to ");
  Serial.println(ssid);
  WiFi.begin(ssid, password);
  while (WiFi.status() != WL_CONNECTED) {
   delay(500);
   Serial.print(".");
  }
  Serial.println("");
  Serial.println("WiFi connected");
  // Start the server
  server.begin();
  Serial.println("Server started");
  // Print the IP address
  Serial.print("Use this URL to connect: ");
  Serial.print("http://");
  Serial.print(WiFi.localIP()); //Gets the WiFi shield's IP address and Print the IP address of serial monitor
  Serial.println("/");
 }
 void loop() {
  // Check if a client has connected
  WiFiClient client = server.available();
  if (!client) {
   return;
  }
  // Wait until the client sends some data
  Serial.println("new client");
  while(!client.available()){
   delay(1);
  }
  // Read the first line of the request
  String request = client.readStringUntil('\r');
  Serial.println(request);
  client.flush();
  // Match the request
  if (request.indexOf("/OFF1") != -1) {
   digitalWrite(R1,LOW);
    client.println("HTTP/1.1 200 OK");
    client.println("Content-Type: text/html");
    client.println("");
    client.println("<!DOCTYPE HTML>");
    client.println("<html>");
    client.println("Relay 1 is ON");
    client.println("</html>");
    client.stop();
    delay(1);
  }
  if (request.indexOf("/ON1") != -1) {
   digitalWrite(R1, HIGH);
    client.println("HTTP/1.1 200 OK");
    client.println("Content-Type: text/html");
    client.println("");
    client.println("<!DOCTYPE HTML>");
    client.println("<html>");
    client.println("Relay 1 is OFF");
    client.println("</html>");
    client.stop();
    delay(1);
  }
  if (request.indexOf("/OFF2") != -1) {
   digitalWrite(R2,LOW);
    client.println("HTTP/1.1 200 OK");
    client.println("Content-Type: text/html");
    client.println("");
    client.println("<!DOCTYPE HTML>");
    client.println("<html>");
    client.println("Relay 2 is ON");
    client.println("</html>");
    client.stop();
    delay(1);
  }
  if (request.indexOf("/ON2") != -1) {
   digitalWrite(R2, HIGH);
    client.println("HTTP/1.1 200 OK");
    client.println("Content-Type: text/html");
    client.println("");
    client.println("<!DOCTYPE HTML>");
    client.println("<html>");
    client.println("Relay 2 is OFF");
    client.println("</html>");
    client.stop();
    delay(1);
  }
  if (request.indexOf("/OFF3") != -1) {
   digitalWrite(R3,LOW);
    client.println("HTTP/1.1 200 OK");
    client.println("Content-Type: text/html");
    client.println("");
    client.println("<!DOCTYPE HTML>");
    client.println("<html>");
    client.println("Relay 3 is ON");
    client.println("</html>");
    client.stop();
    delay(1);
  }
  if (request.indexOf("/ON3") != -1) {
   digitalWrite(R3, HIGH);
    client.println("HTTP/1.1 200 OK");
    client.println("Content-Type: text/html");
    client.println("");
    client.println("<!DOCTYPE HTML>");
    client.println("<html>");
    client.println("Relay 3 is OFF");
    client.println("</html>");
    client.stop();
    delay(1);
  }
  if (request.indexOf("/OFF4") != -1) {
   digitalWrite(R4,LOW);
    client.println("HTTP/1.1 200 OK");
    client.println("Content-Type: text/html");
    client.println("");
    client.println("<!DOCTYPE HTML>");
    client.println("<html>");
    client.println("Relay 4 is ON");
    client.println("</html>");
    client.stop();
    delay(1);
  }
  if (request.indexOf("/ON4") != -1) {
   digitalWrite(R4, HIGH);
    client.println("HTTP/1.1 200 OK");
    client.println("Content-Type: text/html");
    client.println("");
    client.println("<!DOCTYPE HTML>");
    client.println("<html>");
    client.println("Relay 4 is OFF");
    client.println("</html>");
    client.stop();
    delay(1);
  }
 }
We hope that you learn the working of the project and now try to make it on your own. If you are facing any problems while making it let us know in the comments section below. Also, check out tutorials on Arduino and Raspberry Pi written by us.

HAPPY LEARNING!