The PIR sensor arduino allows sensing the movement. the sensor is used in many applications like automatic light on and off. In this post, we are going to share how to connect PIR sensor arduino. PIR sensors are mostly used to detect motion. read the article carefully to learn about the project we shared all the detail step by step and if you have any queries you can ask us in the comment section. this sensor work on the same principle that we used in Connect potentiometer with Arduino. here we are going to use the same code only we have to calibrate the sensor according to our requirements. that’s why we are sharing the basics with you if you learn the basics once you can make the project by itself.
Hey guys, Welcome back to Techatronic. We are Shahid and Adnan Electronics engineers and we are here to learn you the basic electronics and Embedded with the different microcontrollers. we always share our project with you with all the details so you can learn. our motive is to aware the students of the technology.

What is PIR Sensor Arduino ?
PIR stands for Passive infrared sensor. or it is known as an IR motion sensor. the sensor allows for detecting the motion of any person. There are two slots in the PIR sensor. both the slots are made up of a special type of material both the slots are sensitive to IR. and there is a lense used at the top of the sensor that doesn’t make more into the sensor. we see that the two openings can ‘see’ out past some distance (fundamentally the affectability of the sensor). At the point when the sensor is inactive, the two openings recognize a similar measure of IR, the encompassing sum emanating from the room or dividers or outside. Arduino PIR sensor project reacts with the LED notification. When a human body or we can say a warm body like a human or animal passes by, it intercepts one-half of the PIR sensor first, which makes a positive differential change. When the body leaves the sensing area, the reverse phenomenon happens, whereby the sensor generates an opposite differential change. These change pulses are what is detected when a human body passes.

How does the PIR sensor Arduino Works?
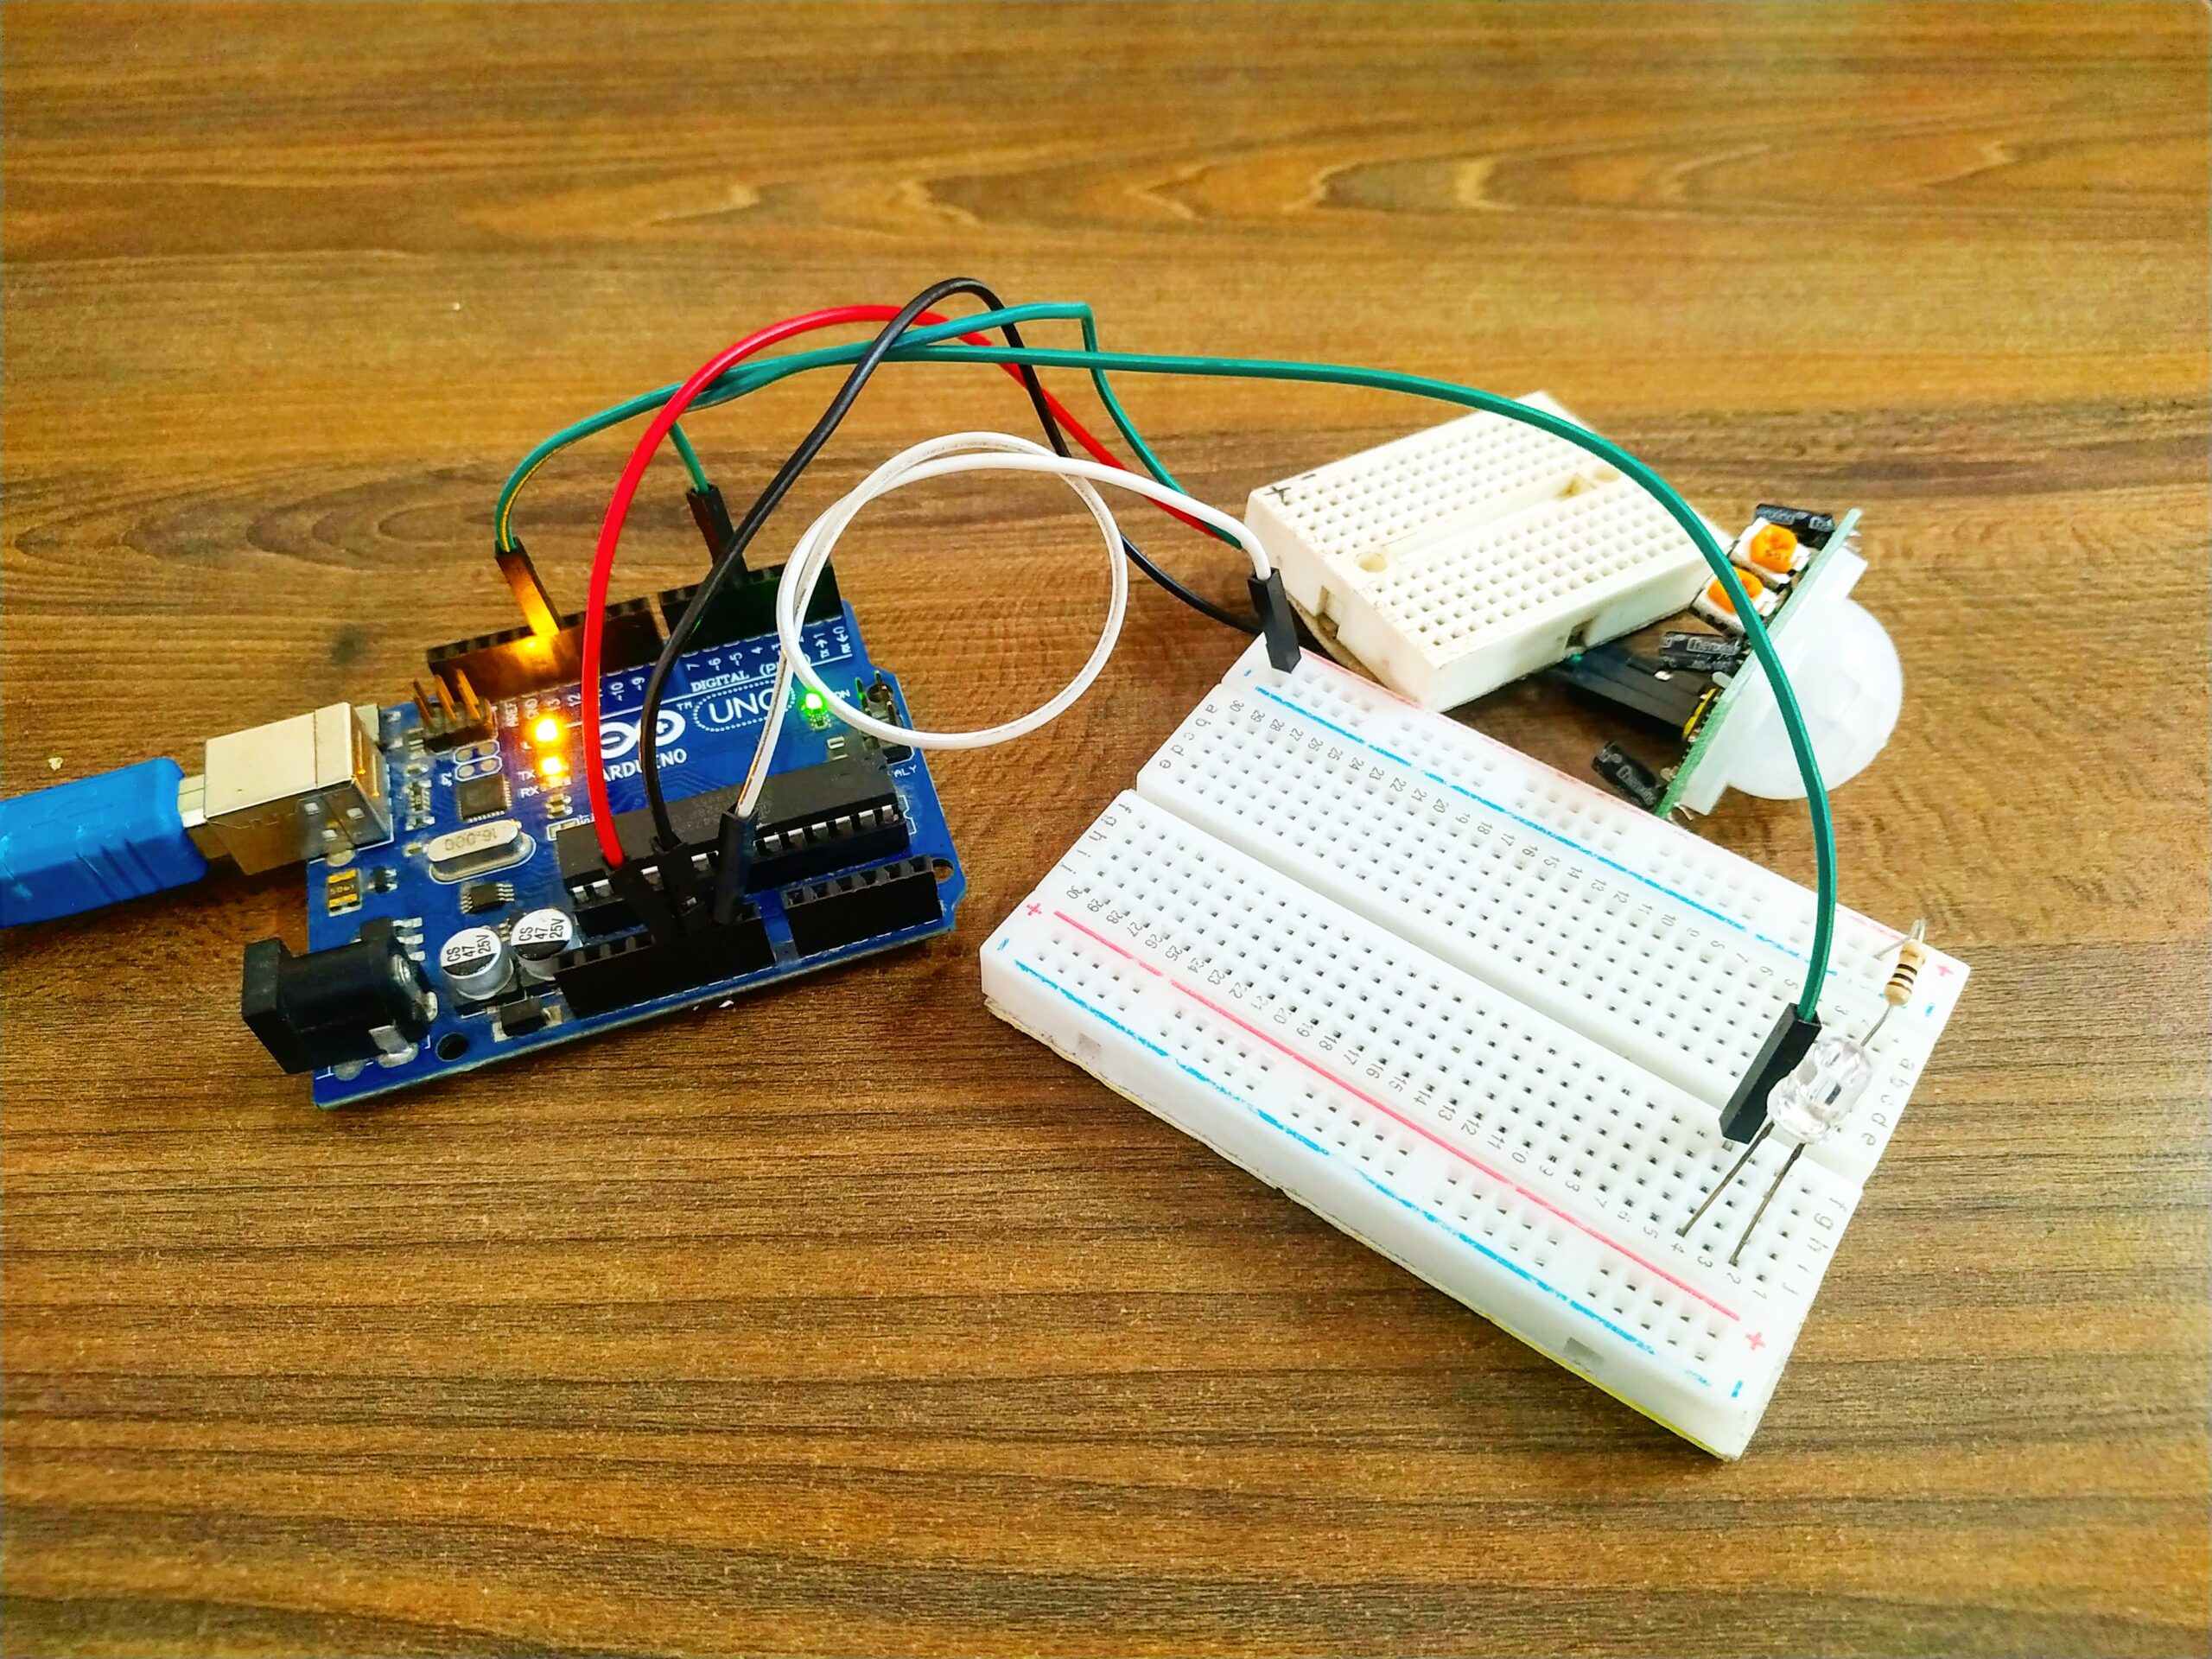
Arduino connects with the sensor after uploading the code. Arduino reacts according to the sensor input. when any motion detects in the covered area of the sensor there is a light that will turn on. There are two lights we used one is green and another is red. when the sensor is on the green light is on. and when it detects any motion the red light will be turn on. PIR sensor senses the motion by a warm body differential changes. and send this information to the Arduino from the Arduino input pin. now Arduino compares the value with the database and according to the condition sends the instruction to the LED.PIR sensor Arduino is pretty simple. there are three pins in the sensor. one is VCC another is ground and one output. where we get high or low. there is an ic inbuilt with the sensor which makes the analog differential output to the digital.

Components used PIR SENSOR Arduino :-
- Arduino Uno
- PIR sensor
- LED’S
- Jumper wire
- Breadboard
- 9 Volt Battery
- 9 Volt Battery Connector

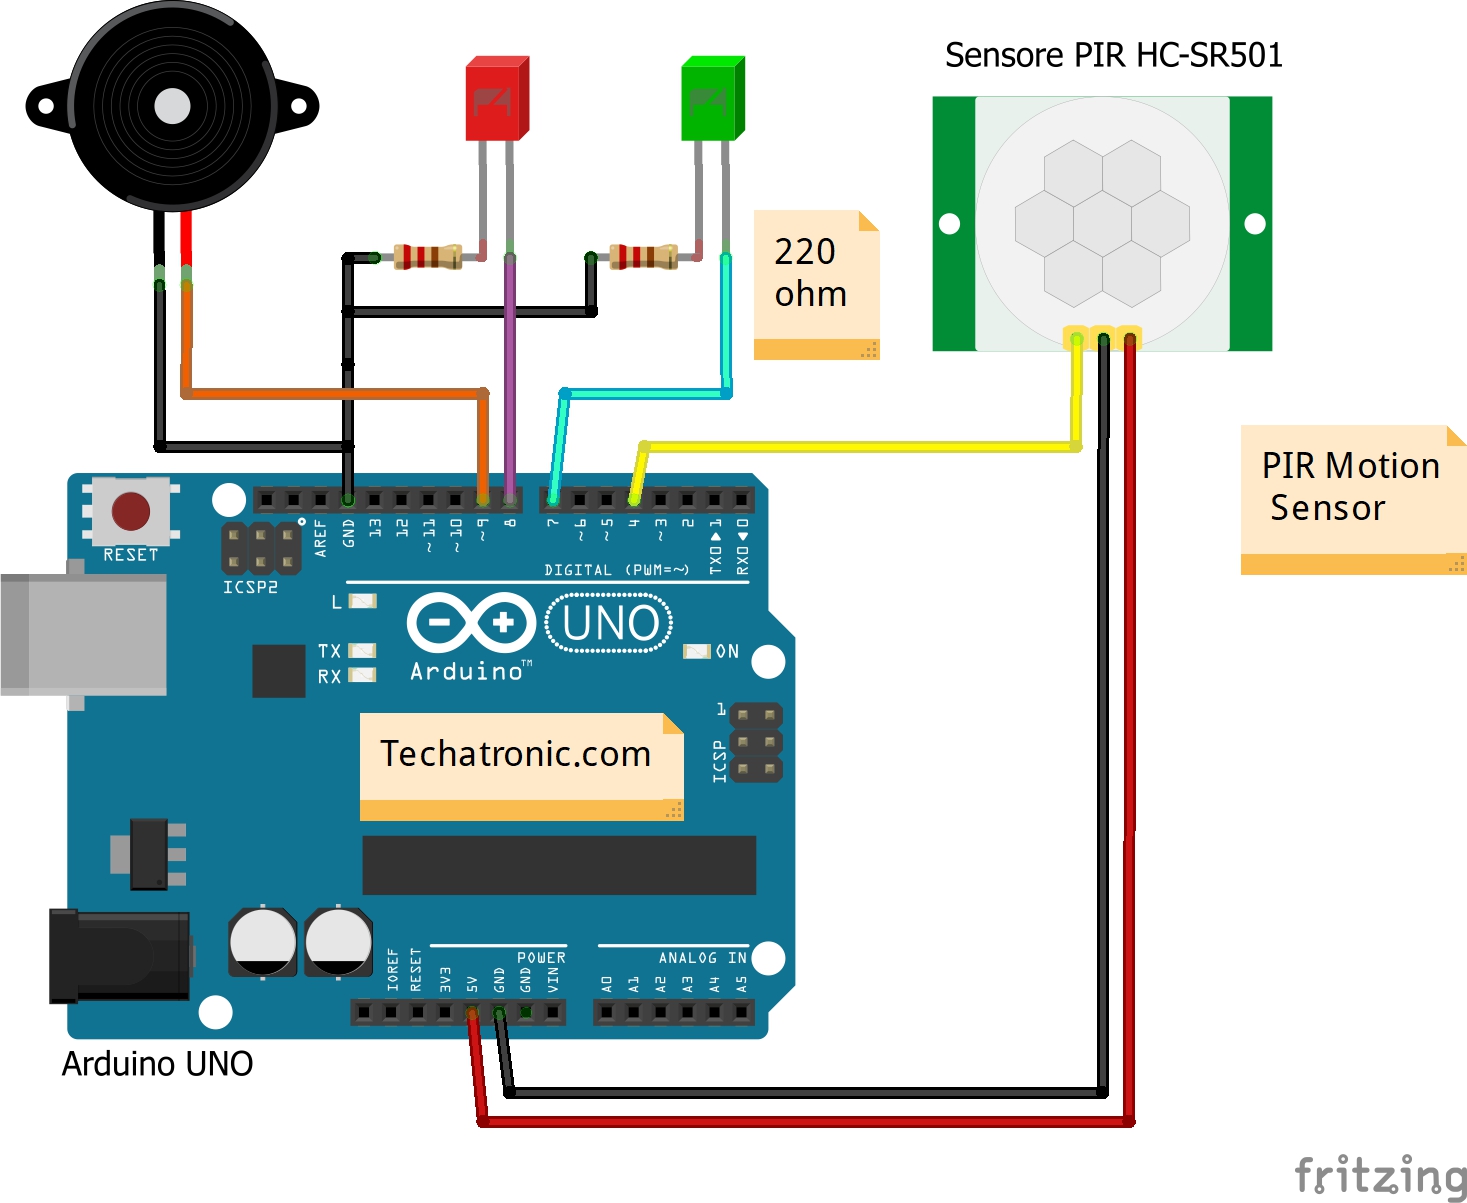
PIR motion sensor Arduino circuit diagram

connection table pir sensor arduino
| Arduino UNO | PIR Motion Sensor | ||
| ( +5V ) | VCC | ||
| GND | GND | ||
| D4 Pin | OUT Pin | ||
| Arduino UNO | Buzzer | ||
| D9 Pin | Positive | ||
| GND | Negative | ||
| Arduino | LED R | LED G | 220 Ohm Resistor |
| D8 Pin | Anode Pin | ||
| D7 Pin | Anode Pin | ||
| GND | Terminal 1 | ||
| Cathode Pin | Cathode Pin | Terminal 2 |
Now we are going to share the code note:- the PIR sensor arduino doesn’t work with nonliving things.
Arduino motion sensor Code:-
 // arduino motion sensor
// Techatronic.com
 int val = 0 ;
 void setup()
 {
 Serial.begin(9600);
 pinMode(4,INPUT); // pir sensor output pin connected
 pinMode(7,OUTPUT); // Green led pin
 pinMode(8,OUTPUT); // Red led pin
 pinMode(9,OUTPUT); // Buzzer pin
 }
 void loop()
 {
 val = digitalRead(4); // pir sensor output pin connected
 Serial.println(val); // see the value in serial monitor in Arduino IDE
 delay(100);
 if(val == 0 )
 {
 digitalWrite(7,HIGH);  // Green led on
 digitalWrite(8,LOW);  // Red led off
 digitalWrite(9,HIGH); // Buzzer on
 }
 else
 {
 digitalWrite(7,LOW);  // Green led off
 digitalWrite(8,HIGH); // Red led on
 digitalWrite(9,LOW); // Buzzer off
 }
 }
Upload the given code to the Arduino and Make a circuit diagram properly. all the best.

