Table of Contents
Introduction
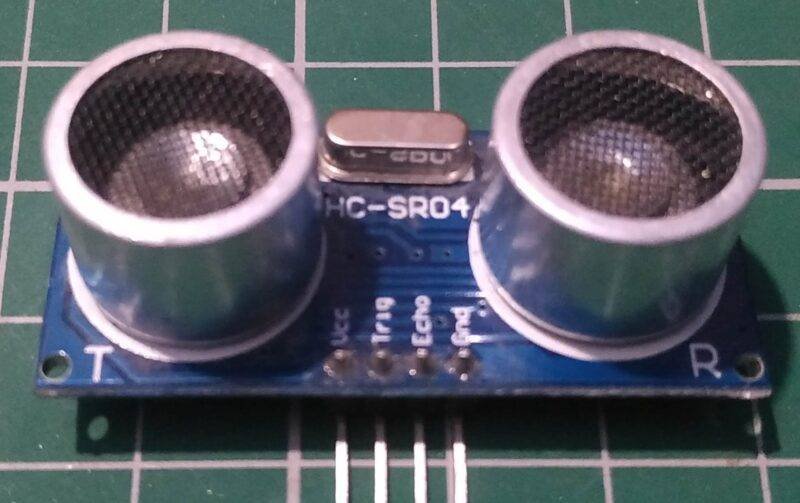
Hey techies, welcome back to Techatronic. Do you know what is an ultrasonic sensor is?
In this article, we are going to teach you the interfacing of an hc sr04 with esp8266 IoT development board from this iot tutorial.
We are using an HC-SR04 ultrasonic sensor for making this project. You can also read the latest projects on Arduino and IoT. The same system is used in submarines and ships to find the locations of the obstacles underwater which is known as SONAR.
In this project, we use an ultrasonic sensor with a nodemcu to obtain the distance between the sensor and the obstacle. The circuit diagram and code for this project both are given below.
We have also made a smart blind stick using Arduino in one of our previous articles.
A preview image how the system will look like

Interfacing of the hc sr04 with esp8266
This project is all about the interfacing of an ultrasonic sensor with nodemcu.
- The project can calculate and display the distance between the obstacle and the sensor.
- The distance that we are getting is in centimeters.
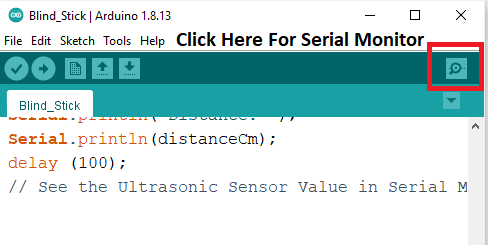
- You can open the serial monitor screen if you want to view the values for the distance variable.
- Set the baud rate to 9600. The values of the distance variable update automatically as the position of the obstacle is changes in iot tutorial.
- The sensor can only calculate the distance of the obstacle when it is in front of the sensor and also in the range of the sensor.

We have also made a very interesting project on radar using Arduino.
The ultrasonic sensor emits and receives ultrasonic waves continuously and the distance is calculated by the time duration between them.

Software Simulation

Components Required
| HC-SR04 ultrasonic sensor | BUY LINK |
| ESP8266 nodemcu | BUY LINK |
| Jumper wires | BUY LINK |
| USB cable for uploading the code | BUY LINK |
| Breadboard | BUY LINK |
Components Table/buy link
You can buy the whole components from the given link we have to share the amazon link. from where you can get a good discount on the components.
hc sr04 with esp8266 Circuit Diagram
Connection Table
| Nodemcu esp8266 | Ultrasonic Sensor |
| VV, Vin | VCC |
| G, GND | GND |
| D5 Pin | Trig Pin |
| D6 Pin | Echo |
- The HC-SR04 ultrasonic sensor has four pins out of which two are used to provide power to the sensor and the other two are for the data.
- Connect the VCC pin of the ultrasonic sensor to the VIN pin of the nodemcu.
- Join the GND pin of the ultrasonic sensor with the GND pin of the nodemcu.
- Connect the TRIG and ECHO pins of the ultrasonic sensor with the digital-5 and digital-6 pins of the nodemcu as shown above in the diagram.
- Now connect the USB cable to the nodemcu so that the ultrasonic sensor starts working and you can see the values on the serial monitor screen.

The working of this iot tutorial is similar to the ultrasonic range finder which is also made by us.
Code for the Project
NOTE: Please upload the code which is given below to the nodemcu as it is. Before that install <ESP8266wifi.h> to the IDE software. Click here to learn how to add a zip library to the IDE software.
 //TECHATRONIC.COM
 // ESP8266 LIBRARY
 // https://github.com/ekstrand/ESP8266wifi
 const int trigPin = D5;
 const int echoPin = D6;
 long duration;
 int distance;
 void setup() {
 pinMode(trigPin, OUTPUT); // Sets the trigPin as an Output
 pinMode(echoPin, INPUT); // Sets the echoPin as an Input
 Serial.begin(9600); // Starts the serial communication
 }
 void loop() {
 // Clears the trigPin
 digitalWrite(trigPin, LOW);
 delayMicroseconds(2);
 // Sets the trigPin on HIGH state for 10 micro seconds
 digitalWrite(trigPin, HIGH);
 delayMicroseconds(10);
 digitalWrite(trigPin, LOW);
 // Reads the echoPin, returns the sound wave travel time in microseconds
 duration = pulseIn(echoPin, HIGH);
 // Calculating the distance
 distance= duration*0.034/2;
 // Prints the distance on the Serial Monitor
 Serial.print("Distance: ");
 Serial.println(distance);
 delay(2000);
 }
We hope that you learn the working of the ultrasonic sensor with the nodemcu. You must try to make it now on your own for better understanding. If you have any doubts regarding the project then ask them in the comments section below. You can also read our tutorials on Arduino and Raspberry Pi.
Video Sample


