
Welcome to Techatronic. Are you in need of making a Touchless Water Tap using Arduino? In this article, we are going to make a Touchless Automatic Water Tap Using Arduino and some other components. We will also share the complete build guide which includes the Circuit Diagram and Arduino Code. on our website, We have uploaded various articles on topics such as Arduino Projects, Arduino Tutorials, and Basic Electronics and Embedded Projects. You can visit them if you are a beginner and want to learn.
What is Touchless Water Tap?
Touchless water tap is a new technology developed to prevent unnecessary water usage by preventing the water flow. This is also gaining popularity in large public crowded places such as malls and restaurants, where people share the tap allowing the transfer of germs and bacteria. So, the use of this type of taps and faucets is gaining popularity. A sensor detects the position of the hand or any other object and turns on and off a water pump on another side.
Since the technology is relatively new, Buying this from the market is quite costly. Using Arduino, We can make this a DIY project which also works as good as a branded one. Many Other DIY projects such as Touchless Hand Sanitizer Dispenser, Touchless Hand Wash Soap Dispenser can also be made using the same principle. We can also use an Ultrasonic Sensor in place of an IR Sensor to detect the presence of the hand. We have already done a project on How to Make A Automatic Soap Dispenser using Ultrasonic Sensor.
How does This work?
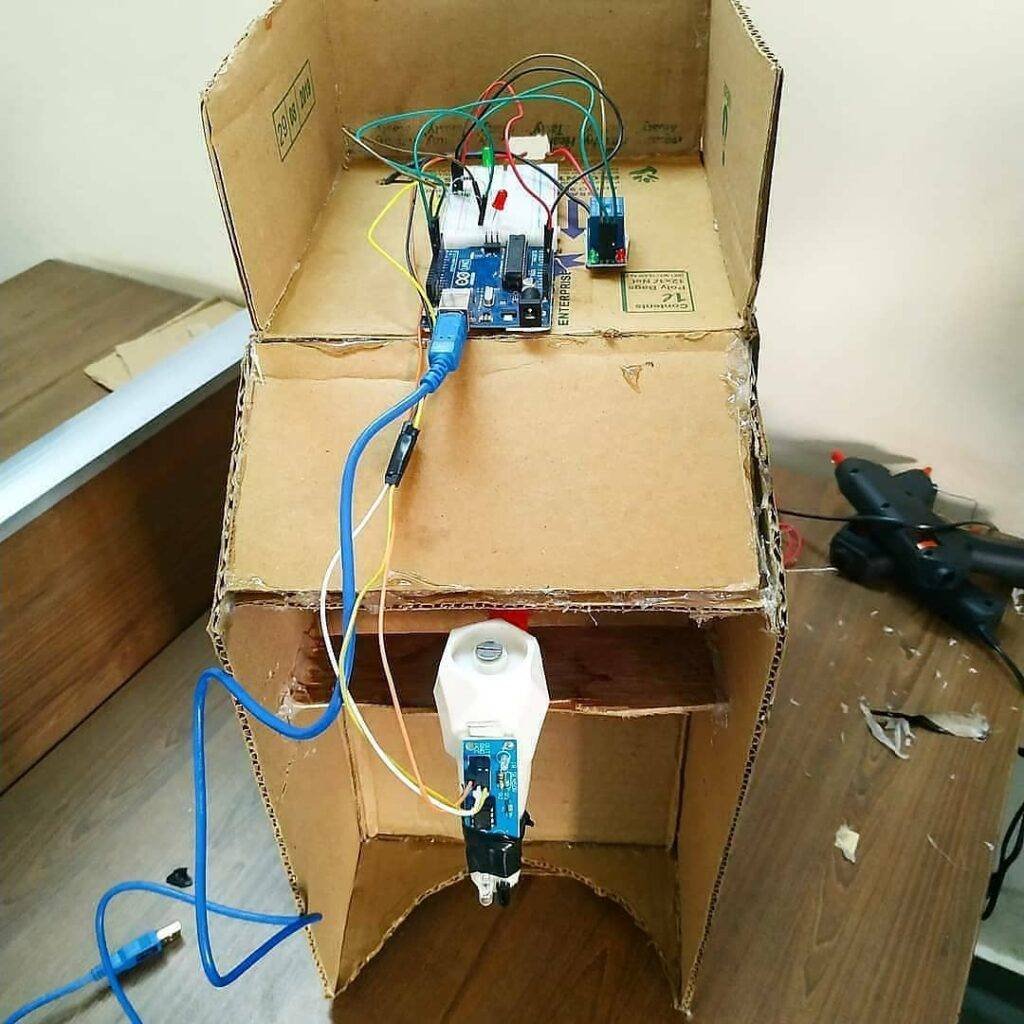
In this project, we are using an IR sensor, which detects the presence of a hand or some other object using Infrared Radiation. When a hand is detected, it generates a Digital signal which is sent to the Arduino UNO. When the signal is HIGH, the Arduino makes the Green LED glows and also activates the relay module which turns on the 12v DC water pump and the water comes out from the tap.
While the Sensor is not detecting any presence of the hand, Red LED glows continuously and the water pump is also off. The IR sensor needs to be placed right above the water outlet point for better working.
Components Required
| Arduino UNO | BUY LINK |
| IR Sensor | BUY LINK |
| Single Channel Relay Module | BUY LINK |
| 12V DC Water Pump | BUY LINK |
| 12V DC Power Supply | BUY LINK |
| LED(Green And Red) | BUY LINK |
| 2x 220-ohm Resistor | BUY LINK |
| Jumper wires | BUY LINK |
| Breadboard | BUY LINK |
| USB Cable to connect Arduino UNO to Computer | BUY LINK |
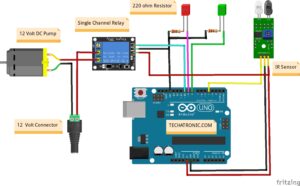
Arduino Automatic Water Tap Circuit Diagram
Arduino Automatic Water Tap Code
 // Techatronic.com
 int val = 0 ;
 void setup()
 {
  Serial.begin(9600);
  pinMode(4,INPUT);  // IR sensor output pin connected
  pinMode(8,OUTPUT); // Green led pin
  pinMode(9,OUTPUT); // Red led pin
  pinMode(10,OUTPUT); // Relay
  pinMode(10,HIGH);  // Relay
 }
 void loop()
 {
  val = digitalRead(4); // pir sensor output pin connected
  Serial.println(val); // see the value in serial monitor in Arduino IDE
  delay(100);
 if(val == 1 )
 {
  digitalWrite(8,HIGH);  // Green led on
  digitalWrite(9,LOW);  // Red led off
  digitalWrite(10,HIGH); // Relay Module
 }
 else
 {
  digitalWrite(8,LOW);  // Green led off
  digitalWrite(9,HIGH); // Red led on
  digitalWrite(10,LOW); // Relay Module
 }
 }
After Uploading the code, we need to connect one end of the water pump with a water source and power it as shown in the circuit diagram. we also need to adjust the range of the IR sensor for a good response. Also, keep the circuit away from the water source as water can cause damage to the circuit, which may lead to malfunctioning. I hope you found this article helpful. If you have any queries, you can post them in the comment section below.