
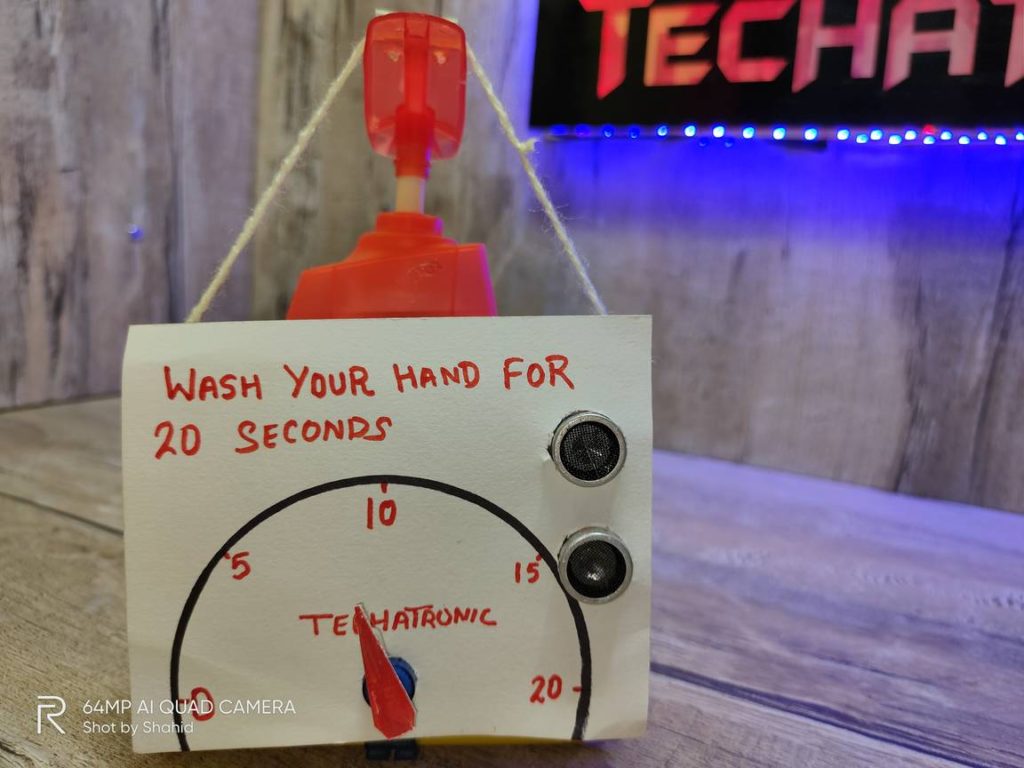
Welcome back to the Techatronic, In this project, we are making the automatic soap dispenser using Arduino. at this time this project is very useful. As we all know in this tough time of Covid-19 it can be helpful for all. which can auto dispense hand wash and having a timer watch of 20 seconds which can help you to give the 20 seconds for hand wash? if you will use this project you will wash your hand automatically for 20 seconds. So, you should try this project and use into your family as well as in other places. many of the people also making other projects to help in this situation we did also something that can be helpful. We made it with the Arduino and the servo motors. there is only 1 sensor that detects the person and gives the soap to that person. so this is very easy and simple to make. so, once you will start the project you will automatically feel how it is easy as our more projects like heart rate monitor project. Now, we are going to share with you how does it work in the next paragraph.
How does it work?
In this paragraph, we will share how does automatic soap dispensers work. start with working, when we place our hand in front of the DIY soap dispenser there is a sensor place at the dispenser and it will detect your hand in front of the sensor and then the soap will dispense in your hand. from that moment the timer will start to count 20 seconds. as we know the recommended time for wash is 20 seconds. so, after 20 seconds all will be reset like before. now we will talk about the deep working of sensors and all things work. there is an ultrasonic sensor which works on the ultrasonic waves. there is a transmitter and the receiver in the ultrasonic sensor which transmit the ultrasonic waves from the transmitter and the waves come back after the incident from the target. and the receiver receives the transmitted wave. then send to the Arduino microcontroller which processes the data and measure the distance with the time and speed formula.
distance = time X speed
of the ultrasonic wave = 340 m/s
if the distance will more than 15 centimeters then it will send an instruction to the servo motors. and servo motor presses the dispense and it dispenses the soap in the hand of the person. then there is a timer on the dispense which starts to count the 20 seconds as you can see in the image given below. automatic soap dispenser project uses a servo motor for the timer. we set the speed of the servo motor at which it can complete the 180 degree’s in 20 second and after that, a semi-circle has been drawn over the paper of timer. and after 20 seconds the whole system will restart again and ready to use again. so without touching the whole setup, you get the soap and the 20 seconds timers as well. I think this is a very good project which can help a lot. we are giving you the code and circuit diagram using in this project. Now we will see the required component to make Arduino automatic soap dispenser
At the point when it went to the hand wash, the highest point of the distributor was smooth, so I included a guide rail and screw as found in the photograph to keep the system from sneaking off. Here I am utilizing a LiPo battery to control the framework, so I added a LiPo check to demonstrate when the battery goes low. It keeps going about seven days on this battery however I sure I can utilize a force bank or a battery and putt the Arduino in a lower power state. This would make the battery last more.
Learn 10+ basic activity & sensor interfacing with our Arduino ebook. Well explained program. And brief circuit diagram WhatsApp and email support. which will help you to learn basic electronics, Arduino Coding, Sensor interfacing with Arduino, Arduino, and much more. buy Arduino Ebook to learn https://techatronic.com/arduino-ebook/
Components Required for automatic soap dispenser
- Arduino NANO or Uno (any version) –BUY LINK
- HC-SR04 Ultrasonic Sensor –BUY LINK
- Servo Motors –BUY LINK
- Jumper Wires –BUY LINK
- On-Off switch –BUY LINK
- Battery –BUY LINK
Circuit Diagram for automatic soap dispenser
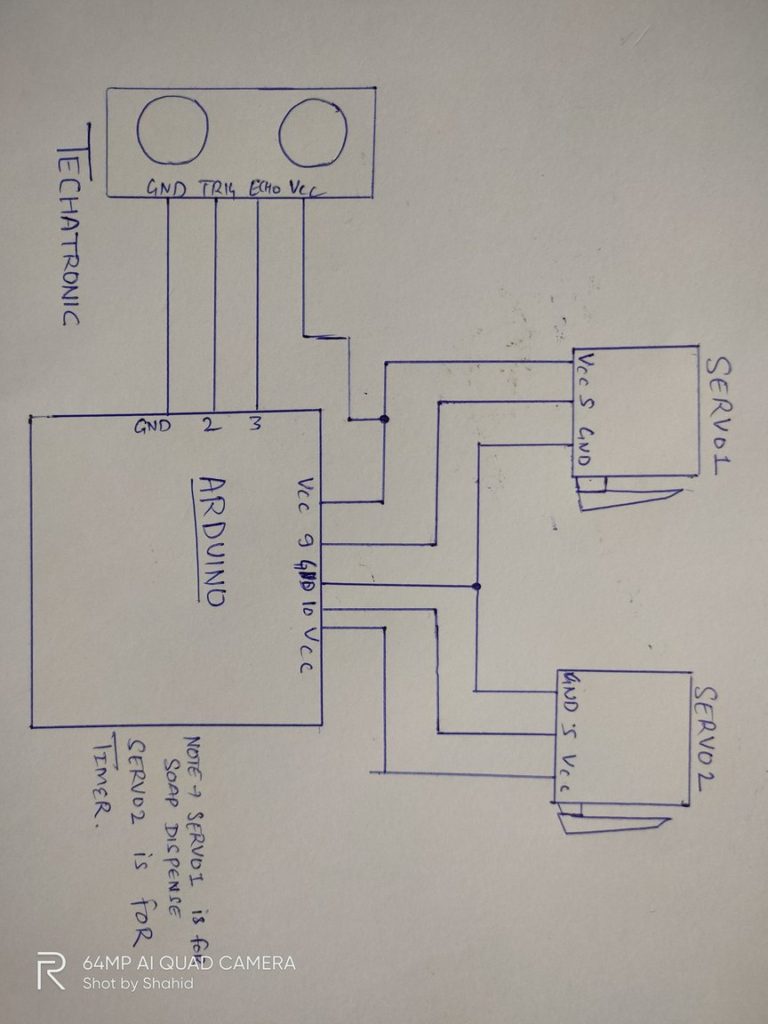
The given diagram is very easy. make sure all the connections should be made properly as the given diagram. do not short circuit the connections. switch off the power supply during the connections.
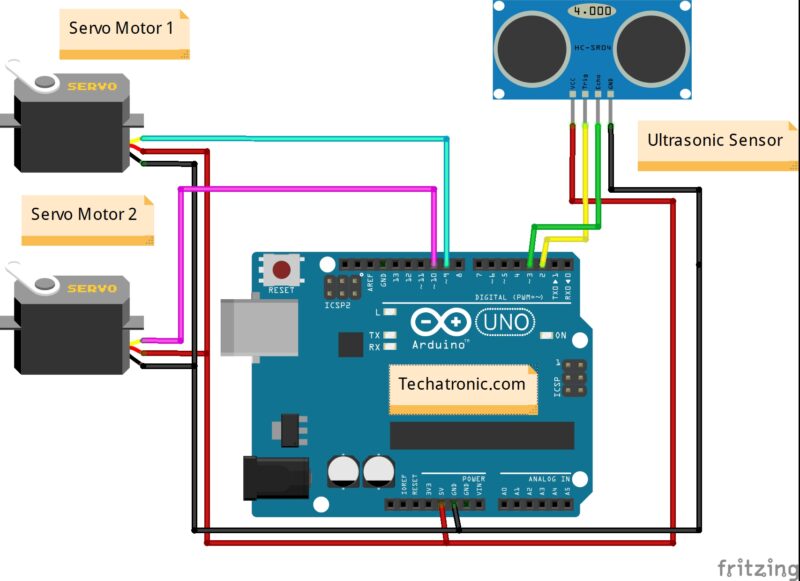
| Arduino UNO | Ultrasonic Sensor 1 | |
| ( +5V ) | VCC | |
| GND | GND | |
| D2 Pin | Trig Pin | |
| D3 Pin | Echo Pin | |
| Arduino UNO | Servo Motor 1 | Servo Motor 2 |
| D9 Pin | OUT Pin | |
| D10 Pin | OUT Pin | |
| ( +5V ) | VCC | VCC |
| GND | GND | GND |
- Connect Ultrasonic sensor Gnd to the Arduino Gnd
- Connect Ultrasonic sensor Vcc to the Arduino +5v
- Connect Ultrasonic sensor TRIG to the Arduino PIN 2
- Connect Ultrasonic sensor ECHO to the Arduino PIN 3
- Connect Servo 1 Vcc to the Arduino +5v & Servo 2 Vcc to the Arduino +5v
- Connect Servo 1 Gnd to the Arduino Gnd & Servo 2 Gnd to the Arduino Gnd
- Connect Servo 1 pot pin to the Arduino PIN 9
- Connect Servo 2 pot pin to the Arduino PIN 10
Code for Arduino automatic soap dispenser
#include <Servo.h>
Servo myservo;
Servo myservo1;// create servo object to control a servo
// twelve servo objects can be created on most boards
int pos = 0;
int duration_front=0;
long distance_front=0;
void setup() {
// put your setup code here, to run once:
myservo.attach(9);
myservo1.attach(10);
myservo.write(180);
myservo1.write(180);
pinMode(2,OUTPUT);
pinMode(3,INPUT);
pinMode(9,OUTPUT);
pinMode(10,OUTPUT);
Serial.begin(9600);
}
void loop() {
digitalWrite(2, HIGH);
delayMicroseconds(10);
digitalWrite(2, LOW);
delayMicroseconds(2);
duration_front= pulseIn(3,HIGH);
distance_front=duration_front*0.034/2;
Serial.println(distance_front);
if(distance_front<=10)
{
// put your main code here, to run repeatedly:
myservo.write(180); // tell servo to go to position in variable ‘pos’
myservo.write(0); // tell servo to go to position in variable ‘pos’
delay(500); // waits 15ms for the servo to reach the position
myservo.write(180); // tell servo to go to position in variable ‘pos’
delay(500); // waits 15ms for the servo to reach the position
// waits 15ms for the servo to reach the position
for (pos = 180; pos >= 0; pos -= 1) { // goes from 180 degrees to 0 degrees
myservo1.write(pos); // tell servo to go to position in variable ‘pos’
delay(113); // waits 15ms for the servo to reach the position
}
}
}
Upload the given code into the Arduino with Arduino IDE and if you want to learn how to upload code in the Arduino using Arduino IDE.
Watch Full Video Here