

Hey guys, welcome back to Techatronic. Today we are going to look at the top 10 IOT projects which you can give it a try. IoT, to put it briefly, is the idea of linking any device to the internet and other devices that are connected. To gather and exchange data, every instrument in the network communicates with every other instrument.
IoT is being used widely nowadays to reduce human burden. IoT is used in a variety of applications, including smart grids, smart cities, smart cars, wearables (watches and bracelets), smart farming, smart retail, smart cars, and smart healthcare. With so many potential uses, the Internet of Things appears to have a brighter future than it did in the past. We present to you the best internet of things projects for 2020 in this article.
1. Smart Irrigation System With Email Notification
We are going to use an ESP32, a pump, a relay, an ultrasonic sensor, and a moisture sensor v1.2 in this smart irrigation system with email and ESP32. We will go over each part in detail and how it operates. According to the program we’re going to write, the ESP32 would sense when the soil’s moisture content dropped below a certain point and activate the water pump for a brief period of time.
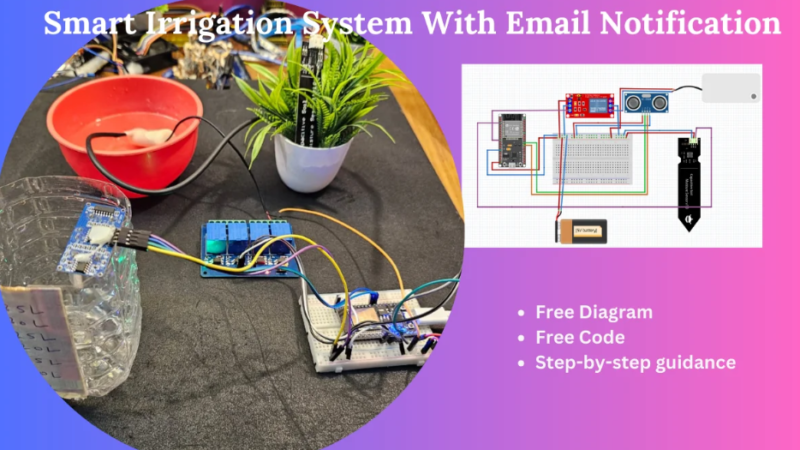
We also need a water storage container so that we can water our favorite plants. This project is unique in that we will write a program that, upon detecting a drop in the water level below a predetermined threshold, will email you. Isn’t that a neat feature?
Components Required
| ESP32 | BUY LINK |
| Breadboard | BUY LINK |
| 5v relay | BUY LINK |
| Ultrasonic sensor | BUY LINK |
| Moisture Sensor v1.2 | BUY LINK |
| Water pump | BUY LINK |
2. IoT Based Patient Health Monitoring| SPO2, Heart rate and Temperature
In essence, this is for the patient who is unable to see their physician in person to ask questions regarding their health. The doctor will receive all of the information on the same app, and they can check from home. Only physicians with Internet access may use the application. even though internet access is required for both sites.
Here, we’re making use of Blynk, a third-party server. Continuous data transmission from the device, or nodemcu, to the server is received by the mobile application on the phone and shown to the user.

Although there are a lot of health tracking gadgets available, we’ve developed a project that lets you monitor your data from anywhere in the globe as long as you have access to a functional internet connection.
For remote patient monitoring, this Internet of Things health monitoring project is very beneficial. We will only share all of the information with you here. You need to know the fundamentals of electronics and the ESP8266 in order to learn and build this.
Components Required
- ESP8266 (nodeMCU)
- MAX30100
- MLX6014
- Zero PCB
- Hook up wires
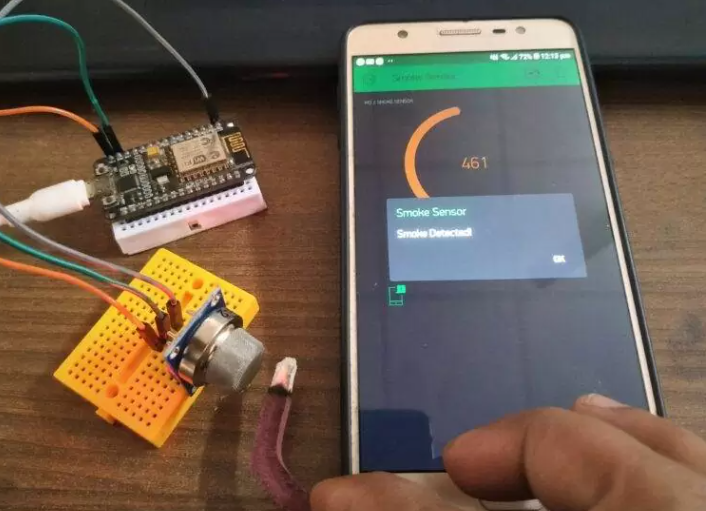
3. Blynk Smart Smoke Detector | MQ-2 Gas Sensor
You may have seen Smoke Detectors in various places, like library, school, labs, offices etc. These smoke detectors are installed to prevent any fire accidents. You know any little spark can put your whole house on fire. This MQ-2 Gas sensor can detect the smoke and send you the alert on your mobile app.
Components Required
- NodeMCU esp8266 board
- USB cable for uploading the code
- MQ2 gas sensor
- breadboard and jumper wires
- Smartphone with a good internet connection
| NodeMCU esp8266 | BUY LINK |
| USB cable for uploading the code | BUY LINK |
| MQ2 gas sensor | BUY LINK |
| breadboard | BUY LINK |
| jumper wires | BUY LINK |
4. Blynk water level indicator
It’s very basic and simple to set up. We’ll also control the pump and show an alert using the Blynk App. We intend to upload the Arduino demonstration soon, even though we haven’t done so yet. You can obtain details until then by visiting a few reference projects. Arduino and Blynk Ultrasonic Sensor (without HC-SR04) power the water level indicator. So let’s avoid wasting any more time and get straight to the point.

Components Required
- NodeMCU (ESP8266 MOD)
- 16×2 LCD with I2C module
- Relay module
- DC pump
- Ultrasonic sensor (HC-SR04)
- 12v power supply
- Jumper Wire
- Breadboard
| NodeMCU (ESP8266 | BUY LINK |
| 16×2 LCD | BUY LINK |
| I2C module | BUY LINK |
| Relay module | BUY LINK |
| DC pump | BUY LINK |
| Ultrasonic sensor (HC-SR04) | BUY LINK |
| 12v power supply | BUY LINK |
| Jumper Wire | BUY LINK |
| Breadboard | BUY LINK |
5. Blynk Home Automation
We will connect a relay or relays to the NodeMCU today and use WiFi to connect it to the internet. We can use the Blynk App or the included physical button to control the electrical appliances in our homes. It’s not that difficult; all you need to do is focus a little. Don’t panic.
The module that is built upon is the ESP8266. It’s an integrated Wi-Fi chip. There are a lot of other models on the market, so you can pick any one. I’ll use this version for today’s project, but I will also be working on some other models.
Components Required
- NodeMCU(ESP8266)
- Relay Module(4 in 1)
- LED(s) (for demonstration only)
- A phone with Blynk App installed
- Push Buttons
- Jumper Wires
- Breadboard
- AC fan
| NodeMCU(ESP8266) | BUY LINK |
| Relay Module(4 in 1) | BUY LINK |
| LED(s) | BUY LINK |
| A phone with Blynk App installed | BUY LINK |
| Push Buttons | BUY LINK |
| Jumper Wires | BUY LINK |
| Breadboard | BUY LINK |
| AC fan | BUY LINK |
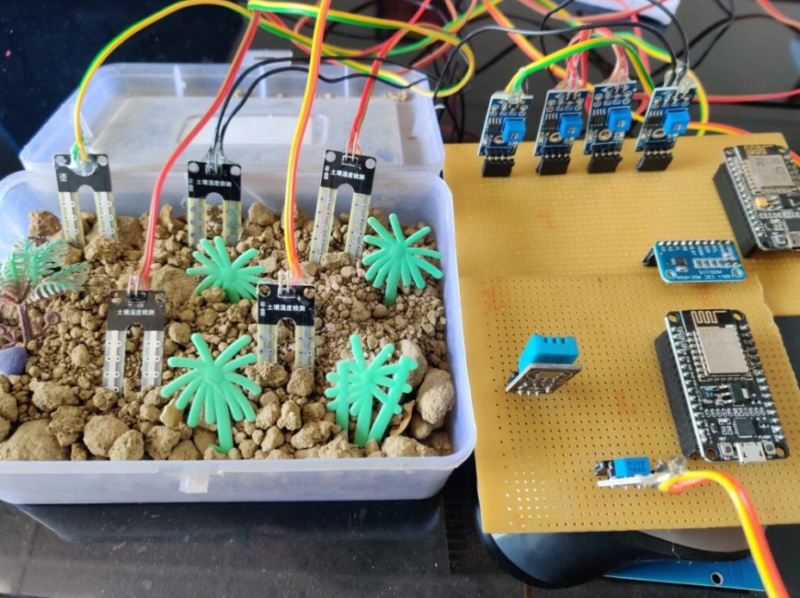
6. smart farming using IoT
This is smart farming powered by IoT. This project shares characteristics with our most recent IoT-based smart agriculture project in that sensor data will be stored on a server. Still, more than six sensors will be used in this project.
But this will be very challenging because we’ll be using seven sensors in addition to the esp8266. We’ll be using a lot of analog pins, even though the NodeMCU only has one. Despite having completed this challenging task, we will still share all the information and specifics with you all. This represents the next wave of IoT farming ideas. Agriculture could also benefit from this.
Components Required
- NodeMcu-2
- General-purpose PCB
- 4 channel ADC multiplexer
- 5 soil moisture sensor
- DHT11
- Breadboard
- Jumper wires
- connecting cables
| NodeMcu-2 | BUY LINK |
| General-purpose PCB | BUY LINK |
| 4 channel ADC multiplexer | BUY LINK |
| 5 soil moisture sensor | BUY LINK |
| DHT11 | BUY LINK |
| Breadboard | BUY LINK |
| Jumper wires | BUY LINK |
| connecting cables |
7. IoT Door Lock Using Esp32 and KME Smart
It’s easy and enjoyable to make the Internet of Things door lock project. Every step that will be very helpful to you is included there. The Kme platform is very easy to use. In order to create Internet of Things projects, coding is not necessary. We need to connect our esp32 to the computer before we can upload the sketch.
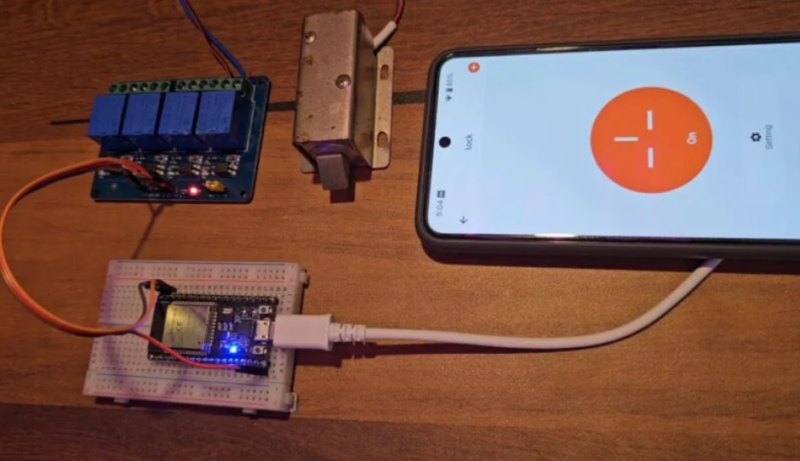
You can use this portable, IOT-enabled smart door lock anywhere. anywhere—at work, home, school, or otherwise. To build this little project, we are using an esp32 and a solenoid lock. What an amazing IoT door lock tool. and here, we’ll walk you through each step of building and using it.
Components Required
- ESP32S
- Solenoid lock
- 5v single-channel relay module
- Jumper Wire
- Breadboard
| ESP32S | BUY LINK |
| Solenoid lock | BUY LINK |
| 5v single-channel relay module | BUY LINK |
| Jumper Wire | BUY LINK |
| Breadboard | BUY LINK |
8. Wi-Fi Controlled Robot | NodeMCU esp8266
Are you trying to find a wifi-controlled robot that works without a network connection? If so, continue with the instructions we’ll go over to build an IoT development board, a NodeMCU esp8266, that can control a robot over wifi. Before you start, set up your Arduino IDE to upload the code to NodeMCU.

The IP address of this robot can be used to control it. The robot can move in several different directions. You can change the robot’s direction by tapping on the corresponding buttons. Also, take a look at our numerous IoT projects. The wheels are being controlled by an L298N motor driver module. You can also see the smartphone-controlled SPY robot in action.
Components Required
- NodeMCU esp8266
- 4 DC gear motors with wheels
- L298N motor driver module
- A switch and a 9 – 12-volts DC power supply
- Smartphone with a good internet connection
- USB cable for uploading the code
- Jumper wires and a Breadboard
- On-Off switch
- Jumper wire
- Breadboard
| NodeMCU esp8266 | BUY LINK |
| 4 DC gear motors | BUY LINK |
| wheels | BUY LINK |
| L298N motor driver module | BUY LINK |
| Switch ON OFF | BUY LINK |
| 12-volts DC power supply | BUY LINK |
| Smartphone with a good internet connection | |
| USB cable for uploading the code | BUY LINK |
| Jumper wires | BUY LINK |
| Breadboard | BUY LINK |
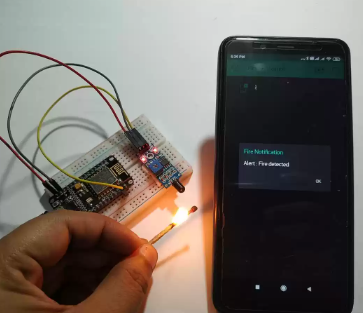
9. Blynk Fire Alarm
The infrared spectrum that is emitted whenever there is a fire is detectable by any infrared camera or detector. These seem to be highly priced, though. We can use an IR receiver led or photodiode to receive the infrared spectrum emitted by fire at a lower cost.
The photodiode is less efficient than other imaging technologies. It can be used in this manner, though. The sensor has a potentiometer that lets you change the values that are sent to the microcontroller. It can generate outputs that are digital or analog.
But bear in mind that even though photodiodes function well in this context. However, sunlight can damage it because it contains infrared light, which a photodiode can detect and cause the sensor to malfunction or produce incorrect readings.
Component Required
- NodeMCU (ESP8266 MOD)
- Flame sensor
- Jumper wires
- Breadboard
- Phone with Wi-Fi connection
| NodeMCU (ESP8266 MOD) | BUY LINK |
| Flame sensor | BUY LINK |
| Jumper wires | BUY LINK |
| Breadboard | BUY LINK |
| Phone with Wi-Fi connection |
10. Real-Time Data Transfer between Two ESP32 using Web-Socket Client on Arduino IDE
The popularity and usefulness of webserver projects built on Arduino and ESP32 have increased recently. But one of the biggest drawbacks of such a web server is that it is static. Put another way, you have to update the entire webpage over HTTP before you can update any data. There are several ways to fix this problem, like having the webpage automatically refresh after a short period of time.
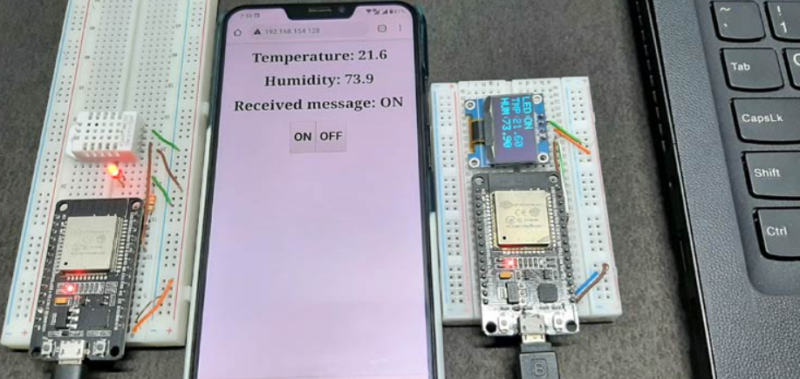
The best approach, though, is to use a WebSocket connection to get the most recent data in real-time. This method is very efficient and saves a lot of clock cycles for resource-intensive applications. Our plan is to build a WebSocket client based on ESP32 in order to establish a connection with the ESP32 Websocket server.
In order to do this, we will use the quickest and most efficient technique available to establish communication between ESP devices. Now let’s get started without further ado.