
Welcome back, friends, I’m here with another interesting post on IoT. Blynk water level indicator is today’s topic. We’re going to make today a water level indicator using NodeMCU and an ultrasonic sensor. This is very simple and easy to set up things. Also, we are going to display and alert also control the pump using Blynk App. We have not yet uploaded its demonstration on Arduino but will be soon uploaded. Until you may visit some reference projects for information. Blynk Ultrasonic Sensor, Arduino water level indicator (without HC-SR04). So without wasting time, let’s switch to the main topic.
HC-SR04:
If you guys are wondering that it is a distance sensor so how we’ll use this at water level. So don’t worry the principle and process is the same, but there is an only a slight change in coding. As explained in my detailed article on Blynk HC-SR04 tutorial, it is simple and easy to use. But briefly and in short words, I’ll explain this again.
HC-SR04 works on the principle of reflection of ultrasonic sound. The two-round things which are in front of the sensor are the speakers which send and receive ultrasonic sound. Actually, one sends and one receives. We digitally control also the events which are required to make this sensor work. Trig and echo pins are the signal pins that are used for this process.
Material Required:
- NodeMCU (ESP8266 MOD)
- 16×2 LCD with I2C module
- Relay module
- DC pump
- Ultrasonic sensor (HC-SR04)
- 12v power supply
- Jumper Wire
- Breadboard
Circuit Design:

| Nodemcu esp8266 | Ultrasonic Sensor | |
| Vin, VV | VCC ( Positive + ) | |
| G , GND | GND ( Ground – ) | |
| D3 Pin | Trig Pin | |
| D4 Pin | Echo Pin | |
| Nodemcu esp8266 | I2C LCD Module | |
| D2 Pin | SDA Pin | |
| D1 Pin | SCL Pin | |
| Vin, VV | VCC | |
| G, GND | GND | |
| 16 * 2 LCD | I2C LCD Module | |
| 16 Connect | 16 Connect | |
| Nodemcu esp8266 | Single Channel Relay Module | |
| D5 Pin | IN1 | |
| Vin, VV | VCC | |
| G, GND | GND | |
| DC Water Pump | 9-12V DC Supply | Relay Module |
| Normally Open | ||
| Positive | Common | |
| Terminal 1 | Normally Closed | |
| Terminal 2 | Negative |
PINOUT
Code & Explanation:
Explanation:
First, we include some libraries which are important for running code. Afterward, we enter our auth code and Wi-Fi details. Below which we define Trig & Echo pins of Ultrasonic Sensor.
Then in the setup section, we define pin modes and initialize physical LCD connected to NodeMCU. Also, initialize virtual display on Blynk App using BLYNK_WRITE(v0) function.
void setup() {
  pinMode(trig, OUTPUT);
  pinMode(echo, INPUT);
  pinMode(relay, OUTPUT);
  Wire.begin(D2, D1);
  lcd.init();
  lcd.backlight();
  Serial.begin(9600);
  Blynk.begin(auth, ssid, pass);
  timer.setInterval(10L, Wlevel);
  digitalWrite(relay, HIGH);
}

BLYNK_WRITE(V0) {
  pinValue = param.asInt();
}
In loop, we run two main loops which comprises all code. Then in Wlevel function we check water level using Ultrasonic Sensor and update distance on Physical LCD and Blynk App.
void Wlevel() {
  if (pinValue == 1) {
    digitalWrite(relay, LOW);
    lcd.setCursor(0, 1);
    lcd.print("Motor is ON ");
  } else if (pinValue == 0) {
    digitalWrite(relay, HIGH);
    lcd.setCursor(0, 1);
    lcd.print("Motor is OFF");
  }

  digitalWrite(trig, LOW);
  delayMicroseconds(4);
  digitalWrite(trig, HIGH);
  delayMicroseconds(10);
  digitalWrite(trig, LOW);
  long t = pulseIn(echo, HIGH);
  long cm = t / 29 / 2;

  Blynk.virtualWrite(V1, cm);
  Serial.println(cm);
  lcd.setCursor(0, 0);
  lcd.print("Water Level: ");
  lcd.print(cm);
  lcd.print("   ");
}
Code:
Here is the main code
//TECHATRONIC.COM
// ESP8266 LIBRARY
// https://github.com/ekstrand/ESP8266wifi

#include <LiquidCrystal_T2C.h>
#include <Wire.h>
#define BLYNK_PRINT Serial
#include <ESP8266WiFi.h>
#include <BlynkSimpleEsp8266.h>
LiquidCrystal_I2C lcd(0x27, 16, 2);

char auth[] = "your-auth-code";//Enter your Auth token
char ssid[] = "your-wifi-ssid";//Enter your WIFI name
char pass[] = "your-wifi-password";//Enter your WIFI password

BlynkTimer timer;
bool pinValue = 0;

#define trig D3
#define echo D4
#define relay D5

void setup() {
  pinMode(trig, OUTPUT);
  pinMode(echo, INPUT);
  pinMode(relay, OUTPUT);
  Wire.begin(D2, D1);
  lcd.init();
  lcd.backlight();
  Serial.begin(9600);
  Blynk.begin(auth, ssid, pass);
  timer.setInterval(10L, Wlevel);
  digitalWrite(relay, HIGH);
}

BLYNK_WRITE(V0) {
  pinValue = param.asInt();
}

void loop() {
  Blynk.run();
  timer.run();
}

void Wlevel() {
  if (pinValue == 1) {
    digitalWrite(relay, LOW);
    lcd.setCursor(0, 1);
    lcd.print("Motor is ON ");
  } else if (pinValue == 0) {
    digitalWrite(relay, HIGH);
    lcd.setCursor(0, 1);
    lcd.print("Motor is OFF");
  }

  digitalWrite(trig, LOW);
  delayMicroseconds(4);
  digitalWrite(trig, HIGH);
  delayMicroseconds(10);
  digitalWrite(trig, LOW);
  long t = pulseIn(echo, HIGH);
  long cm = t / 29 / 2;

  Blynk.virtualWrite(V1, cm);
  Serial.println(cm);
  lcd.setCursor(0, 0);
  lcd.print("Water Level: ");
  lcd.print(cm);
  lcd.print("   ");
}
Blynk App:
Install Blynk App from your preferred App Store Playstore | Apple AppStore. Login into app using your social accounts. After login, you’ll reach the main screen.

Create new project using any preferred name. Here I have used ‘Water Level Indicator’.
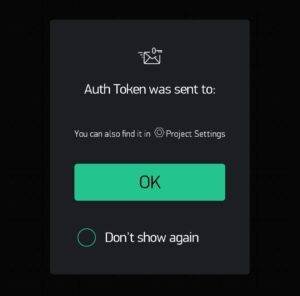
Auth token will be sent to the registered email-id used at the time of login. Put that auth code into the code mentioned above.

This is how the main project screen looks like. Now you are good to import widgets on the screen.


Import widgets as reference from above images and then the main screen will look like this.


Change setting of each widget as shown above and try to make it like the image below after all things done

This is the final snapshot of the main project screen and with this, you are ready to go.
Now plug in power-supply to NodeMCU and wait for the display to update information in both LCD and Blynk App.
With this, we have completed our tutorial on the Blynk water level indicator. I hope you find it easy. If you find an issue then ask me below. I’ll try to solve all your problems.