
Hey geeks, welcome back to Techatronic. We all are familiar with touch screen smartphones, LCDs, and many more gadgets that we use in our daily lives. This project will learn how you can make your own Touch Switch Using Arduino and Touch Sensor. For making such cool projects on your own, you can check out more projects based on Arduino. In this project, we use an Arduino UNO microcontroller board and a Touch sensor. The function of a common electric switch is to complete or break a circuit. In our project, we use a touch sensor that acts as a switch whenever we touch it. We have to touch the sensor in order to on the LED. Complete the circuit and then upload the given Arduino code. The touch switch starts working as soon as you give power to the Arduino board.

How Does it Work?
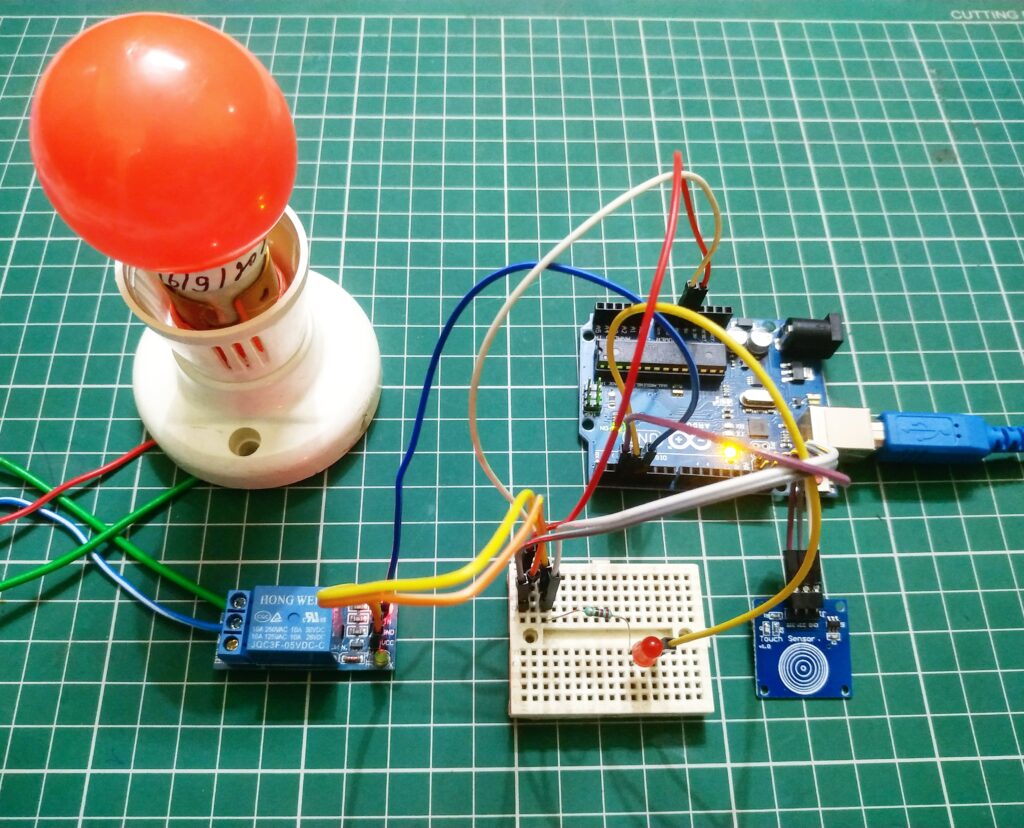
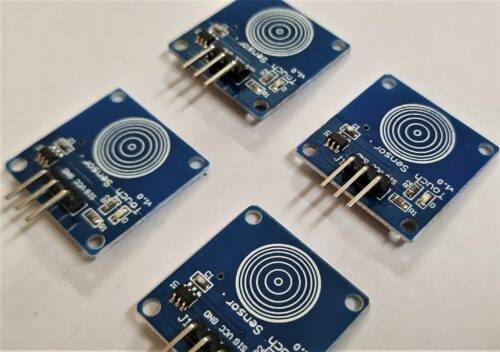
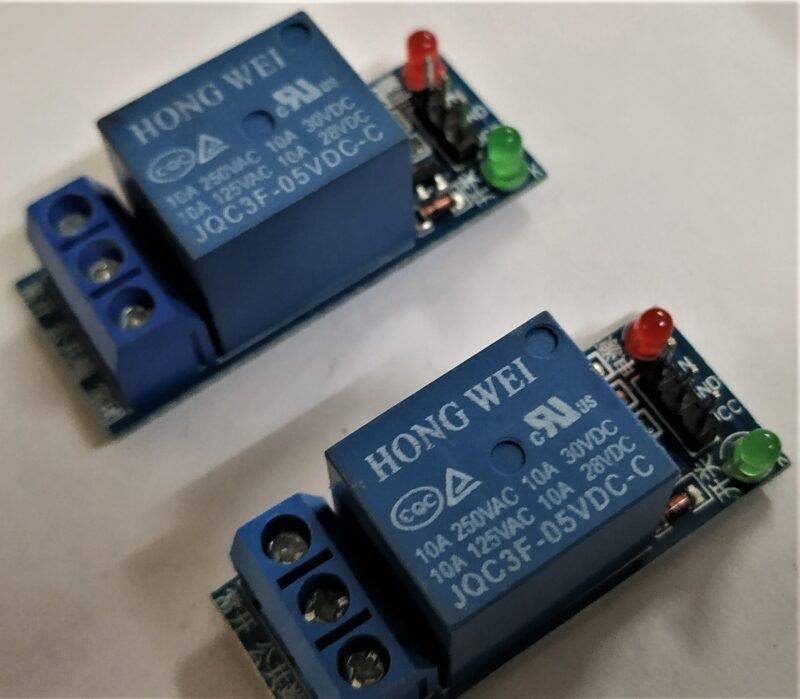
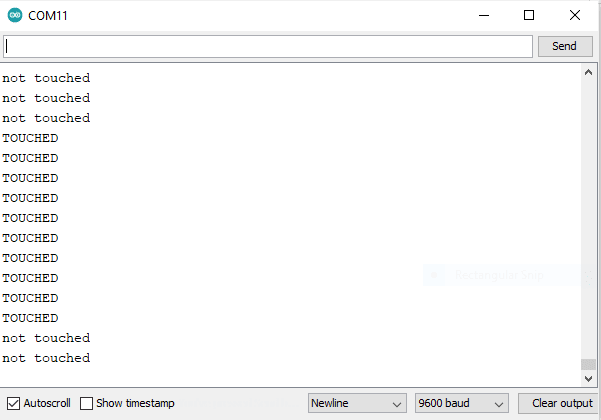
The touch sensor that we use in our project is the TTP223 capacitive touch module that offers a one-touch key. The touch sensor generates a HIGH output when we touch it on its surface and LOW output for normal conditions. When we touch the sensor the LED goes on and “TOUCHED”, this message can be seen on the serial monitor screen. Use the image given below to open the serial monitor on Arduino IDE. We can also use an AC bulb in place of LED by using a Relay module. If you are dealing with AC supply, please take proper care. To know the interfacing of a Relay module with Arduino please click here. Codes for both of the projects are given below seperately.
Components Required
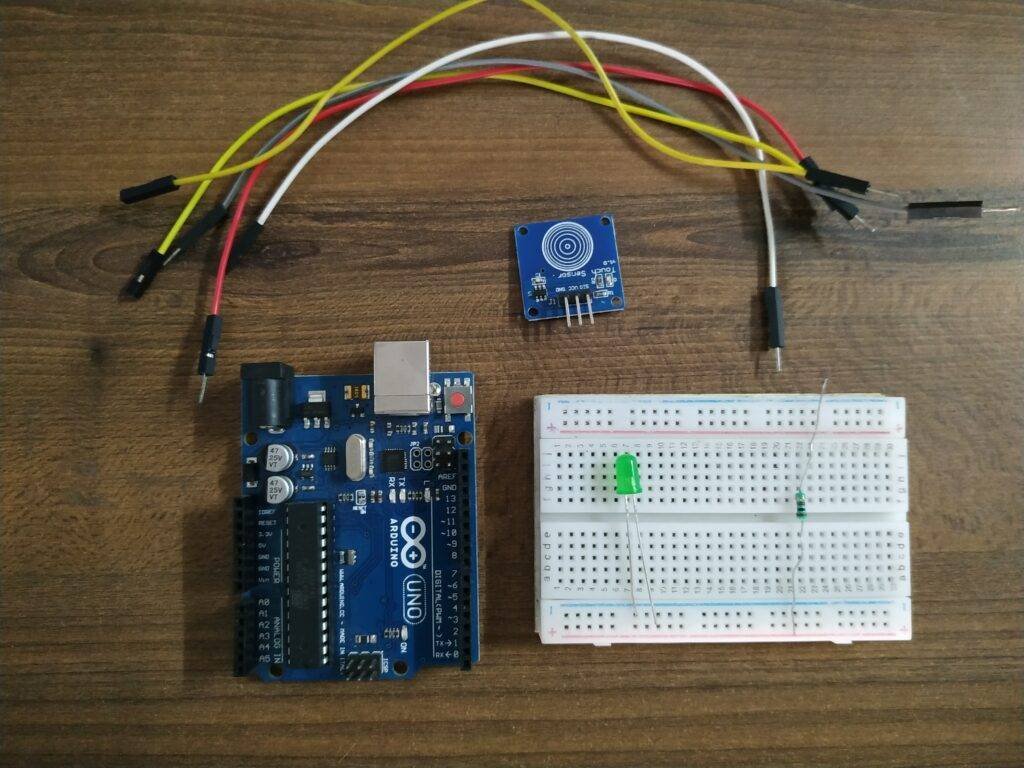
- Arduino UNO
- USB cable for uploading the code
- Touch sensor
- Jumper wires
- Breadboard
- One LED
- A 220-ohm resistor
Circuit Diagram for the Project
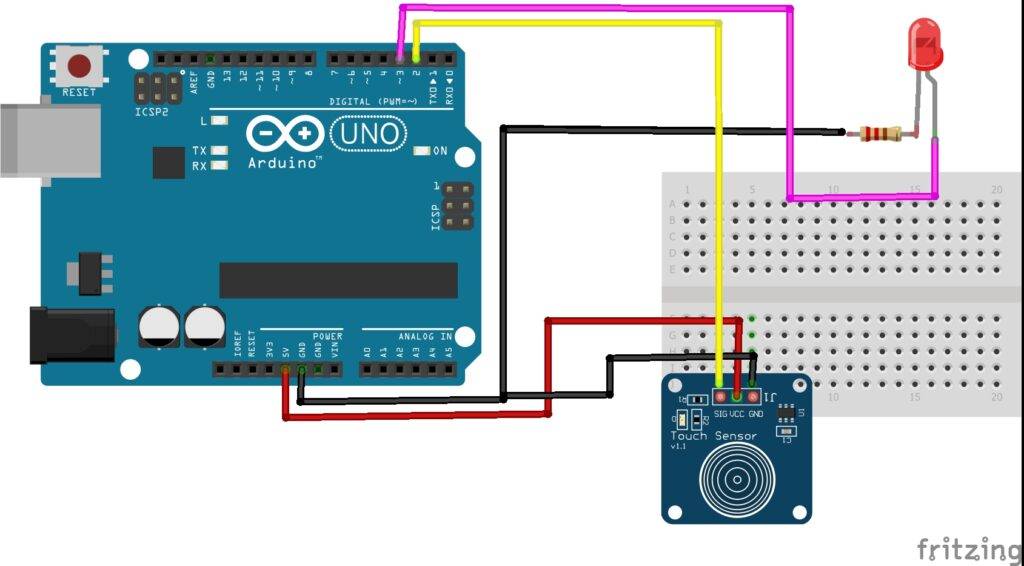

Make the connection according to the diagram given above. You can use batteries or a USB cable to power the Arduino. Connect the 5-volt pin of the Arduino to the VCC of the touch sensor module and the GND pin of the Arduino to the GND pin of the touch sensor module. Attach the signal(SIG) pin of the sensor to the digital-2 pin of the Arduino. Join the positive leg of the LED to the digital-3 pin of the Arduino and the negative wire to the GND pin of the Arduino through a 220-ohm resistor. You can use a breadboard for making the common connections easy. After that, you have to upload the given code.
Serial Monitor Screen Look Like This


Code for the Touch Switch
NOTE: Please upload the given code to the Arduino according to the circuit you have made.
- Code for operating an LED
#define tsPin 2  // touch sensor pin
int ledPin = 3;  // led pin

 void setup()
 {
     Serial.begin(9600);       //sensor buart rate
     pinMode(ledPin, OUTPUT);  // led
     pinMode(tsPin, INPUT);    //  touch sensor
     }
  void loop()
    {
      int tsValue = digitalRead(tsPin);
      delay(100);

      if (tsValue == HIGH)
        {
           digitalWrite(ledPin, HIGH); // led on
           Serial.println("TOUCHED");
           }
     else
        {
         digitalWrite(ledPin,LOW);     // led off
             Serial.println("not touched");
          }
      }
- Code for operating an AC bulb
int touchPin = 2; // touch sensor
int ledPin   = 3; // led pin
int relayPin = 4; // relay module


int val = 0;
int lightON = 0;
int touched = 0;

void setup() {
  Serial.begin(9600);        //sensor buart rate
  pinMode(touchPin, INPUT);  //  touch sensor
  pinMode(relayPin, OUTPUT); // Relay Module
  pinMode(ledPin, OUTPUT);   // led

  digitalWrite(relayPin, HIGH); // Normally Relay

}

void loop() {

  val = digitalRead(touchPin);

  if(val == HIGH && lightON == LOW){

    touched = 1-touched;
    delay(100);
  }

  lightON = val;

      if(touched == HIGH)
      {
        Serial.println("Light ON");
        digitalWrite(relayPin, LOW); // Relay ON
        digitalWrite(ledPin, HIGH);   // led on

      }else
      {
        Serial.println("Light OFF");
        digitalWrite(relayPin, HIGH);  // Relay OFF
        digitalWrite(ledPin,LOW);     // led off

      }

  delay(100);
}

I’m sure that the given steps help you a lot in the making of your own touch switch. If you are facing any errors please do inform us in the comments section below. You can also read more Tutorials on Arduino and also on Raspberry pi.
HAPPY LEARNING!