
Hello Techie. Are you thinking of using RGB led in your project? Do you want to know to interface RGB led with Arduino? well, you are at the right place. In this article, we will be covering all these topics in a detailed guide. We will also provide you the circuit diagram and Arduino code. Hence, I hope you find this useful. We at Techatronic have already uploaded several Arduino Tutorials and detailed project guides related to Arduino which will be useful to learn the basics and programming of Arduino.
What Is RGB Led?
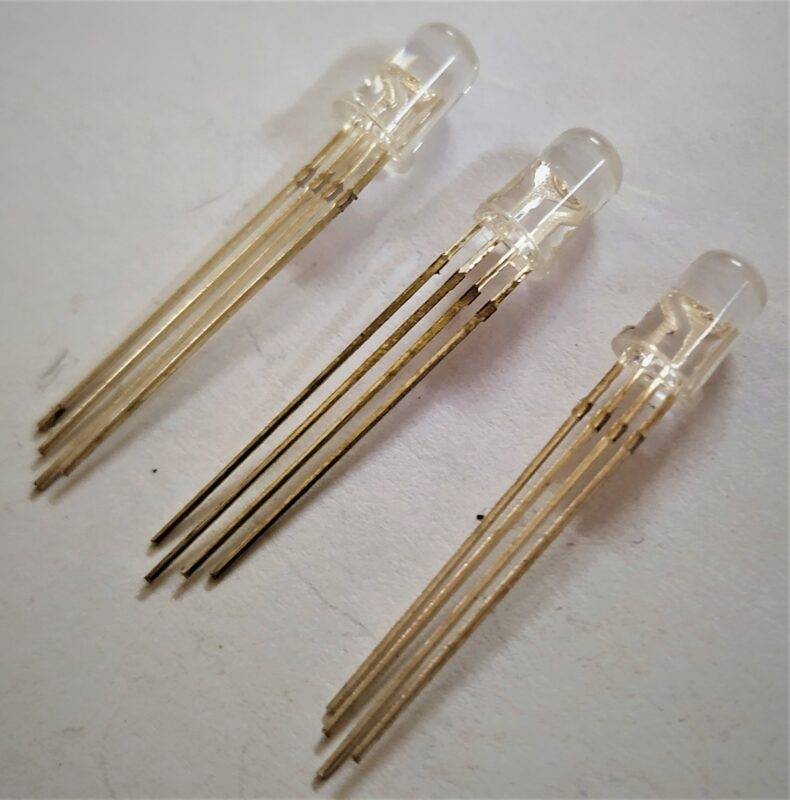
RGB led is made by adding three LEDs of Color Red, Green, and Blue. these are encased in a single led shape which can be addressed individually. This LED is capable of producing as many colors as you want using the three different LEDs. This can be done by varying the voltage supplied to the individual R-G-B pins.
This type of LED is very popular among many Electronic enthusiasts and DIY Project makers. Due to its easy-to-use application and several color outputs, this is very useful to Indicate different types of status or can be used as an indicator thereby eliminating the use of different LEDs for different colors. There are also many RGB Strips that use these LEDs in a parallel mode forming a strip that can also be used with Arduino. We will also make the projects on this using them in the future.
How RGB led With ArduinoWorks?
RGB Led also works the same as normal led work. But since it has three separate LEDs inside, it has three different terminals for each color with a common terminal. the common terminal can be an Anode or a Cathode. so there are two different types of RGB LEDs available in the market. Hence, one must be aware of this which getting the LED as per the need of the project. We are using the common Anode type for this tutorial.

Components Required
- Arduino UNO
- RGB Led(Common Anode)
- Jumper Wires
- Breadboard
- 220-ohm Resistor
- USB cable to connect Arduino UNO with computer
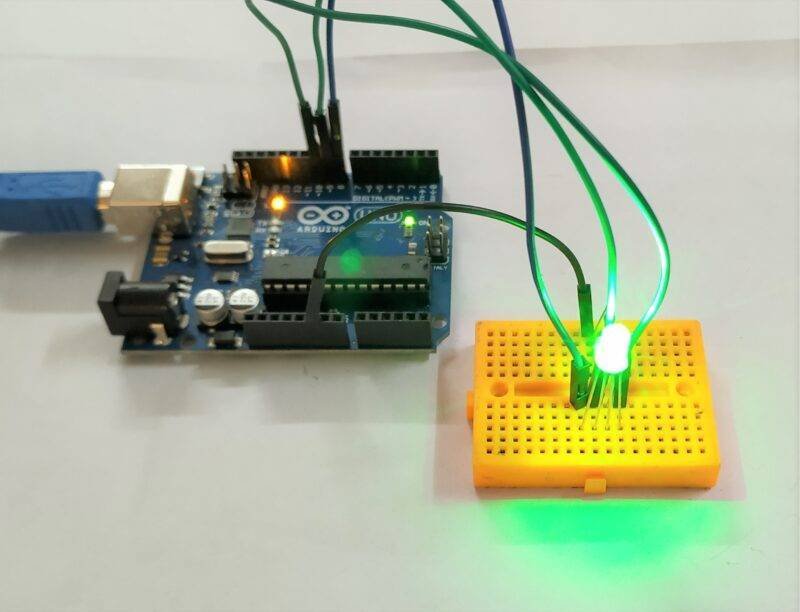
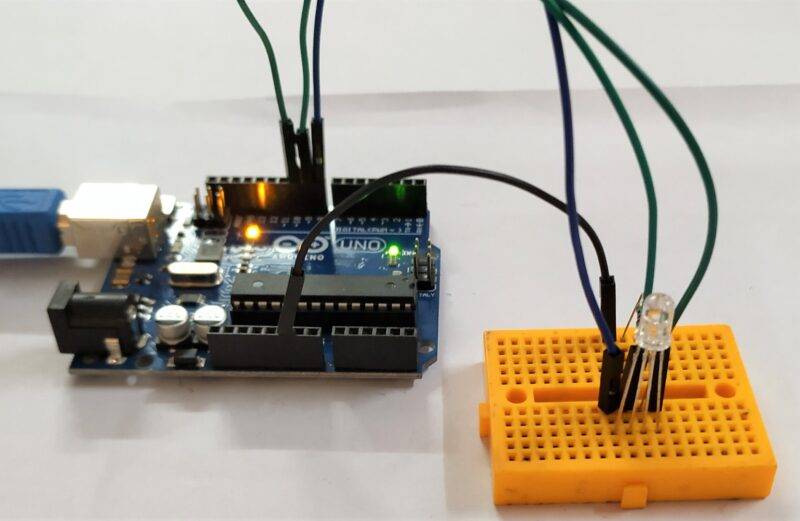
RGB LED with Arduino Circuit Diagram
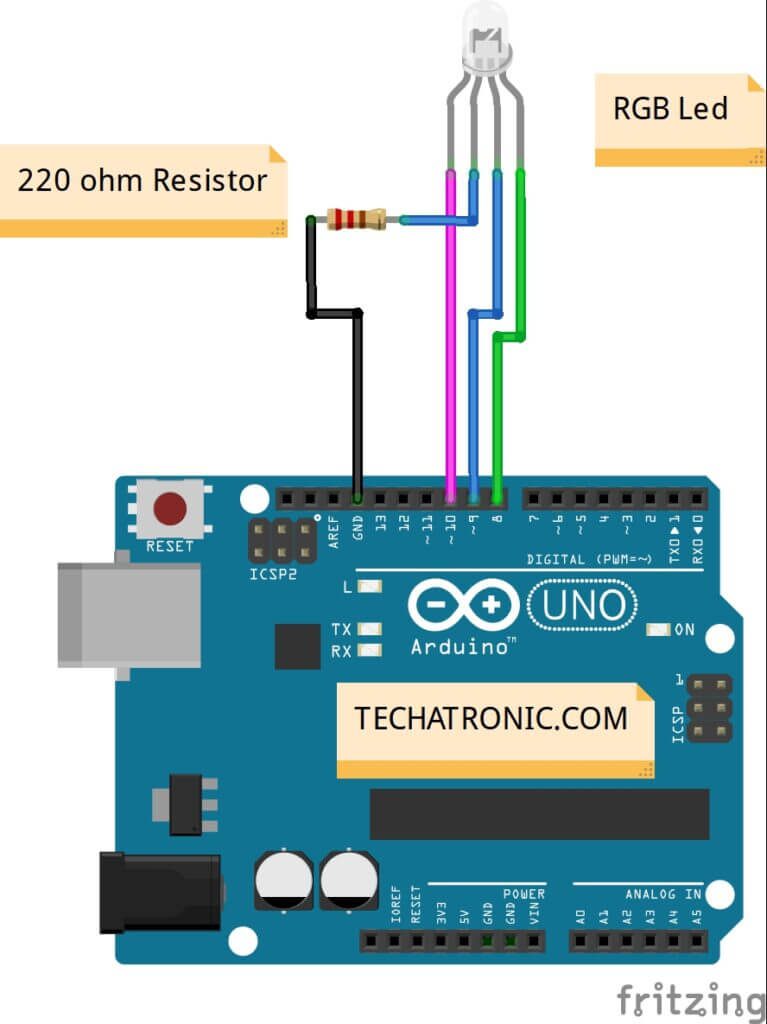
| Arduino UNO | RGB Led | 220 Ohm Resistor |
| D10 Pin | Terminal 1 | |
| Terminal 2 | Terminal 1 | |
| D9 Pin | Terminal 3 | |
| D8 Pin | Terminal 4 | |
| GND | Terminal 2 |
- Red pin of Led to D8 of Arduino UNO
- Green pin of Led to D9 of Arduino UNO
- Blue pin of Led to D10 of Arduino UNO
- GND pin of Led to GND of Arduino UNO with 220-ohm Resistor in between
Arduino RGB led code
 void setup()
 {
   pinMode(8,OUTPUT); // Red led pin
   pinMode(9,OUTPUT); // Green led pin
   pinMode(10,OUTPUT); // Blue led pin
 }
 void loop()
 {
  digitalWrite(8,HIGH); // Red led ON
  delay(1000);
  digitalWrite(8,LOW);  // Red led OFF
  delay(1000);
  digitalWrite(9,HIGH); // Green led ON
  delay(1000);
  digitalWrite(9,LOW);  // Green led OFF
  delay(1000);
  digitalWrite(10,HIGH); // Blue led ON
  delay(1000);
  digitalWrite(10,LOW); // Blue led OFF
  delay(1000);
 }

After Uploading the code, provided above, the LED connected will start blinking with each color appearing for one second and then turning off after one second and then the other color appearing sequentially.
Arduino RGB led code pattern
 void setup()
 {
   pinMode(8,OUTPUT); // Red led pin
   pinMode(9,OUTPUT); // Green led pin
   pinMode(10,OUTPUT); // Blue led pin
 }
 void loop()
 {
  digitalWrite(8,HIGH); // Red led ON
  digitalWrite(9,LOW);  // Green led OFF
  digitalWrite(10,LOW); // Blue led OFF
  delay(1000);
  digitalWrite(8,LOW);  // Red led ON
  digitalWrite(9,HIGH);  // Green led OFF
  digitalWrite(10,LOW);  // Blue led OFF
  delay(1000);
  digitalWrite(8,LOW);  // Red led ON
  digitalWrite(9,LOW);  // Green led OFF
  digitalWrite(10,HIGH); // Blue led OFF
  delay(1000);
 }
After Uploading the above code, the LED connected will glow in a pattern. I hope you liked this article. If you need any help, you can ask them in the comment section below.