
Hello Mate. Are you working on a project that requires the use of a 4×4 Keypad with Arduino? or, Do you want to know how the 4×4 Keypad works? well, you are at the right place. In this article, we’ll go over how to interface a 4×4 Keypad with Arduino in a step-by-step detailed guide. Hence, I hope you find this useful. We at Techatronic have already uploaded several Arduino Tutorials and detailed project guides related to Arduino which will be useful to learn the basics and programming of Arduino.
What Is Keypad?
The Keypad is a type of Keyboard that can be used with any microcontroller such as Arduino to input some characters manually. This can also be customized as per our needs. Many projects require the need for the keypad to input characters or process some commands with a push of a button. Some Projects include a password-protected door lock, a Basic Calculator, and many more.
These are available pre-built in two configurations. one is a 3×4 matrix with 12 individual buttons and a 4×4 matrix with 16 individual buttons. one can also make their own keypad with the use of some pushbuttons, and some connecting wires.

How Does The Arduino with Keypad Work?
The keypad is basically a set of Buttons organized next to each other to make an array of buttons. When the keys are at rest, no current passes through them. This depicts as the low state in terms of digital electronics. when current is made to pass through them, by pushing the button, the state of current changes from low to high. the microcontroller detects this high state signal and processes this further.
This Requirement for making the connections with the controller increase with the increase in rows and columns. One should keep the requirements of this in mind while making the project.
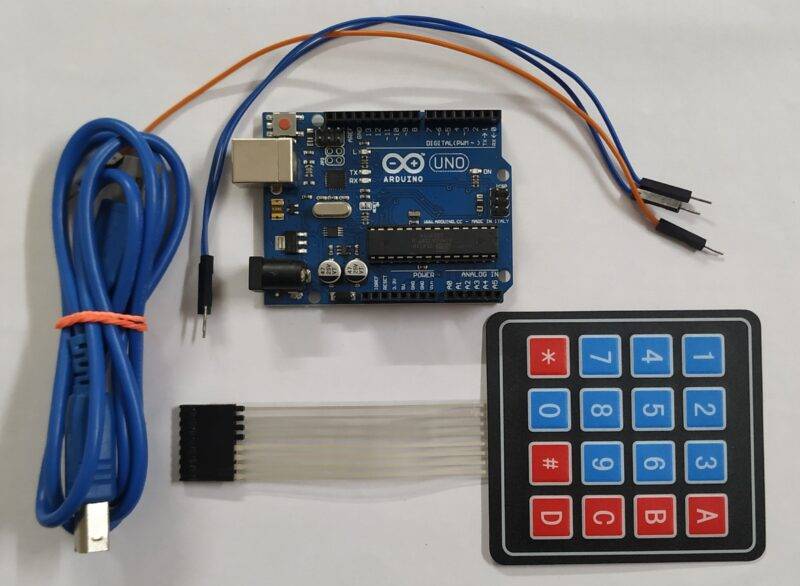
Components Required
- Arduino UNO
- Keypad (We are using a 4×4 Keypad)
- Jumper Wires
- Breadboard
- USB cable To connect Arduino With Computer
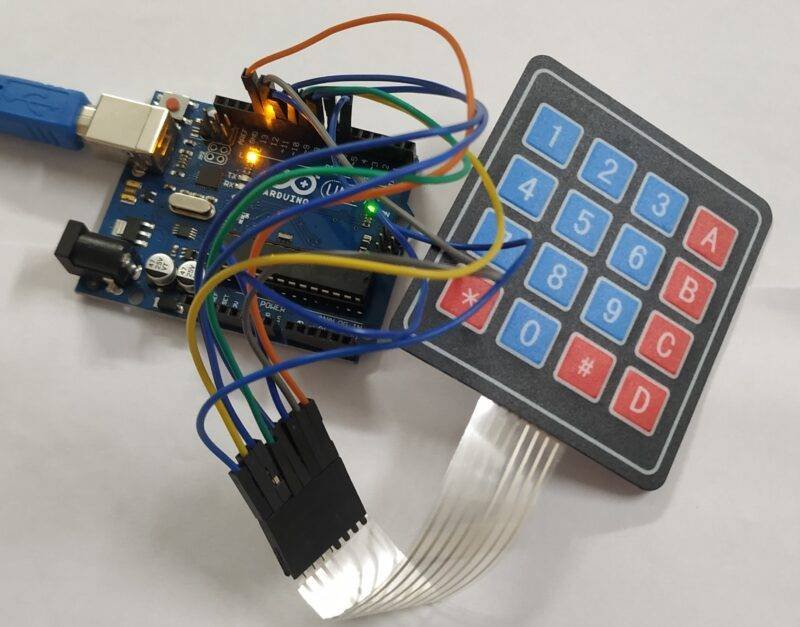
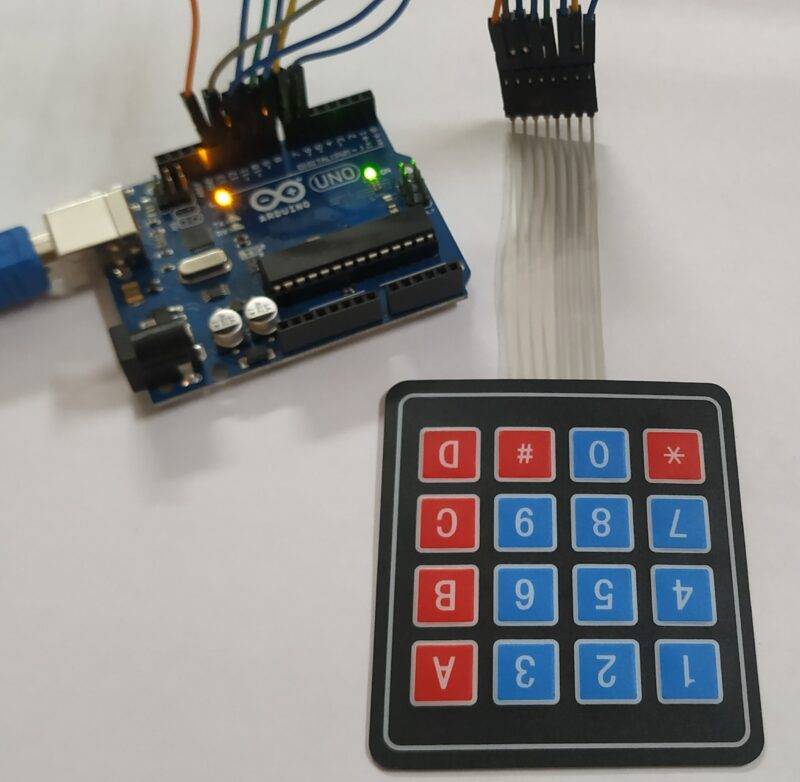
4×4 Keypad Interfacing With Arduino Circuit Diagram

| Arduino UNO | 4*4 Keypad |
| D13 Pin | 1 Row |
| D12 Pin | 2 Row |
| D11 Pin | 3 Row |
| D10 Pin | 4 Row |
| D9 Pin | 1 Column |
| D8 Pin | 2 Column |
| D7 Pin | 3 Column |
| D6 Pin | 4 Column |
- Column pins 1,2,3,4 to D6,D7,D8,D9 of Arduino UNO respectively.
- Row pins 1,2,3,4 to D10,D11,D12,D13 of Arduino UNO respectively.
Arduino Code for 4×4 Keypad
NOTE– Before you upload the code, you need to install Arduino Keypad Library from HERE.
 // Techatronic.com
 // keypad library link
 // https://github.com/Chris--A/Keypad
 #include <Keypad.h>
 const byte ROWS = 4; /* four rows */
 const byte COLS = 4; /* four columns */
 /* define the symbols on the buttons of the keypads */
 char hexaKeys[ROWS][COLS] = {
  {'D','C','B','A'},
  {'#','9','6','3'},
  {'0','8','5','2'},
  {'*','7','4','1'}
 };
 byte rowPins[ROWS] = {13,12,11,10}; /* connect to the row pinouts of the keypad */
 byte colPins[COLS] = {9,8,7,6}; /* connect to the column pinouts of the keypad */
 /* initialize an instance of class NewKeypad */
 Keypad customKeypad = Keypad( makeKeymap(hexaKeys), rowPins, colPins, ROWS, COLS);
 void setup()
 {
 Serial.begin(9600);
 }
 void loop()
 {
  char customKey = customKeypad.getKey();
  if (customKey)
  {
    Serial.println(customKey);
  }
 }
After Uploading the code then Open Serial Monitor

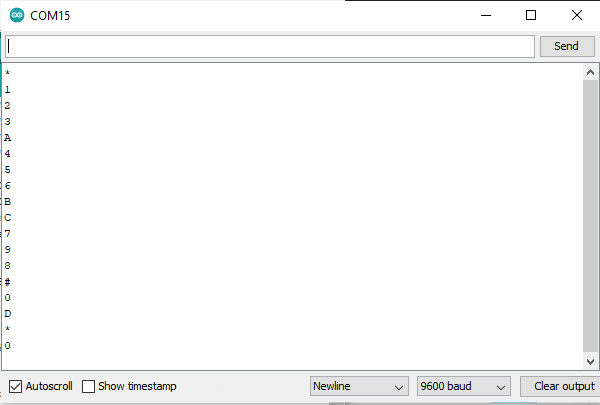
After uploading the code, open the Serial Monitor in your Arduino IDE. When You press any key on the keypad, The character corresponding to that key will be displayed on your Serial Monitor. I hope you liked this article. If you have any Query, Suggestions, or Project Ideas, You can type them in the comments section below.
