Hey guys, welcome back to Techatronic. We are sharing today how to control dc motor with Arduino? this will go to be very simple. In this article, you will learn something definitely. We are going to share every single step and all information that is necessary to make it possible. in robotics, we use dc motor in many projects. like robotics cars, Smart irrigation systems.
INTRODUCTION: –
Controlling the motion of any device or any locomotive is a very complicated and big task especially when it is for automation Today we’ll tell you how you can control a motor using Arduino and a motor driver. The driver for the motor is necessary as to drive the motor with its maximum power we have to send a signal to the driver and this can be done with the help of an l298n motor driver. Motor drivers and motors come with various rpm and power ratings so choose them wisely for better compatibility.
The two we are going to use in very famous and widely available in the market are l298n motor driver and l293d and both are necessary for control dc motor with Arduino? the motor driver which is compatible with BO geared motors and various other small ones. we must take an example to understand better if are using 4 motors in an RC car the Arduino can’t operate these all four motors. because Arduino only can give low current on 3.3-5v at each port.
DESCRIPTION: –
In this project, the main part is Arduino UNO which is the heart of the project and for movement control, we are using L298N and L293D motor drivers which are used due to their h-bride for motor driving also two signal wires for bi-direction movement. L298N is a 15 pin ic whose pinout is attached below for further reference. It comes in two packages Multiwatt-15 and powerSO20 which are for different purposes. The internal schematic of IC is a bit complicated but as a whole, it uses a combination of 4, not gates along with 2-PNP and 2- NPN transistors in two sets to control two motors simultaneously. This IC provides pins for variable power supply which is used to drive motor, i.e., if we power ic by 5v and supply voltage by 12v then motor will run on 12v but the logic in ic will be controlled at 5 v.
Due to heat generation at the time of driving motor to describe it a heat sink is attached to the icon module to provide efficient heat dissipation
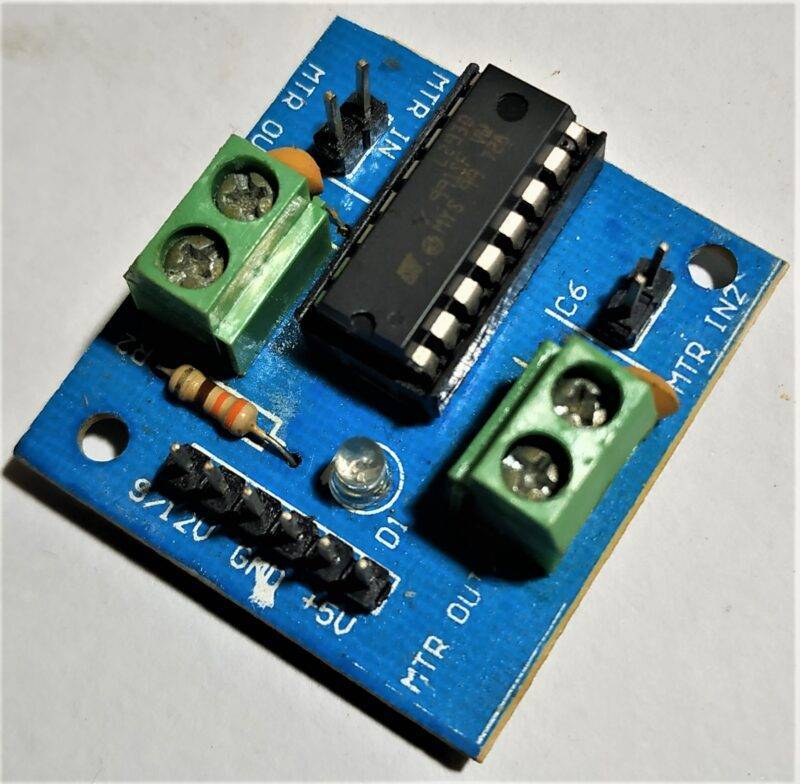
Similarly, L293D is a 16 pin IC that also works on the same as L298N but has a change in its package type.

*NOTE: – THE IC MUST BE UNDER GIVEN PARAMETERS OF VOLTAGE AND CURRENT GIVEN IN THE DATASHEET OF THE IC.
SCHEMATIC DIAGRAM: –
the schematic diagram for the L239d driver
the schematic diagram for the L298n driver
FEATURES AND APPLICATIONS: –
- Used to drive almost all small motors
- Easy to understand and use
- Good heat dissipation
- Low price
DATASHEET: –
COMPONENTS NEEDED: –
- Any microcontroller preferably Arduino Uno for beginners.
- An L298N or L293D module
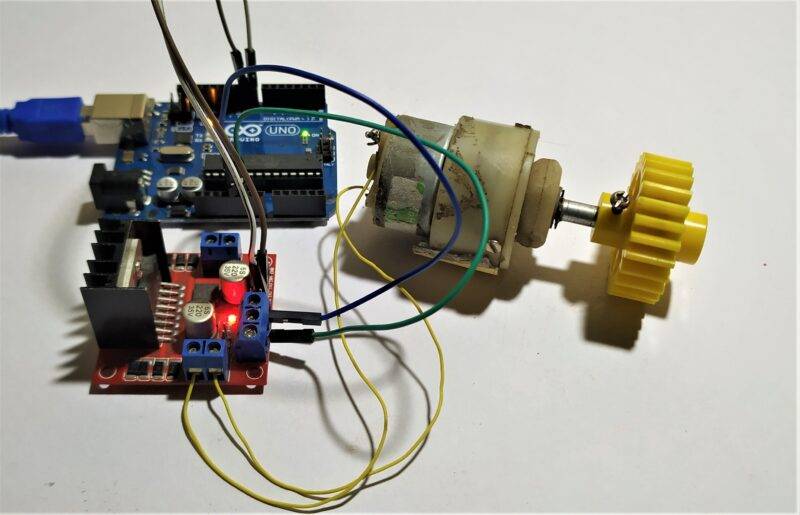
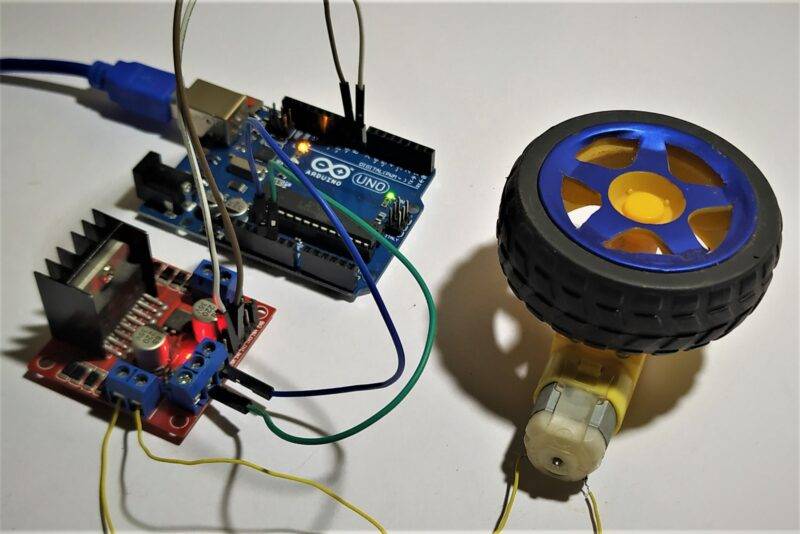
- A BO geared motor
- Jumper wires
- 220ohm resistor

Arduino motor control circuit diagram,
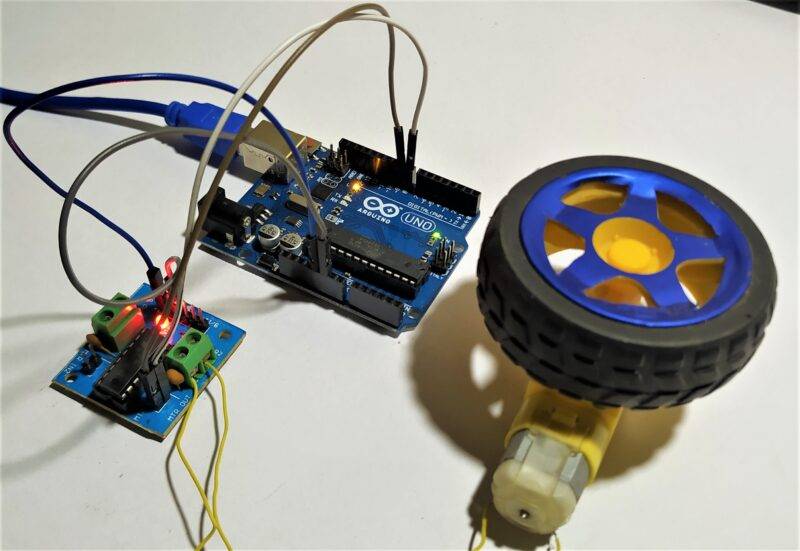
Arduino with L293d driver circuit
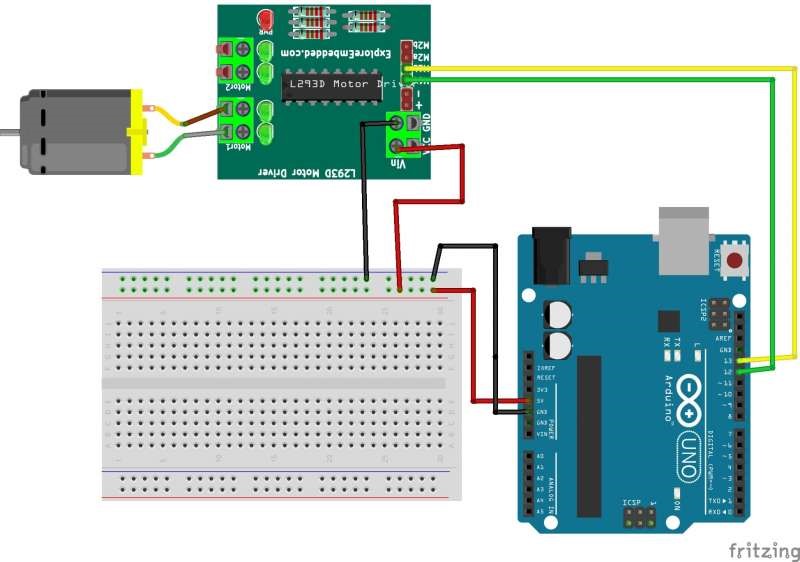
| Arduino UNO | L293d Motor Module |
| ( +5V ) VCC | VCC |
| GND ( Ground ) | GND |
| D13 Pin | M1 A Pin |
| D12 Pin | M1 B Pin |
| DC Motor | L293d Motor Module |
| Terminal 1 | OUT 1 |
| Terminal 1 | OUT 2 |
Arduino with L298N circuit

| Arduino UNO | L298N Motor Module |
| ( +5V ) VCC | + 5 volt VCC |
| GND ( Ground ) | GND |
| D13 Pin | IN 1 Pin |
| D12 Pin | IN 2 Pin |
| DC Motor | L298N Motor Module |
| Terminal 1 | OUT 1 |
| Terminal 1 | OUT 2 |
Connect BO geared motor, Arduino, and motor modules with each other according to the schematic in the above diagrams
DC motor Arduino Code: –
 //put this code in the ide of Arduino from this line
       void setup()
      {
       pinMode(13,OUTPUT);
       pinMode(12,OUTPUT);
       }
       void loop()
       {
       digitalWrite(13,HIGH); // Clock wise direction of motor
       digitalWrite(12,LOW);
       delay(1000);
       digitalWrite(13,LOW); // Anti clock wise direction of motor
       digitalWrite(12,HIGH);
       delay(1000);
       }
Arduino dc motor working: –
Now, we will see how the dc motor Arduino control system works? Arduino always sent 3.3v to 5v to the output port with the less amount current. so it is not possible to operate the motor directly so we need something to amplify the current and the voltage in the circuit. and if we connect the motor direct then it can damage the Arduino board due to the back emf. which can be generated. so, these both are the reason to attach a motor driver to control a dc motor with Arduino. The code is very simple in the setup section we initialize the signal pins of the module, and in the loop section, we turn pins high and low turn by turn to rotate the motor clockwise and anti-clockwise.
as you are seeing the code above let me explain the code for you so that you can understand it better. first of all, we need to initialize and set up the pin. which we are using in this project for example if are going to use pin 4 of Arduino then we will write like “pinMode(4, OUTPUT) ” this is the terminology used in the Arduino coding to recognize the Arduino that we are using which pin. and now next is to send the instruction to send HIGH or LOW to the pin. For example, if we are sending HIGH on pin 4 then the Arduino will send a 3.3v to 5v power supply at that pin. and we will write it like” digitalWrite(4, HIGH); ” digitalWrite is terminology to Send HIGH or LOW to the Digital pin.