Force sensors are used to either detect the pressure or weight of an object which can be detected by any microcontroller through ADC. So, if you are looking to know what is force sensor you will get the full information about the sensor
Table of Contents
Introduction
- This is the most basic sensor you’ll come across through whenever you’ll search for a project on pressure or weight detection. This sensor is very easy to find and use, just you should have any microcontroller with ADC. also we knows this sensor as force sensitive resistor.
- It comes in many variants and sizes, all the properties remains same except resistance which depends on size of the pressure applied area.
- It gives voltage values which you have to map (like in Arduino IDE) to range its values in acceptable ranges.
- Try not to connect the sensor to the supply of lower voltages and current as due to low and high resistance the sensor may heat up. So try to connect it through microcontroller power supply with a pull-up/pull-down resistor.

Force sensor Construction

- The construction of the sensor is very simple, and its price vary slightly according to the size. Also, due to its flexibility and durable material, it can be used in any situation. You can see the pricing for this sensor according to size and choose wisely according to your need.
- As these are very simple and cheaply available, the quality you need for a professional project will not be adequate, so in my opinion use a one with better quality.
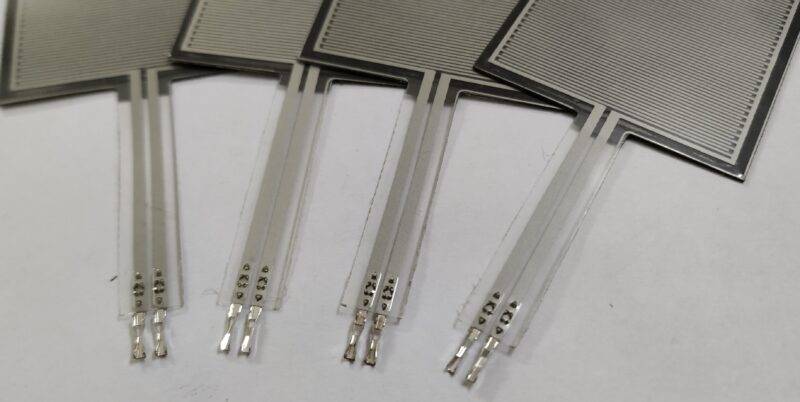
- The force sensor arduino is built out of three layers which consolidate to make the sensor flexible, durable and usable.
- Out of 3 layers two are conductive and one it for spacing, the working of these 3 layers will be explained further.
Force sensor Working

- The working of this sensor is very simple as it is a simple analog sensor. The microcontroller read the output of the sensor as analog or voltage value, which needs to be converted or mapped using ADC.
- You have to connect it this sensor to the Analog pin of the sensor and power line in combination with pull-up /pull-down resistor to make the values in microcontroller logic level range.
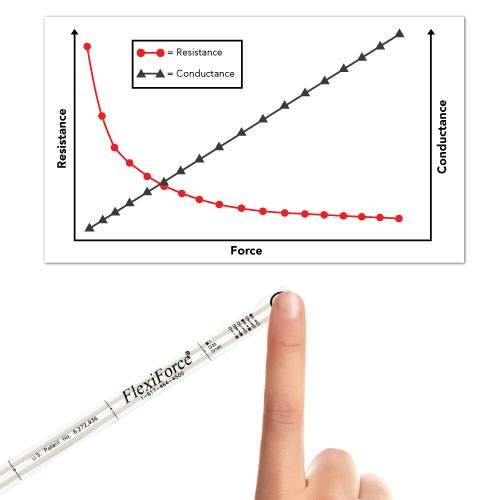
- The applied pressure on the surface is directly proportional to the analog value of the sensor as on applying pressure the resistance of the sensor decreases and vice-versa
- The 3 layers of the sensor as described above from which two are conductive does the job in increasing and decreasing resistance of the force sensing resistor.
- The 3rd layer which act as a spacer between the two provide a mild tension which you can feel while applying pressure.
- One layer has a resistance ring which is of fixed resistance (which we get when no pressure is applied). The 2nd layer which has horizontal line which on applying pressure get in contact with the 1st layer ring and resulting in decreasing the resistance through parallel connection.

Advantages:
- The ad vantage of this sensor is due to its size and flexible material. As it small and cab be fixed in any placed it is very portable.
- It is very cheap in price and easily available in various resistor ranges. But the size will vary slightly according to the resistance.
Disadvantages:
- The only disadvantages is that you can’t connect it to high voltages pins or power supply. You are forced to attach between analog input and VCC of the microcontroller using.
- Also, the material which is used to make it flexible is also vulnerable to lose its flexibility or elasticity due to long time bent.
force sensing resistor Price & Availability:
- This sensor is easily available in online and offline market. But for your convenience, I’m providing like for some of the online platforms where you can look up for this product.
- ELECTRONICSCOMP
- ELECTRONICSCOMP
- ROBU.IN
Applications of Force sensor:
- We have made few projects which include the use of force sensor. You can visit them for better understanding and code with various microcontrollers. we have made a many projects on this small and usefull force sensitive resistor such as weight control fan. weight control fireflies.
- Force sensor with Arduino UNO
- NodeMCU
- Raspberry Pi
- ESP32
- Raspberry Pi PICO
This is the complete description of the force sensor (working and construction). The images related to these are provided above in every subheading, refer to these for better understanding. If you need more information related to this topic or any issue then ask in comment we’ll try to do it as soon as possible.
Q. Can Digital Pins be used for connecting force sensor?
Yes, you can use any of the PWM Pins of the microcontroller for reading the analog values.
Q. How to solder pins safely of the force sensor?
For soldering safely, either uses High-Temperature tape or put the pin side of the sensor on some metal surface. So to ensure that heat dissipates into the metal surface evenly.
Q. Can we connect force sensor to Analog Pin and Ground of the microcontroller?
Yes, you can surely connect it between Analog Pin and Ground, but you have to pull up the Analog pin for values.
