
Hello techies, Here we are back with another tutorial soil moisture sensor with Arduino. As we have covered many sensors with Arduino and today we will cover another sensor known as a soil sensor. There is 50+ article in our Arduino tutorial. We are sharing all the detail of this activity. if you are a learner then you should bookmark this website. Soil moisture sensors can be used in any project as a smart irrigation system that can be used on crops as well as in the garden. So if you have plants in the garden you can make this awesome project. and if you want to learn how the soil sensor is working and where can we use this sensor. to learn this activity you need to know some basic electronic and Arduino programming. Let’s start with the Article.
What is a Soil moisture sensor?
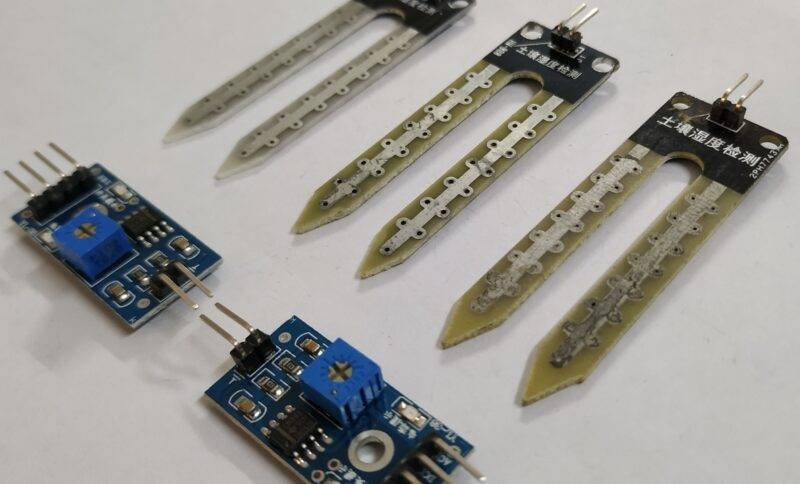
In this activity, we will learn soil moisture sensor connectivity, programming, and many other things. we will detect the moisture in the soil with the help of programming. the soil moisture sensor is a sensor that works on the resistivity of the conductor using in the sensor. when the sensor metal conductor comes in the contact with the water the resistance of the sensor will change according to the intensity of water. more the waterless the resistance. water is inversely proportional to the resistance of the sensor. Soil moisture sensor made by a conducting material. this conducting material is reactive to the water. The soil moisture monitoring system used this principle to make the project work. we get the output from the soil moisture sensor and according to the value, we will program Arduino coz we are using Arduino with the soil moisture sensor.
How does the Soil moisture sensor system work?
Soil moisture sensors react with the water. when the sensor gets in contact with the water the value will change. There is two output pin in the sensor one is digital and another is output. at the output, if we are using a digital pin we will get only the two outputs one is high and another is low. so, there we can make only two conditions with both conditions. and there is also an analog pin so there is a 0 to 1023 value. so we can make here multiple conditions. and we are going to share both details. Soil moisture sensors with Arduino can be used to make multiple conditions. so, the output from the sensor will be the input for the Arduino and according to this input, we will make the programming. so here we also share the well-defined programming.
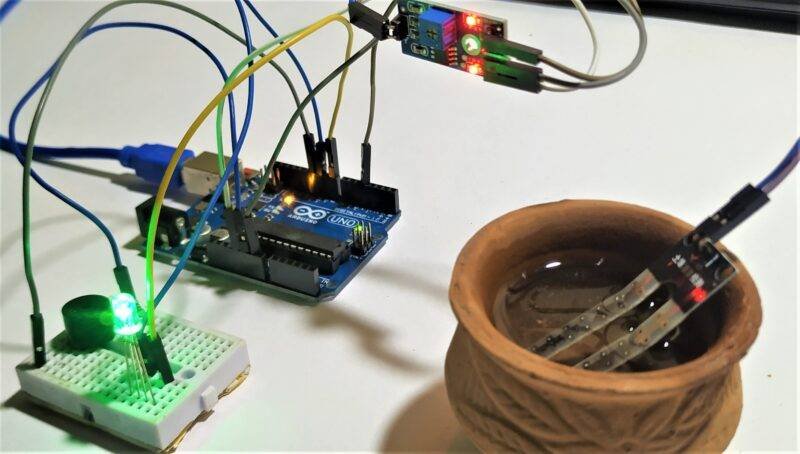
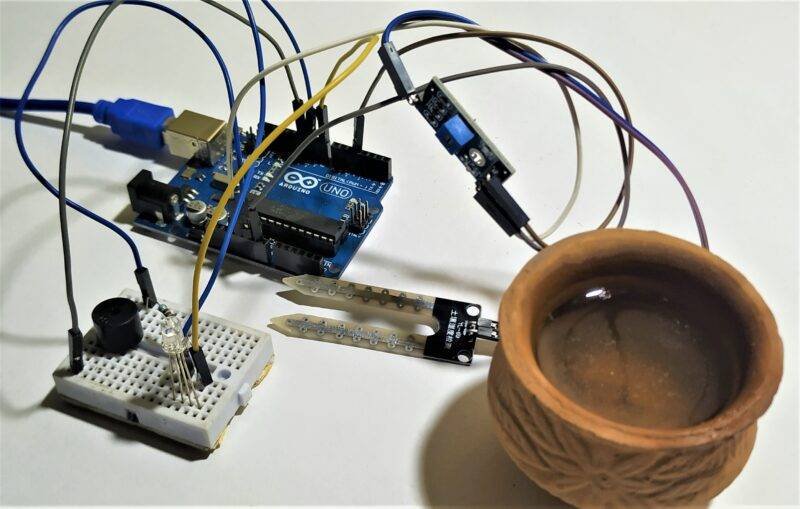
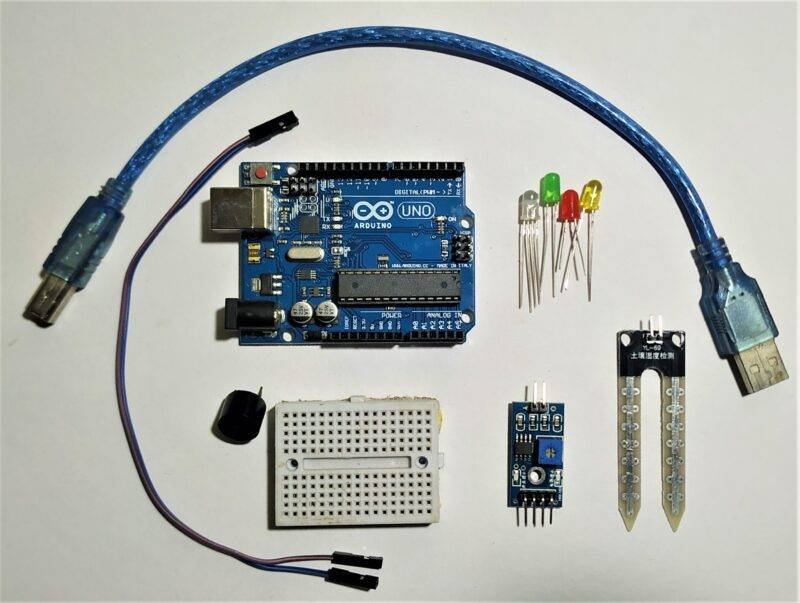
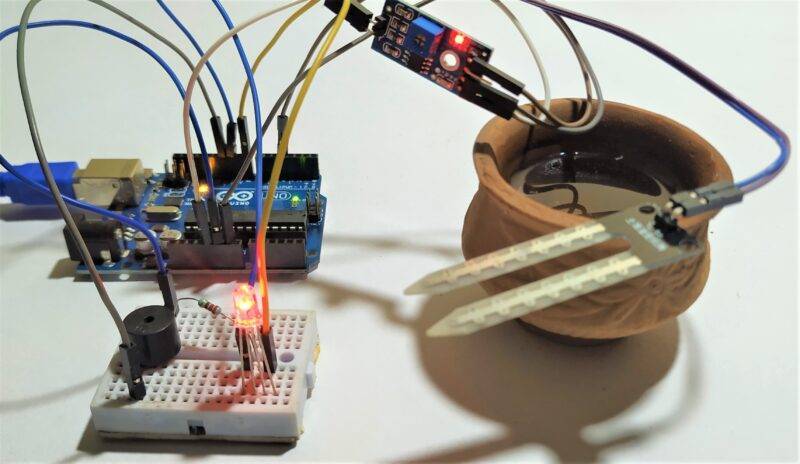
Components Required to make the project.
| Arduino Uno | BUY LINK |
| Breadboard | BUY LINK |
| Jumper wire | BUY LINK |
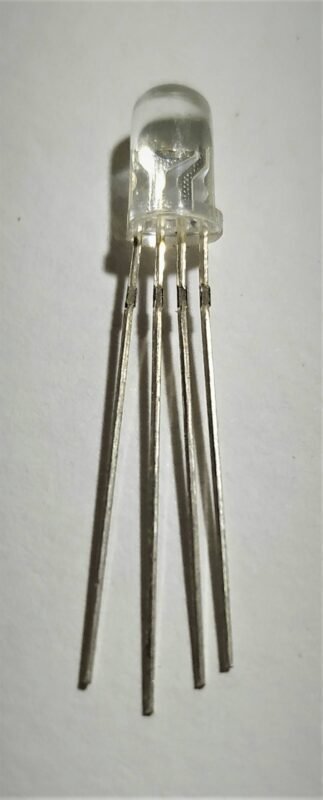
| RGB Led | BUY LINK |
| 220-ohm Resistor | BUY LINK |
| Soil moisture sensor | BUY LINK |
| Arduino cable | BUY LINK |
you can buy all components together-BUY LINK
Soil moisture sensor with Arduino Circuit Diagram
for analog
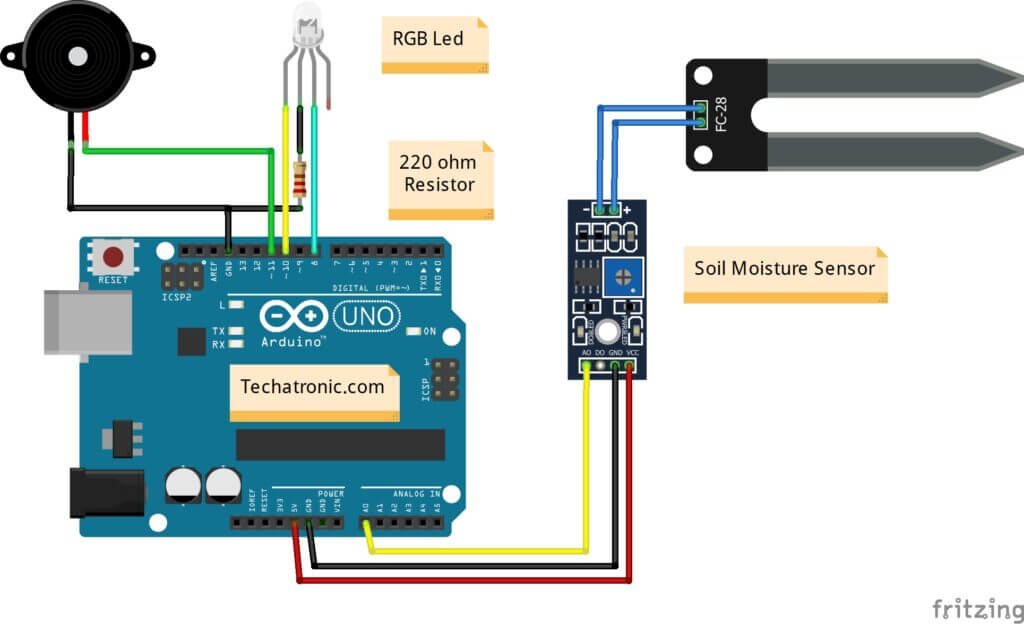
| Arduino UNO | Soil Moisture Sensor | |
| A0 Pin | AO Pin | |
| ( +5V ) | VCC | |
| GND | GND | |
| Arduino UNO | Buzzer | |
| D11 Pin | Positive Terminal | |
| GND | Negative Terminal | |
| Arduino UNO | RGB LED Common Cathode | 220 Ohm Resistor |
| D10 Pin | Terminal 1 | |
| GND | Terminal 1 | |
| Terminal 2 | Terminal 2 | |
| D8 Pin | Terminal 3 |
For digital
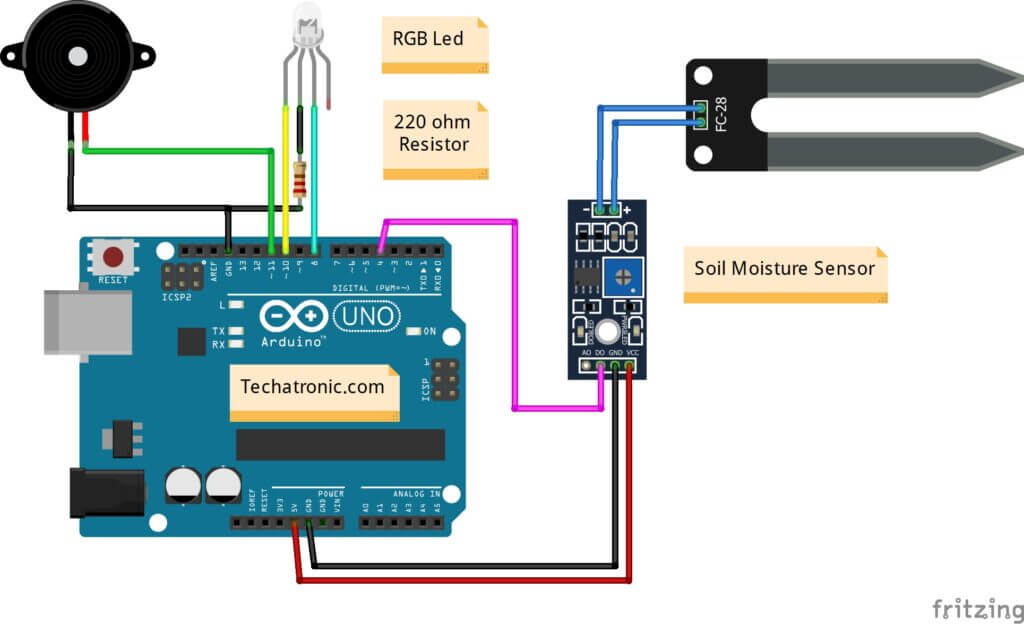
| Arduino UNO | Soil Moisture Sensor | |
| D4 Pin | DO Pin | |
| ( +5V ) | VCC | |
| GND | GND | |
| Arduino UNO | Buzzer | |
| D11 Pin | Positive Terminal | |
| GND | Negative Terminal | |
| Arduino UNO | RGB LED Common Cathode | 220 Ohm Resistor |
| D10 Pin | Terminal 1 | |
| GND | Terminal 1 | |
| Terminal 2 | Terminal 2 | |
| D8 Pin | Terminal 3 |
Arduino soil moisture sensor Code
for analog
 void setup()
 {
  Serial.begin(9600);
  pinMode(8,OUTPUT); //Green LED
  pinMode(10,OUTPUT); // Red LED
  pinMode(11,OUTPUT); // Buzzer
 }
 void loop()
 {
  int s1=analogRead(A0);
  Serial.println(s1);
  delay(50);
  if(s1>100 )
  {
   digitalWrite(8,HIGH);
   digitalWrite(10,LOW);
   digitalWrite(11,HIGH);
  ;
  }
   else
  {
   digitalWrite(8,LOW);
   digitalWrite(9,HIGH);
   digitalWrite(11,LOW);
  }
 }
for Digital
 // Techatronic.com
 int val = 0 ;
 void setup()
 {
  Serial.begin(9600);
  pinMode(4,INPUT); // pir sensor output pin connected
  pinMode(8,OUTPUT); //Green LED
  pinMode(10,OUTPUT); // Red LED
  pinMode(11,OUTPUT); // Buzzer
 }
 void loop()
 {
 val = digitalRead(4); // pir sensor output pin connected
 Serial.println(val); // see the value in serial monitor in Arduino IDE
 delay(100);
 if(val == 0 )
 {
   digitalWrite(8,HIGH);
   digitalWrite(10,LOW);
   digitalWrite(11,HIGH);
 }
 else
 {
   digitalWrite(8,LOW);
   digitalWrite(10,HIGH);
   digitalWrite(11,LOW);
 }
 }
after uploading the code open serial monitor

Analog value
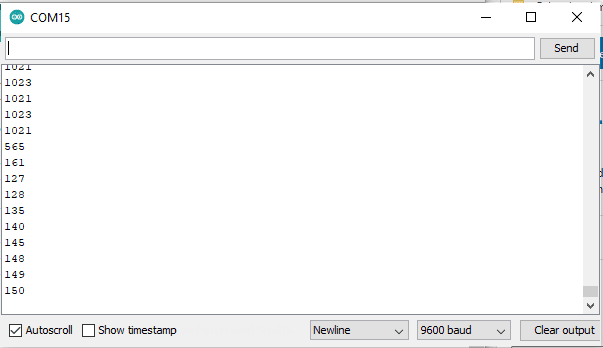
Digital value

at above we have shared both the code for digital output as well as the analog output. upload the given code into the Arduino and make this project.