
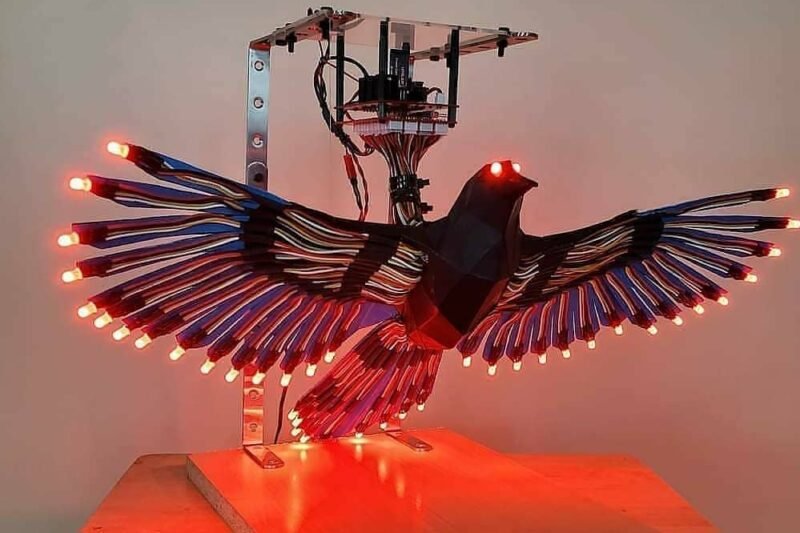
Hey guys, welcome back to Techatronic, today we are going to make a very interesting project which is related to light. I hope you heard about the RGB and pixel light at many places like decorations, vehicles, light bulbs, and many more. so, today we are going to work on the WS2811 with Arduino Bluetooth control using Android app. All the steps we will give you to make that setup. There we will make an android app with the help of the MIT app inventor and control the light’s color and pattern with the same android app. if you want to make the project please keep on the page and follow the instructions.

Table of Contents
Introduction
WS2811 is an IC that makes the RGB light addressable. addressable lights are easy to program with lots of effects. I have done a lot of projects with the same pixel ws2811 light. usually, this RGB light uses in the decoration of homes, shops, restaurants & bars. So, here we are making it easy by controlling ws2811 with Arduino using mobile phones. for that, we will use the MIT app inventor. there are two processes to do this project first is to make the android app and another is the circuit and coding part. So let’s get started with the first process to make the WS2811 with Arduino Bluetooth control using Android app. we have made also many projects in which we have used the same android app such as Bluetooth control RC car.
Create an android application.
So, here we are going to explain to you how to make the android app using the MIT app inventor. In this application, we will send the character using the Bluetooth of the phone. basically, there will be some buttons on the application whenever we touch any button it will send some data to the Arduino. This is basically a Bluetooth control application. let’s get started with the steps to make the Application.
Step 1
Open the MIT app inventor official website and create your account there. click on the create app button then there will be an option to create your account or you may log in with your google account.

step 2.
Click on the start new project and give a name to your project.
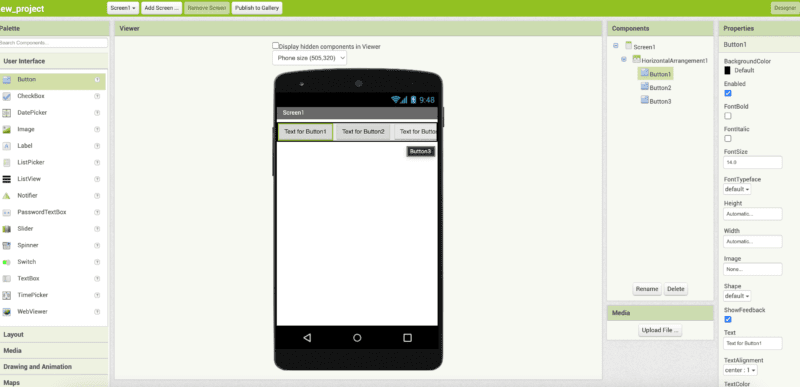
there will be a dashboard to make the application.
from the left side in the layout section drag and drop the horizontal arrangement on the mobile screen.

step 3.
now from the right side click on the width and select the fill parent. and go to the user interface Edgar and drop the button to the mobile screen inside the horizontal arrangement. drag and drop the 3 button at least there

Step 4.
now from the right sidebar changes button properties like color, name, and whatever you want.
drag and drop the Bluetoothclient 1 from the connectivity to the mobile screen
Step 5.
Click on the block button on the upper right side. and start the coding
make these two different blocks from control, list picker 1 and Bluetooth.

Step 6.
make 3 more blocks as given in the image from control, bluetoothclient1 and text.

now your app is ready again click on the design button and click on the built and click on the android app there will be a QR code shown by the website. It will be an important part of your control RGB with Arduino project.
download mit app inventor on your mobile phone from the google play store and scan the same QR code and it will download the app automatically on your mobile phone.
now we will start the second process of making this project.
Creating the circuit which is very easy.
WS2811 Arduino Circuit diagram Bluetooth control using Android app

the circuit diagram is very easy to make.
WS2811 with Arduino code Bluetooth control using Android app
#include <FastLED.h>

#define LED_PINA    13

#include <SoftwareSerial.h>

SoftwareSerial mySerial(4, 5); // RX, TX


#define NUM_LEDS  100

CRGB leds[NUM_LEDS];
void setup() {

   FastLED.addLeds<WS2812, LED_PINA, GRB>(leds, NUM_LEDS);


  mySerial.begin(9600);
Serial.begin(9600);

}

void loop() {
  // put your main code here, to run repeatedly:

int q;

if(mySerial.available()>0)

{
  char m = mySerial.read();
 Serial.println(m);

//  Serial.println(t);
  switch (m)
  {


// warm slowly pattern start here (RED)

  case 'A':
  while(1)
  {
if(mySerial.available()>0)
{
break; }
 for(q=0; q<=90; q++){
    if(mySerial.available()>0)
{
break; }
  for ( i = 0; i <=NUM_LEDS; i++ )
{

  leds[i] = CRGB ( 255,0, 0);

  if(mySerial.available()>0)
{
break; }}
FastLED.setBrightness(  q);
FastLED.show();
delay(d);
 if(mySerial.available()>0)
{
break; }
   }


for(q=90; q>=0; q--){
    if(mySerial.available()>0)
{
break; }
  for ( i = 0; i <=NUM_LEDS; i++ )
{

  leds[i] = CRGB ( 255,0, 0);

  if(mySerial.available()>0)
{
break; }}
FastLED.setBrightness(  q);
FastLED.show();
delay(d);
 if(mySerial.available()>0)
{
break; }
   }


if(mySerial.available()>0)
{
break; }

}


// warm slowly pattern end here (RED)

// warm slowly pattern start here (BLUE)


case 'B':
  while(1)
  {

 for(q=0; q<=90; q++){

  for ( i = 0; i <=NUM_LEDS; i++ )
{

  leds[i] = CRGB ( 0,255, 0);

  }
FastLED.setBrightness(  q);
FastLED.show();
delay(d);

   }


for(q=90; q>=0; q--){

  for ( i = 0; i <=NUM_LEDS; i++ )
{

  leds[i] = CRGB ( 0,255, 0);

 }
FastLED.setBrightness(  q);
FastLED.show();
delay(d);

   }


}
Upload Code to the Arduino if you have any difficulty you can refer to our previous article on how to upload code in Arduino. i hope now you can make your own Control ws2811 with Arduino using the Android app system still if you have any problems you can ask in the comment section.