Table of Contents
Introduction
The visual sense is very important in every living being, because even if our ears would give us some sense of our surrounding but our eyes gives us the clearest image of our surroundings.

We have seen that every small device is fixed with a display or some visual indicator to give the current status of the devices like power banks, chargers, or anything else.
Display some information on some kind of display device can be very easy or very complicated but it totally depends on the interface it uses to communicate with the microcontroller to display content on it.
There is various display available in the market from the simple one to touch or from monochromatic to multicolor OLED in various sizes.
there are two methods LCD interfacing with Arduino first is traditional in which the i2c module doesn’t use. for example we interface LCD with our last final year project for ece sign language glove.
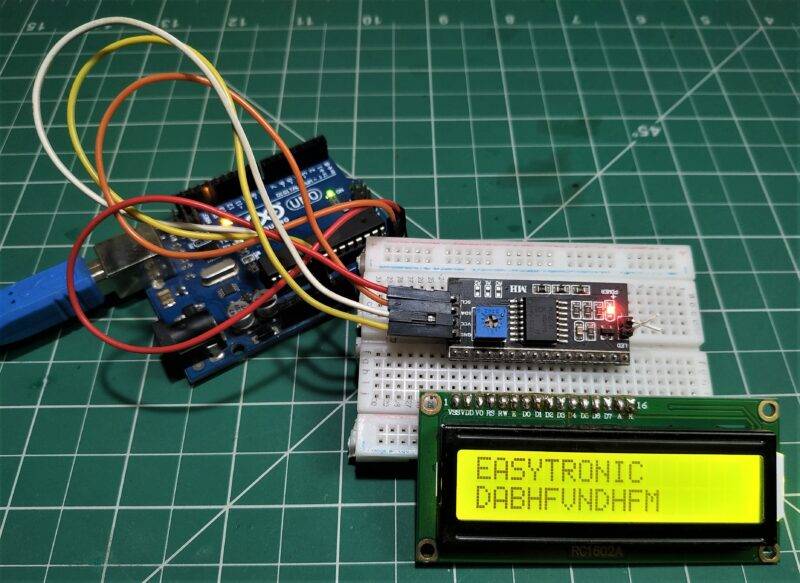
Almost all of the display uses some type of driver in between the microcontroller and the display module to display content but today we are going to hook up a monochromatic LCD interfacing with Arduino Uno and display some content on it.
Description: –
The materials we’ll going to use today are ARDUINO UNO or any other microcontroller similar to it, the I2C module, and the 16×2 LCD module.
What to say about this module it is very simple and a source of light that illuminates the glass surface or we could say liquid crystals which becomes darker where we want to display the content.
- The display originally uses multiple wires communication with the Arduino but we can use an I2C module to make it simple and easier to program.
- The brightness of the display can be controlled if using multiple wires connection or it can be programmed in code if using a liquidcrystal_i2c module
- LCD stands for liquid crystal display and there are crystals inside the display which illuminates the full display and the character as those which crystals are not illuminated.
- if you see the display carefully it works as reverse as other displays. here the character is not illuminating they are inactive when we apply the signal to them.
- for example, if we are sending character A then the A-shaped crystal remains inactive, and the remaining crystal activates.

Features and applications: –
- The visuality of characters is good
- Easy to mount and use
- Available in various sizes 16×2,16×4
- Low price
- Can be used in almost every project
LCD 16×2 Specification: –
Components Required: –
- Any microcontroller preferably Arduino Uno for beginners.
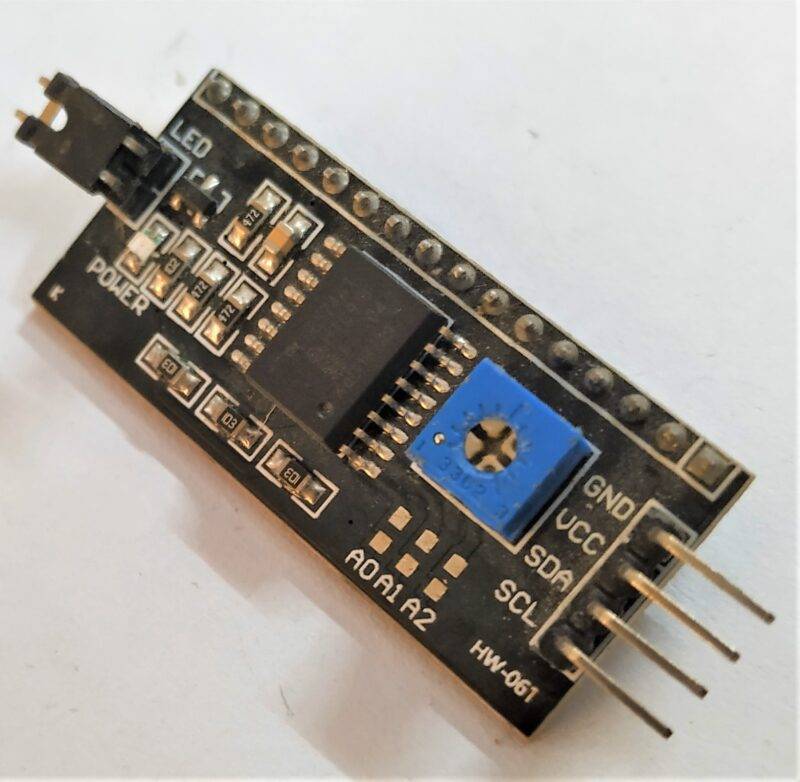
- An I2C module
- A 16×2 LCD display
- A breadboard
- Jumper wires

You can buy the whole components from the given link we have to share the amazon link. from where you can get a good discount on the components.
LCD Connection with Arduino:-
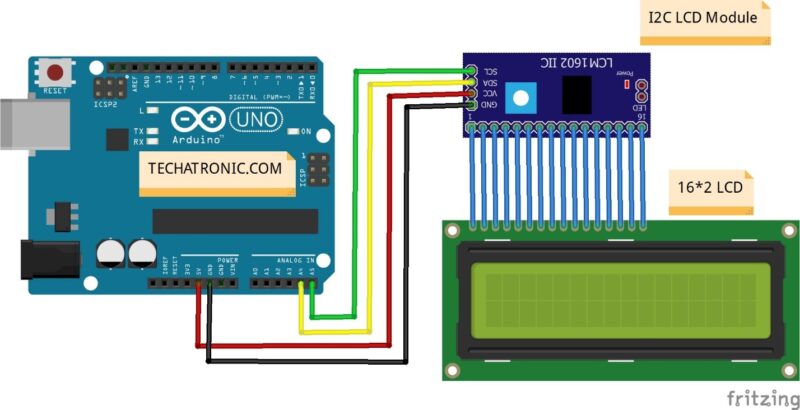
Connection table
| Arduino UNO | I2C Module |
| ( +5V ) | VCC |
| GND | GND |
| A4 Pin ( SDA ) | SDA Pin |
| A5 Pin ( SCL ) | SCL Pin |
| 16*2 LCD Display | I2C Module |
| 16 Pin connect | 16 Pin connect |
Now, we will share with you the I2C connection of the display to the I2C module as pin count is the same and
we have to just connect it to parallelly with I2C module and from I2C module connect 4 Wires VCC, GND to VCC and GND of Arduino
and SCL, SDA pins of I2c module to A5and A4 analog pins or I25C pins of Arduino Uno or any other microcontroller similar to Arduino.
note:- To upload the given code you need to install i2c library download library
Arduino with I2C lcd code: –
//put this code in the ide of arduino from this line
#include <Wire.h>
#include <LiquidCrystal_I2C.h>
LiquidCrystal_I2C lcd(0x27,16,2);
void setup()
{
lcd.init();
lcd.backlight();
lcd.setCursor(0,1);
lcd.print(“Easytronic”);
}
void loop()
{
}
LCD with Arduino working: –
- in the above paragraph, we learn how to make an Arduino LCD connection with the i2c module with the I2c module it got pretty easy to make the connection.
- now we will see the code and it’s working. At the beginning of the code, we first import the library which we are going to use in the code i.e., Wire and LiquidCrystal_I2C library.
- Then we create a Liquid Crystal object with the name LCD connected to I2C pins on Arduino.
In the setup section, we first initialize means set the LCD on or clear it if any previous data is stored in its local flash
memory then we turn the backlight on to illuminate the darkened pixels of the screen and then we set our cursor on the desired position we want and t last, we display connect on LCD quoted in parentheses.