

Hello Guys, Today’s topic is not a tutorial but getting started, Raspberry Pi Pico. RPI Pico is a newly released Raspberry Pi development board. It has more features than most of the models of Arduino. In this, I’ll cover all specs, datasheet, pinout, software, and also programming a simple blink LED program. If you want to program it with Arduino IDE then I’ll cover that in the next article for sure. So, get your hands on Pico now.
Raspberry Pi Pico:
RPi Pico is a new microcontroller from the Raspberry Pi association. Its feature is mostly similar to that of Arduino. You can use Micropython or C/C++ to program it. Behind all these aspects with micropython software, you can use python shell to see the output of your code before uploading it onto the board. From a beginner’s point of view, I must say that as I’m familiar with python I feel no difficulties in programming and understanding various codes. If you are only familiar with C/C++ then it is also no problem. You can also program this with Arduino IDE but live running of code won’t be possible in that case.
Now for the specification, You may refer to Raspberry Pi official website for more information or you may download the datasheet, Micropython introduction, C/C++ Introduction, Hardware design directly from here.
Here is the pinout of the Board. You can refer to this image for pin reference.
NOTE: RPI PICO PINS CAN ONLY BE REFERENCED ACCORDING TO GPIO NUMBERS IN MICROPYTHON SO USE GPIO NUMBERS ONLY.
Material Required:
| Raspberry Pi Pico | BUY LINK |
| Led | BUY LINK |
| 220 Ohm Resistor | BUY LINK |
| Breadboard | BUY LINK |
| Jumper Wire | BUY LINK |
| Power Supply | BUY LINK |
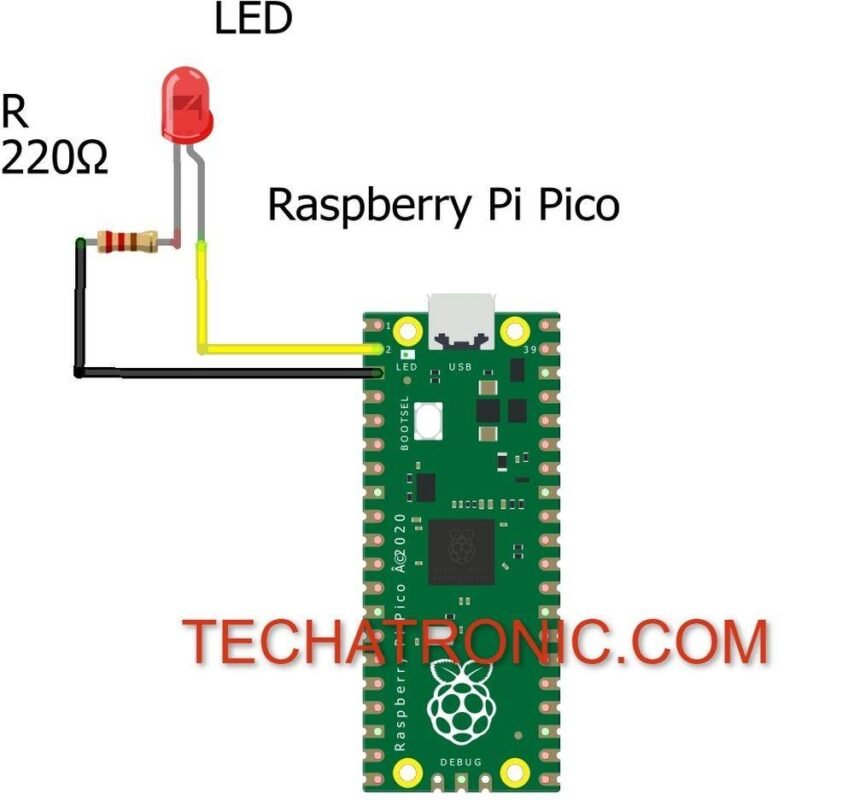
Circuit design:
|
Raspberry PI PICO |
LED |
220 Ohm Resistor |
|
GPIO 1 |
Anode Terminal |
|
|
GND |
|
Terminal 1 |
|
|
Cathode Terminal |
Terminal 2 |
Led —> GPIO 1 (GPIO25 used in code i.e., ON-BOARD LED of Pico)
You may refer to the Arduino blink Led tutorial if you are a beginner
Software download:
Raspberry Pi Pico can be programmed in MicroPython via Thonny Python IDE you can download the latest version from here for Windows, Mac. For Linux use
 pip3 install thonny
 or
 sudo apt install thonny
 or
 sudo dnf install thonny
After installing it open Thonny IDE. IT will look like this (windows):

Now First update firmware on your Pico board. For that under Tools Tab, Select Options
Then a new dialog box appears. On it click ‘Interpreter’ Tab
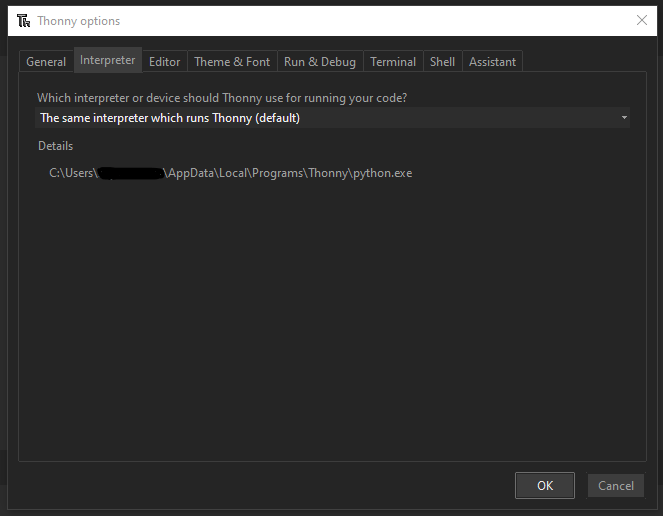
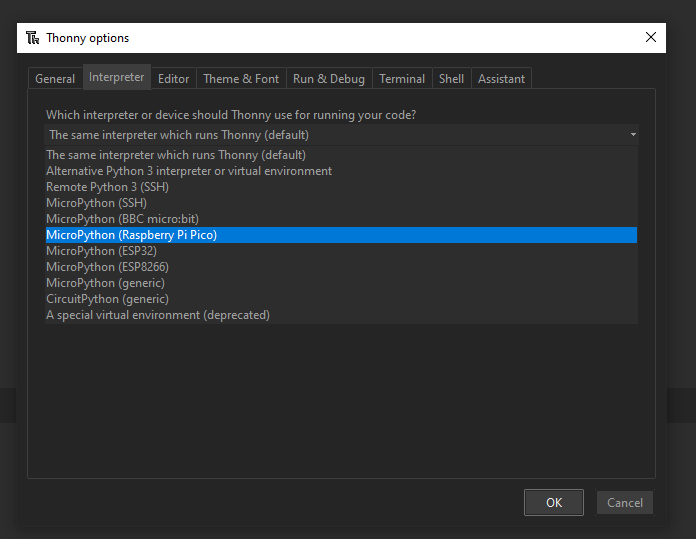
Under the drop-down menu select the ‘MicroPython(Raspberry Pi Pico)’ option.
On the bottom right you will see Install or Update Firmware option click on it. The
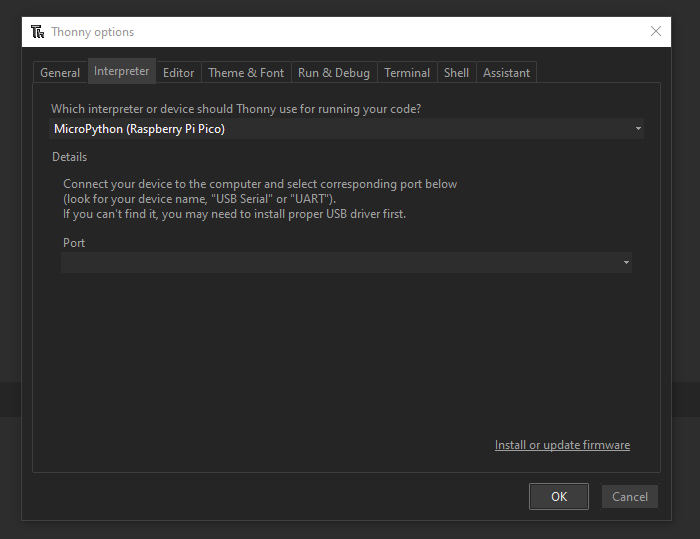
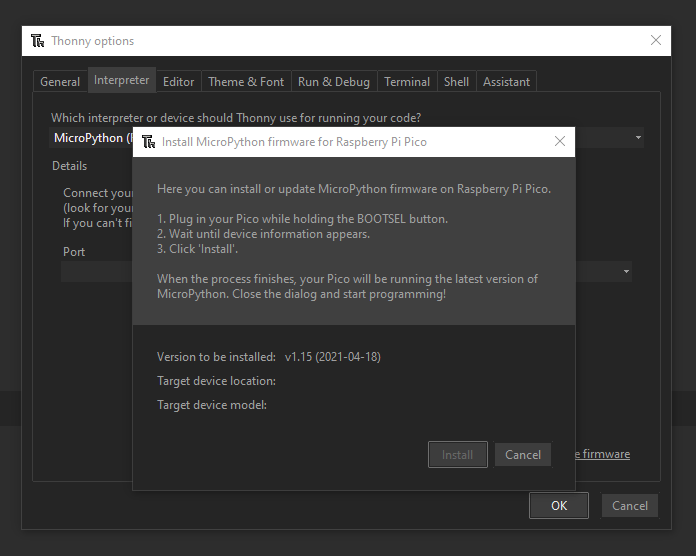
Now follow the instructions on the new dialog box that appears. You will notice that your Pico board restarts. This means you have successfully installed firmware onto it. And it’s done, you are ready to go to program your Pico board.
Programming Code:
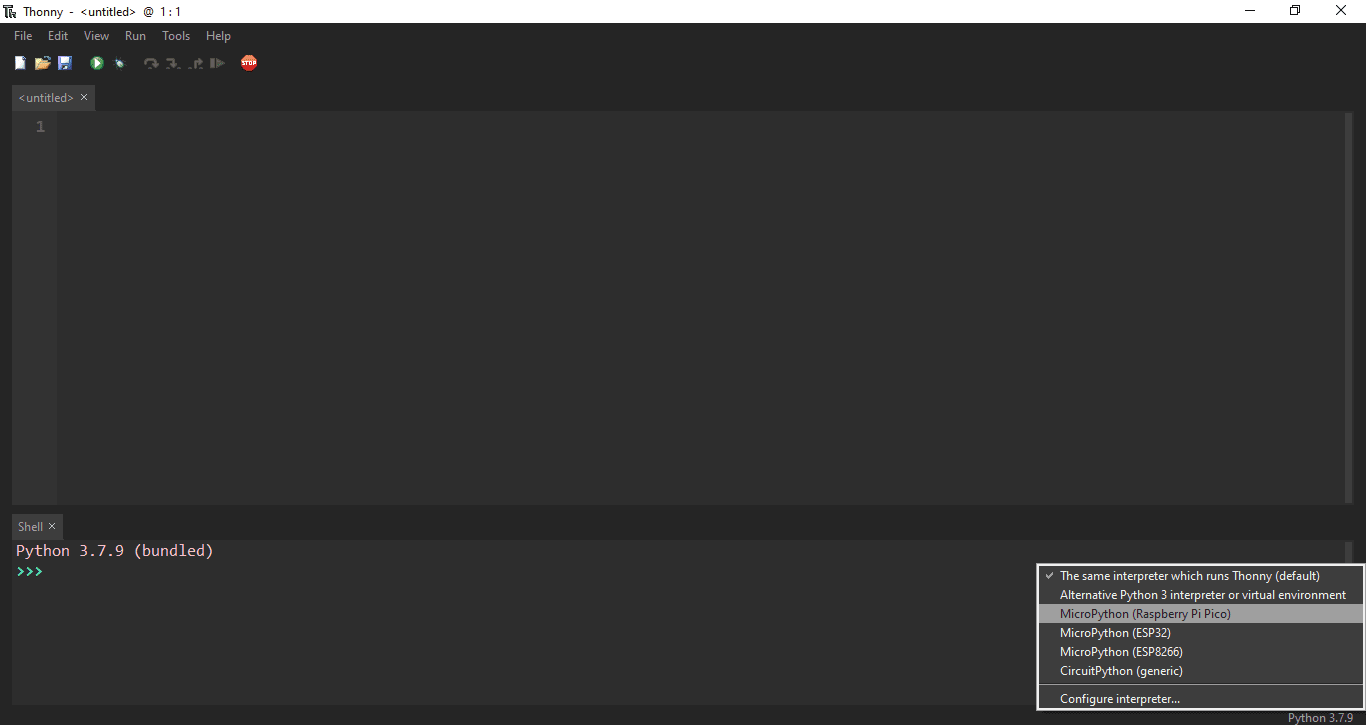
For this Open a new file and on the bottom right, you’ll see Python3.7.9 click on it and a drop-up menu will appear. Select ‘MicroPython(Raspberry Pi Pico) option in it.
You’ll see python shell will change to something like this.
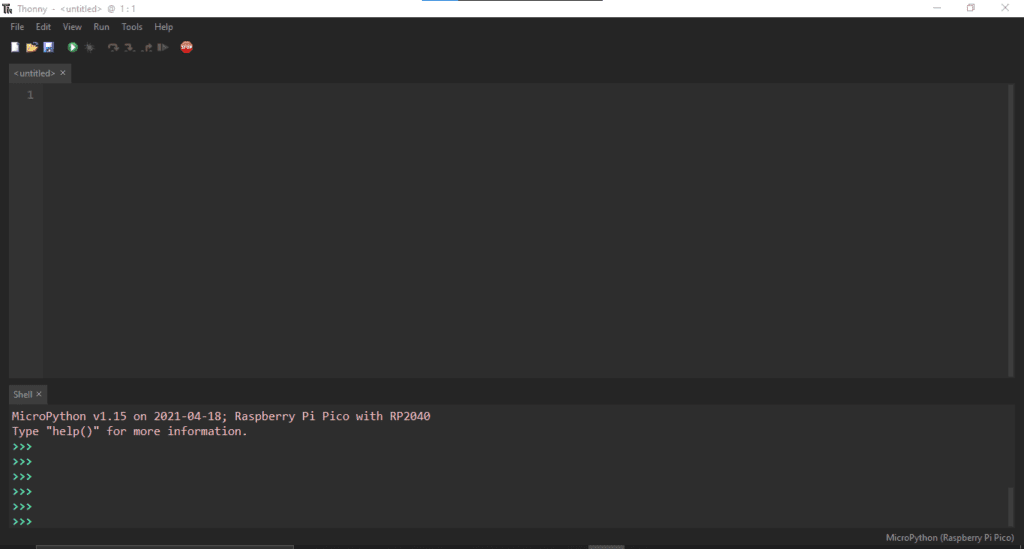
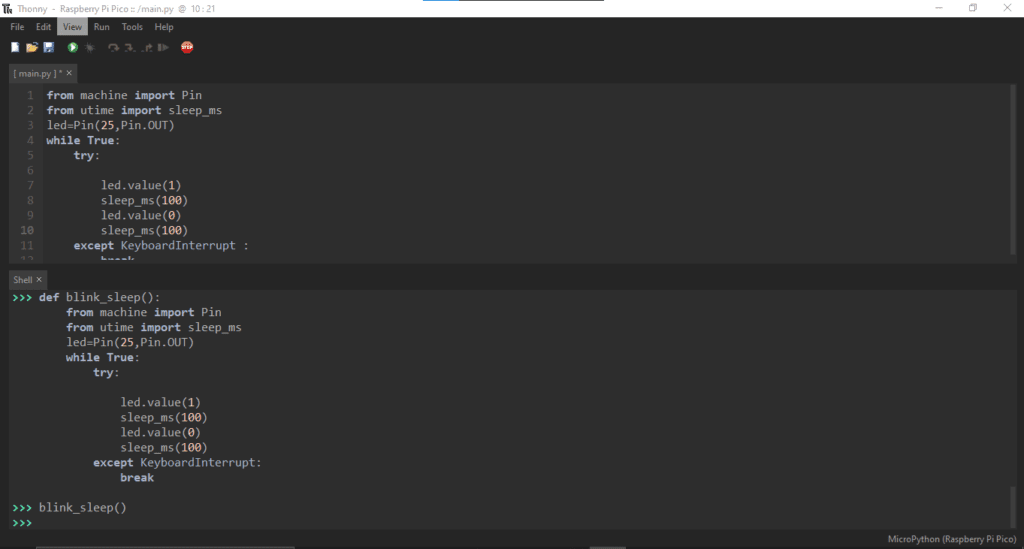
Now we have successfully connected our Pico Board to Thonny Python IDE. Let’s just make a simple program of blink led in it. As I have told you earlier that you can use Python shell for live program checking see how it works now in the picture below.
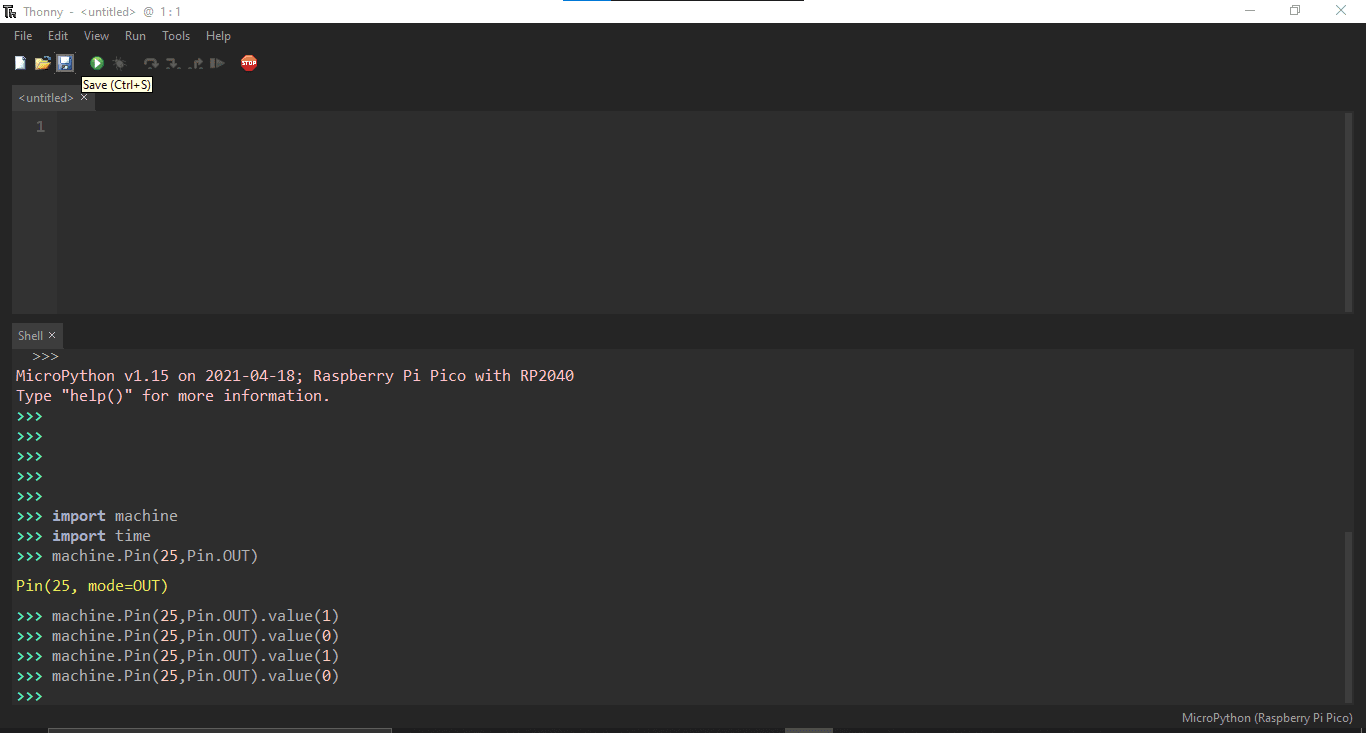
GPIO 25 is the pin to which On-Board led is connected so this will make led on or off. For blink led program you can use either ‘time’ module or ‘utime’ module. In time module only sleep function is available which receives value in seconds. But in utime, sleep_ms function is available which rceives value in milisecond (1000ms=1s) like Arduino.
Code:
NOTE: I have used On-Board led of Pico. If you want to change Pin then refer to Circuit design and in code change pin from 25 to 1 as led is connected to GPIO1
 from machine import Pin
 from time import sleep
 led=Pin(25,Pin.OUT)
 while True:
   try:
     led.value(1)
     sleep(100)
     led.value(0)
     sleep(100)
   except KeyboardInterrupt :
     break
Using sleep function from time module
 from machine import Pin
 from utime import sleep_ms
 led=Pin(25,Pin.OUT)
 while True:
   try:
     led.value(1)
     sleep_ms(100)
     led.value(0)
     sleep_ms(100)
   except KeyboardInterrupt :
     break
Using sleep_ms function from time module
Now if you want to save it then either click on Green button show in picture below or press Ctrl+S on keyboard.

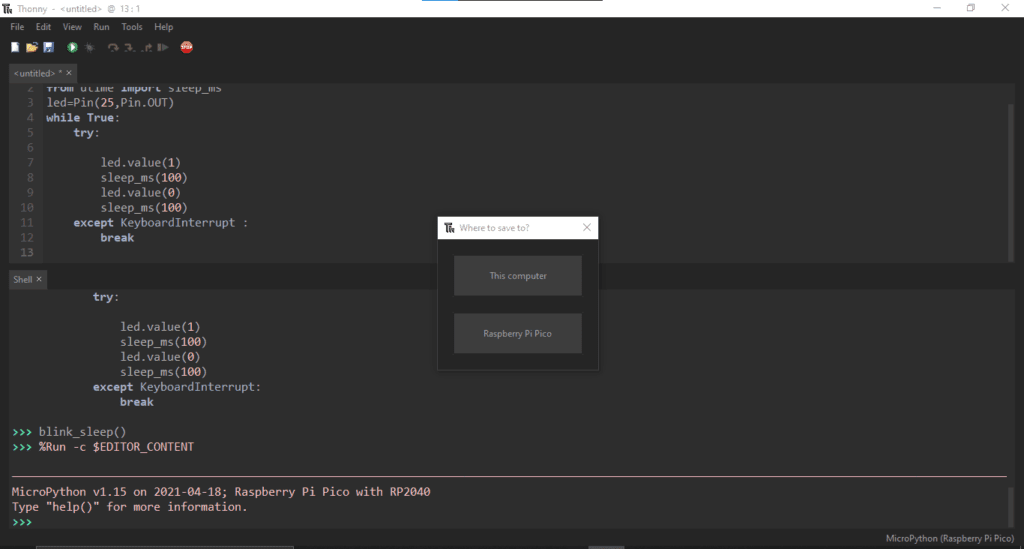
Now click on raspberry Pi Pico in the dialog box and save file with name ‘main.py’. reason for saving it with this name, if you are familiar with python then you must know it. In simple words when Pico restarts or you supply power to it every time it looks for a file named ‘main.py’ as default so as to run it you need to save it with this name. you can also create a ‘__init__’ file if yu want to save multiple files and want to extract some of the function from each. That will be shown in another article of Pi Pico.
Until then, enjoy this one. If you face any problem in any one of these then let me know. I’ll help you out.