Hey guys, welcome back to the techatronic. In this article we are going to explain how can we interface Air Pressure sensor HX710B with Arduino. all the details like code, circuit and other instructions will be given here. This sensor can be used where we need to measure the air pressure like vehicle tyre, ballon and etc. We used this sensor into our vehicle project in which we are measuring the Tyre air pressure by using this small sensor. to use this sensor and about its properties first we need to know it’s working and it compatibility.
Introductions
To interface this sensor is very simple. here are 3 pins which need to connect directly to the Arduino 2 pins for power and 1 pin for signal. from where we can get the data. Air pressure sensor is not using much in this industries.
There is a nozzle on the sensor which need to connect to the air pressure properly. there should not be leakage of air during this. only in condition the air pressure sensor can measure the air pressure from this sensor. we are making a very big project with the using of this sensor. where we are measuring the air pressure from the vehicle tyre.
What is Air pressure sensor?
So, here we will learn how the sensor works. The module includes a pressure sensor (e.g., MPS20N0040D-S) and the HX710B chip, which is a 24-bit ADC. The pressure sensor uses a Wheatstone bridge configuration inside it. The air pressure sensor have 0 t0 40 KPA air pressure sensing chip with AD sampling module.

So, here we are sharing all the detail , how can interface the Air Pressure sensor HX710B with Arduino , how we can code this sensor. To code this device we will use Arduino Ide. Because we are using here the Arduino to interface that’s why we need to use the Arduino IDE software.
So, to need to make this tutorial we need some components, software and tools which are given below.
Componenets Required
- Arduino Uno
- Air pressure sensor HX710B
- 16X2 LCD Display
- Jumper wire
- breadboard
Here we have shared the compoenents and other detail. now you need to know how to connect the sensor ,lcd and arduino all together. so, don’t worry we have shared a circuit diagrama and connections table which will help you to find the connection among all.
Air Pressure sensor HX710B with arduino Circuit Diagram

In this circuit diagram all the connections and components are clear, but still if you counter and doubt you can ask us in the comment sections.
| Arduino Uno | Air Pressure sensor | 16X2 LCD |
| pin 4 | SDA | – |
| PIN3 | SCK | – |
| +5V | VCC | VCC, A, POTENTIOMETER +, |
| GND | GND | GND, K,POTENTIOMETER – |
| pin5 | – | RS |
| pin6 | – | E |
| pin7 | – | D4 |
| pin8 | – | D5 |
| pin9 | – | D6 |
| pin10 | – | D7 |
Now , we need to intsall the code into the Arduino. Code is very simple and given here in the below box.
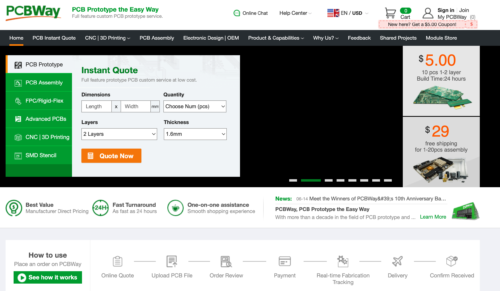
I have assembled the whole circuit on a breadboard. As you know breadboard assembly is not effective for this type of project. So, PCBWay offers Rapid PCB Prototyping for Your Research Work. I personally, recommend PCBWay because you can get your first-try boards right in 24 hours!

The prototyping stage is the most critical period of time for engineers, students, and hobbyists. PCBWay not only makes your boards quick but also makes your job right as well as cost-effective. This greatly reduces your cost and shortens the time for developing your electronic
PCBWay can provide 2 Layer PCBs to highly advanced HDI and flex boards. Even though the PCBs they produce differ a lot regarding functionality and areas of use. I am impressed with the quality of the boards, the delivery time, and the cost-effectiveness
Air Pressure sensor HX710B with arduino Code
#include <Q2HX711.h>

#include <LiquidCrystal.h>

const byte hx711_data_pin = 4;
const byte hx711_clock_pin = 3;
const int rs = 5, en = 6, d4 = 7, d5 = 8, d6 = 9, d7 = 10;
LiquidCrystal lcd(rs, en, d4, d5, d6, d7);

Q2HX711 hx711(hx711_data_pin, hx711_clock_pin);


void setup() {


  Serial.begin(115200);


    lcd.begin(16, 2);
  lcd.clear();
  lcd.setCursor(0, 0);
      lcd.print("Waiting for Data: ");
}

void loop() {

  int X = hx711.read();
//delay(50);


  lcd.clear();
      lcd.setCursor(0, 0);

      lcd.print("Air pressure: ");
      lcd.print(X);
      delay(1000);

}
Code Explanation:
Libraries Included:
cppCopyEdit#include <Q2HX711.h>
#include <LiquidCrystal.h>
Q2HX711.h: Used to communicate with the HX711 ADC module.LiquidCrystal.h: Used to control the 16×2 character LCD.
Pin Setup:
cppCopyEditconst byte hx711_data_pin = 4;
const byte hx711_clock_pin = 3;
- The HX711 is connected to digital pins 4 (data) and 3 (clock).
cppCopyEditconst int rs = 5, en = 6, d4 = 7, d5 = 8, d6 = 9, d7 = 10;
LiquidCrystal lcd(rs, en, d4, d5, d6, d7);
- These pins connect the Arduino to the LCD screen.
Object Creation:
cppCopyEditQ2HX711 hx711(hx711_data_pin, hx711_clock_pin);
- Creates an
hx711object for reading data.
setup() Function:
cppCopyEditvoid setup() {
  Serial.begin(115200);
  lcd.begin(16, 2);         // Initializes a 16x2 LCD
  lcd.clear();              // Clears the display
  lcd.setCursor(0, 0);      // Sets cursor to top-left
  lcd.print("Waiting for Data: ");
}
- Initializes the serial communication and LCD.
- Prints a startup message on the LCD.
loop() Function:
cppCopyEditvoid loop() {
  int X = hx711.read();     // Reads raw data from HX711

  lcd.clear();
  lcd.setCursor(0, 0);
  lcd.print("Air pressure: ");
  lcd.print(X);             // Displays the raw value
  delay(1000);              // Updates every second
}
- Continuously reads a value from the HX711.
- Displays it on the LCD as “Air pressure”.
- Waits 1 second between updates.
Note:
- The
hx711.read()function gives a raw digital value, not actual pressure or weight unless calibration is applied. - The label “Air pressure” might be misleading unless the sensor setup is specifically designed for that.